
Create Higher Quality Documents With Microsoft Word
This post will give you some of the best tips on improving your documents using Microsoft Word.

These are the exact same steps I have been using for creating all of my documents. I wanted to share this with all of you.
Creating Documents
You may be creating documents for work or personal correspondence or even making a draft to copy and paste into an important email.
The traditional way to create the documents was to type the text into a word processor, using separate software to check spelling and grammar. Then if it were an important document, you would take the advice of reading it aloud
I will illustrate a process from start to finish using Microsoft Word.
If you would rather see a companion video for this subject, see the video on my YouTube Channel here.
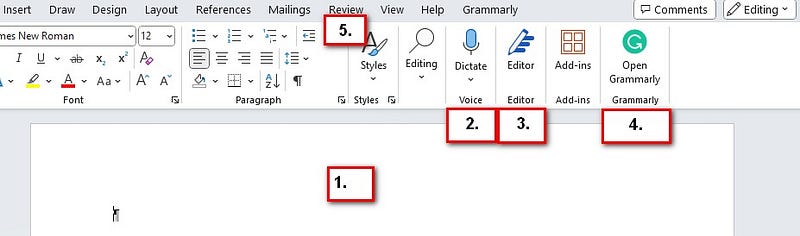
Overview of the Process
1. First, you open a new blank document in Microsoft Word.
2. Choose the “Dictate” option for the voice typing
3. Use the built-in “Editor” menu selection to check spelling and grammar.
4. Optionally, use a Grammarly extension for Word to double-check spelling and grammar
5. Last you choose the “Read Aloud” selection in the “Review” menu
Starting a New Document
Create a blank document by opening the Word app and choosing “Blank Document.” Set the margins or other settings as you usually do.
I started using this process as I am not a great typist as I use 2 or 4 fingers to hunt-n-peck and make lots of typos. So I adopted the feature of Word called “voice typing” to make my creation faster.
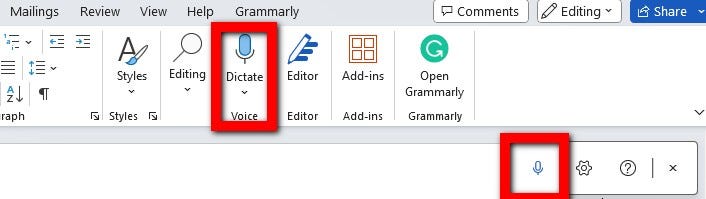
Dictate
In the top right corner of the ribbon menu, is an option named “Dictate” with a small microphone icon. Click on that and a small window pops up with a microphone icon.
If the microphone icon is not colored blue, click on it and it will change. If it is blue already, just start talking and the words will appear on the screen in the document.
You can also control the punctuation with your voice. Just say “Period” or “comma” or “question mark” and the text will change to the proper character. You may see the text doesn’t change right away; it just needs a minute to catch up. (If it doesn’t change, Word didn’t recognize the command)
For starting a new paragraph, you can just say “new line,” “new line.” This will add a paragraph ending character for the text, and then add another blank line for spacing.
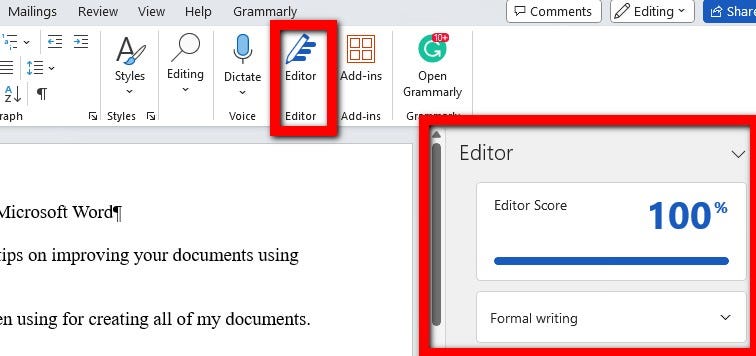
Editor
After all the text is in, you use the “Editor” menu selection to check for spelling and grammar. Editor is similar to Grammarly (that we’ll touch on next) which you may be familiar with.
A new window will pop up to the right of the text, and right in the Word window. You may need to drag the right side of the Word window out to see all of the document text.
Just click on the top large button to start the spelling and grammar checking. Little “buttons” or windows will open on the right side for any concerns that it finds. If it is a misspelling, it shows one or more words as suggestions.
Click on the word to correct it or choose the “trash can” icon to disregard the change. It is not always correct in what it flags as an issue.
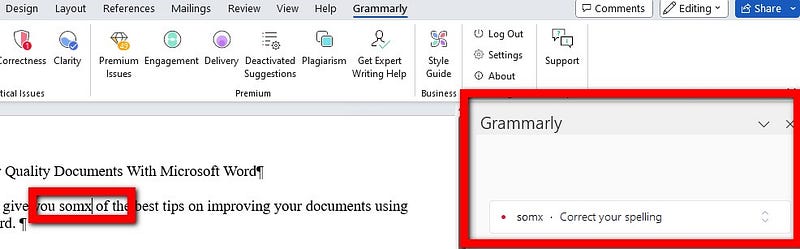
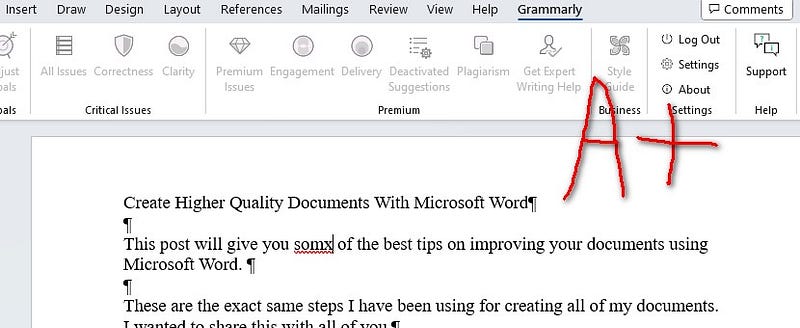
Grammarly (optional)
You don’t have to use Grammarly as a second check, but I recommend its use as it catches other issues that Editor may miss. There is a free version that will load right into Word as an extension, so to me it is worth it.
If you want to install it, you can just go to the Microsoft Store to find it and install it. It is incorporated right into the Word’s ribbon as you can see here so it appears as a menu selection.
When you are done, just close it down using the “X” in the top right corner of the Editor window.
Again, Grammarly loads on the right and displays the issues. When you click on an issue text, it drops down to display the correction it is suggesting in a green highlight. Just click on that text and the change is made.
Manual check
After running Editor and the optional Grammarly check, you still need to check on incorrect words that are spelled correctly. For instance, the words there and their, and also to, too, and two. Grammarly should notice this, but both apps are not perfect.
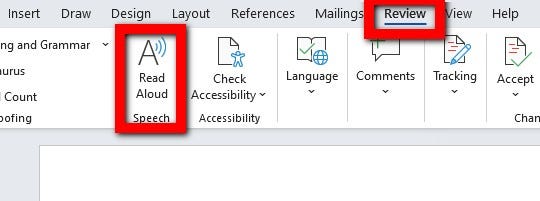
Read Aloud
When creating a document, many people give advice to read it back to yourself. You can catch missing words this way. I find most people don’t want to do this, which includes me.
You can have Word read it back to you instead of reading it yourself.
Read Aloud will identify any missing words, or phrases that do not sound correct. You may have used “was” instead of “were” and listening to it will help spot that issue. Or, a common one, is using “I” or “me.”
Finish
So now you have a finished document that has been spell-checked, grammar-checked, and read back to you.
I also hope this post helps you with creating documents more quickly for better productivity.
If you would like to see this process in a video that steps you through all the screens and lets you hear the Read Aloud feature, see my YouTube video here.