
Frontend to Backend Communication Between Go and JavaScript
Very simple and clean example

- part: creating the service
- part: improving the service
- part: upgrade for web
- part: adding SSE
- part: simple javascript frontend functionality
- part: you are reading it right now
- part: server-side logging
- part: run it all in docker
- part: adding database container
- part: database — service communication
Addition 1: functions, methods, pointers and interfaces Addition 2: websocket communication Addition 3: socket communication
Is it hard to program a communication between frontend and backend?
I can only answer in case of Go and vanilla Javascript. And in this case the answer is: it is as easy as riding a bike.
If you want to be convinced, keep reading. In few minutes you will see and understand that you can do it by yourself. You will send data from webpage to server and back, without even refreshing the page itself.
Prepare before coding
At first, update your homepage.css, so all buttons looks the same.
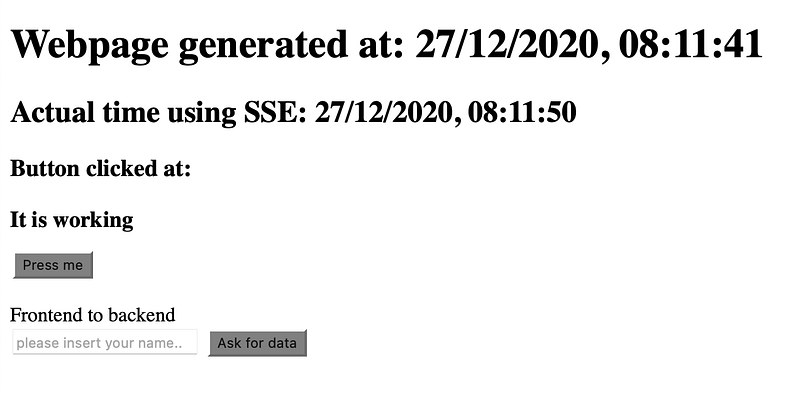
Then, update homepage.html. Add lines starting with those two lines <br> and ending with heading <h3> with id=“ask-time”. From the user point-of-view, we got three new things on the page: a label, an input field and a button. The user cannot see that fourth <h3> with id=”ask-time” as it has no text assigned yet.
You should see the look of the webpage on a screenshot below.
Adding the functionality to frontend
Now switch to homepage.js and start with adding three new constants. (Before it, get rid of that one-an-only console.log(time) we left here from before.)
One will access input element, second will access new button and third will acces for now invisible <h3> element, which will display data from backend.
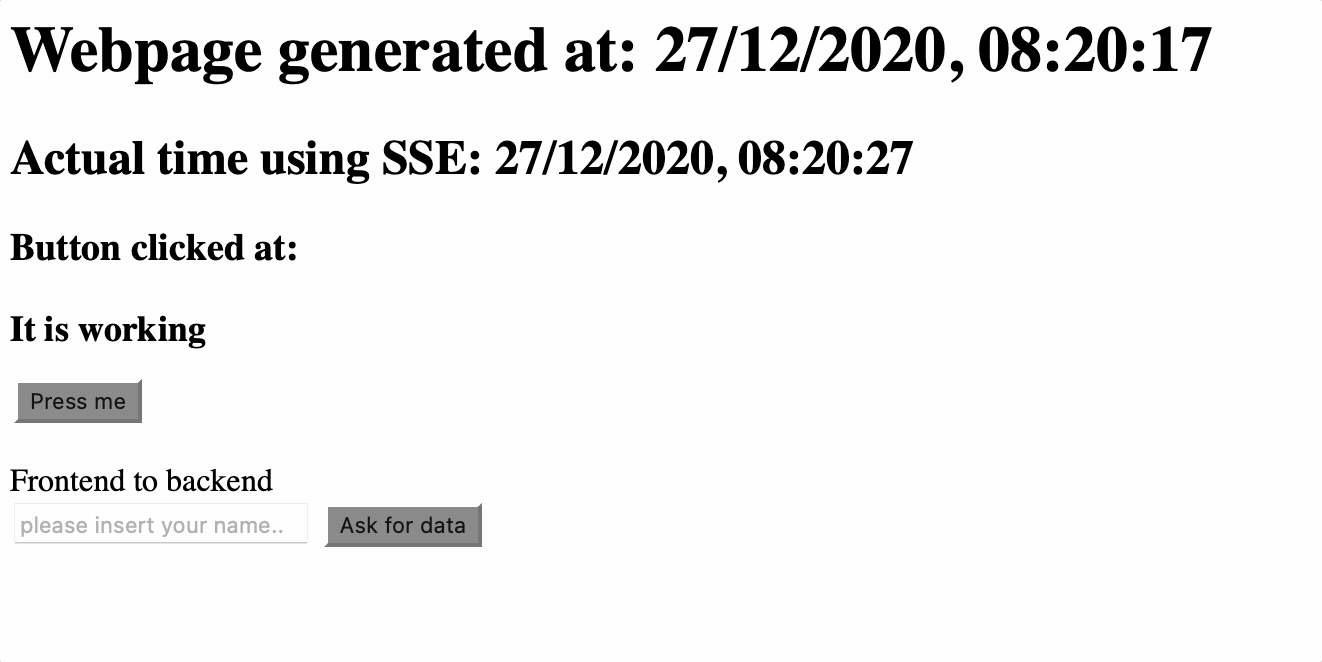
Then add new event listener onto that askButton, that will update that invisible <h3> element, for now just to make sure that everything is working.
Please run the code, so we can see, that everything is working properly, as on an screenshot below. Click the button to check everything is working.
Stay in your homepage.js and update that function, so it looks like below. Go through the code by yourself and then come back here for a little explanation.
Line starting with let data creates a variable, that contains json-style data with two “fields”: Name and Time. I purposely took these two variables, but you can ad more then two. First variable access that input with id=”name”, second variable is actual datime.
Then we are calling fetch() function. This is javascript internal function.
This function calls /get_time (not implemented in backend yet), sets up proper headers, wrap that data and by using POST method is sends everything to backend.
If everything goes well, then() is called. Here we acces the response data, then unwrap JSON data inside and log() it to the console.
If it goes south, we log() the error to the console.
First test
Try it now. Open up your console in browser’s developer tools and hopefully you will see two errors. The first one indicates that the request for /get_time ended badly with an error and you see that error: 404 Not Found. This is understandable, as we did not implement nothing in backend yet. Second error shows you, that the javascript cannot unwrap data, as there are none.

Adding the functionality to backend
Now we are going to implement that /get_time in the backend. Switch to main.go and add new line that contains definition of that new method: router.POST(“/get_time”, getTime). Again, press ALT+ENTER on that getTime() function and create it. Then move that created function to homepage.go file.
Before going back to javascript, we will work only in this homepage.go file. To access that JSON structure we are sending from javascript frontend, we need to make a new structure with exactly the same names. Structure that’ll hold that javascript frontend’s data. We’ll name this structure TimeDataInput with two fields: Name and Time (exactly the same names as in data variable in homepage.js)
Update that getTime() function with code below. First we need to create a variable of type TimeDataInput and then we read the body of the request and unwrap its content into this variable. If there is a problem, we will print this problem onto the screen. If not, we will print those data fields, that were received from javascript frontend.
Second test
Try to run the code now, open the browser, add here your name and press that new button. In Goland console you’ll see your name and time of your request.
Medium service started
Streaming time started
Petr
27/12/2020, 08:56:50
Implementing the response for Javascript
Next, create another structure, now for outgoing data (response back to Javascript). You see four fields in this structure: Result, Time, Text and Duration. You understand in a minute, why those four and of course, you can name them as you line and you can add as much as you want.
Handling the error
But first, we will handle that error, so user can see, what went bad, in case of error.
Update the code as below. As you can see, this code simply prints information about error to console on the server, then creates new TimeDataOutput variable, set the Result to nok and Text to some information. Then wrap this structure into JSON and sends it back to web page.
We omit handling error, when sending data back to the webpage, by using _, to make the code shorter, but it makes sense to handle this error in real code.
Handle the happy path
Then we add code for a success path, called happy path in go terminology. Navigate to those two fmt.Println() function and add code after them. We will simulate some work here for one second: again that time.Sleep() method and then send back proper information about that work. Result is ok in this case, Text is as you like, Time is again actual time formatted properly, and Duration takes advantage of that timer variable. Everything is wrapped into JSON and sent back to the webpage.
Third test
Run it now, open up your console in the browser’s developer tools, insert your name, press the button and after a work is done — that one second — you will see the result from backend

Side note: I tend to use timers a lot in my code, because I want to measure and log almost every function, in term of it’s duration. It helps me to debug the code after the code is in the production. In those logs, I can immediately see how long everything took and I can immediately see, when something is wrong = takes too much time (for example some database heavy lifting). So in case of real production code, I will move that timer := time.Now() in the beginning of the function and at the end of the function, just before the return, I will add fmt.Println(“processing takes: “ + time.Since(timer).String()), to see how long does it take to run a specific function, or method.
Finalising the communication
Back to our homepage.js file. Add one line, just after that console.log() function.
Now, we are done. We are able to communicate with the backend Go code from our webpage, from the javascript frontend. We can send anything we want and we can receive back another anything we want.
Final test
Run the code and try it for yourself. Screenshot below is what you should see.

Real — world usage in production code
Note, that in this case, there is no need to refresh the page after user makes his input and presses the button.
I use this functionality for almost every communication I need to: user input, logging user web page behaviour back on the server (will be covered in next article), downloading data for charts, downloading data for tables, simple sending data between users, ...
Also, when there are more components on the web page — for example charts — I download data for all components separately. The reason is simple: let’s say there are four charts on the web page and one chart has somewhat complicated data. That means that processing those data takes not negligible time. From the user’s point-of-view, three charts will appear immediately and that fourth chart takes time. The user will — of course — report this “problem”, but his report will be much more specific. The user will tell you that one specific chart loads slowly and the user will tell you which one. You then check it in your logs (remember using that timer before) and then you can focus on that one and only function and make it faster (for example cache some data in case of database loading, or something like that), so that fourth chart will load in proper time.
Summary
I hope those few minutes with this article helped you understand, how can you add a simple communication technique between Javascript frontend and — int his case — with Go backend.
From previous article you know how to initiate some action from backend using SSE, now you know, how to initiate some action from frontend.
As usual, we finalise this article with a little summary, I am convinced that now you know, how to…
- send data/information from Javascript frontend
- send those data on demand (click button for example)
- send data from user input
- respond back from Go backend, with another data/information
- do all this without whole webpage refresh


