
Create An Awesome Streamlit App & Deploy it With Docker
This article is a comprehensive overview of a step-by-step guide to deploy a simple sentiment analysis application using streamlit and Docker

Introduction
As Machine Learning or Software Engineer, we would like to share our applications/models and their dependencies with others. This process, if not done properly can cost us not only time but also money. Nowadays, one of the most preferred ways to collaborate with other developers is by using source code management systems (e.g. Git). This might not be enough, because the awesome model that you developed on your computer might not work on someone else’s computer for different reasons. So a better way to tackle this issue might be to use Docker containers, in order to be able to “replicate” your computer and make it accessible to others. In this article, we will learn this concept in the following order:
- Train a simple sentiment classifier
- Create the corresponding Streamlit application using good software project structuring
- Create the Docker image for streamlit application
- Run the image in a container
Machine Learning Model
Since the main goal is to walk you through the steps to deploy your model using Streamlit and Docker, we will not spend too much time on model training.
Model training in Notebook
Useful Libraries Here are the useful libraries for the

Read Spam data Read the dataset and show 3 random samples

spam_data.v1.unique() ==> array([‘ham’, ‘spam’], dtype=object)
Observation: we have two labels, which corresponds to a 2-class classification problem. Then, we need to encode those two labels into a numerical format for model training.

Feature and Target

Feature Extraction & Model training We use the Naive Bayes Classifier

What Streamlit is and how it can be useful
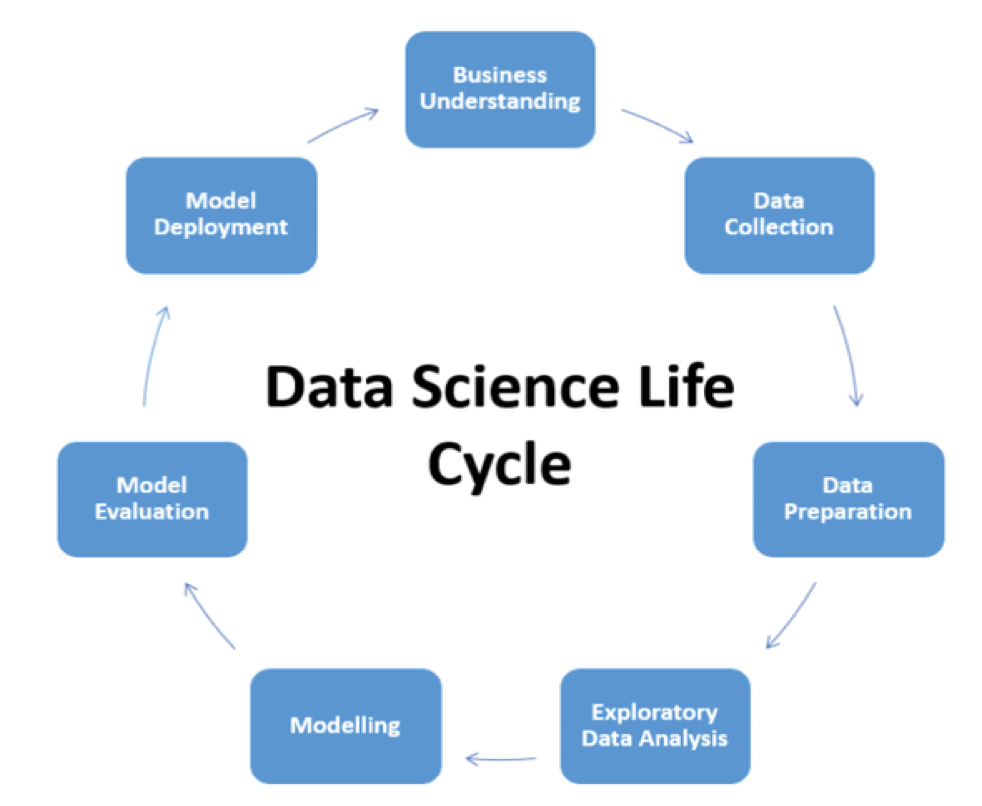
Streamlit is an open-source framework that can be used by Data Science and Machine Learning teams to perform better data visualization for Business and also to deploy models into production environments (instead of using Flask, Django, FastAPI which might take a considerable amount of time for model deployment) as shown on the Data Science Life Cycle below.

Create Our Streamlit App
Prerequisites
- Create and activate a virtual environment

2. Install project dependencies

3. Structure the Project
Structuring the project this way as shown below has the advantage of :
- making collaboration easier
- maintaining a clean a robust code
- making the deployment easier
- etc.

Implementation Project packages The __init__.py is an empty file. And below are the contents of the remaining two files (data_processor.py and model_trainer.py)


Run the app There are two main steps to run the model. They have to be done from the root of the project:

We can finally interact with our application after running the second command. Below are two scenarios:
- A case where the provided message is classified as spam

2. A case where the provided message is classifier as ham (not spam)

Time to Dockerize the application
Create docker layers To be able to dockerize the application, we need to create a Docker file within the docker folder. This file contains seven main instructions as shown below.
- (FROM): pulls an official python image from docker hub, then our files will be built from that image.
- (WORKDIR): create /app as the working directory for the application
- (COPY source destination): copy file(s) from the source folder to the destination folder.
- (RUN): runs the requirements.txt file in order to install the project dependencies.
- (EXPOSE): used in order to expose the port to be used by the model.
- (ENTRYPOINT) & (CMD): create an entry point in order to finally make the image executable.

Build the Docker Image The following command builds the image called streamlitspamapp tagged with the latest version. This image is built from the previous docker file.


From the previous result of the docker build command, we can observe that our image has been created as previously explained.
Run the container The image is built, then we need to run it into a container with the following command.
🚫 Make sure to stop the previous streamlit app before running this command, otherwise, you might face a pretty message error telling that the port is already being used

Two URLs are automatically generated from the previous command. Yours might be different from mine.

You deployed your streamlit application using docker 🎉🎉🎉 !
End of article
In this article, you have learned how to build a simple machine learning model, implement the corresponding streamlit app, and finally deploy it using Docker. You can now use some cloud provider platforms such as Azure, AWS, GCP to deploy the container in a few minutes! For further readings do not hesitate to follow me on YouTube, and consult the following links:
Additional Ressources
Github code Streamlit documentation Docker Layers Explained from DZone Create and share beautiful images of your source code
Bye for now 🏃🏾


