
Create a Kubernetes Cluster using Kind
How to create a Kubernetes cluster in 5 minutes using kind.
kind is a tool for running local Kubernetes clusters using Docker containers. It can create a Kubernetes cluster within minutes. With Kind as a tool to create a Kubernetes cluster, you can stop worrying about creating a Kubernetes cluster for the local development. The cluster can be spun up with just a command. All the long process of bootstrapping the clusters ( like installing kubeadm, setting the swap size, joining thee nodes, Installing cni, etc ) is handled by kind. Kind automatically bootstraps each node with kubeadm. You no longer have to maintain the control plane and worker node components.
What is happening here ( TLDR ):
- We will be using kind to create a local Kubernetes cluster in 5 minutes.
- We will be using kind to switch Kubernetes clusters versions easily.
Prerequisites:
- Docker Installed ( For kind to create a Kubernetes Cluster )
- kubectl Installed ( To communicate with the Kubernetes cluster )
Demo:
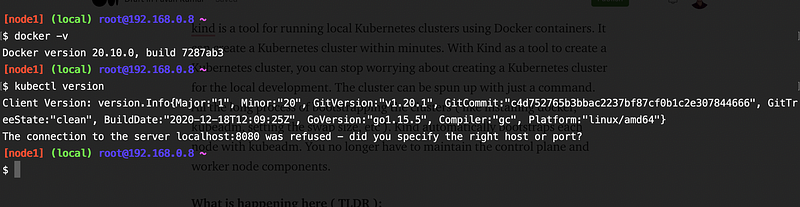
Here is a snapshot where my node has docker and kubectl installed. Let us now Install kind.
curl -Lo ./kind "https://kind.sigs.k8s.io/dl/v0.9.0/kind-$(uname)-amd64"
chmod +x ./kind
mv ./kind /usr/local/bin/
################
You can check the kind version by giving the following command kind version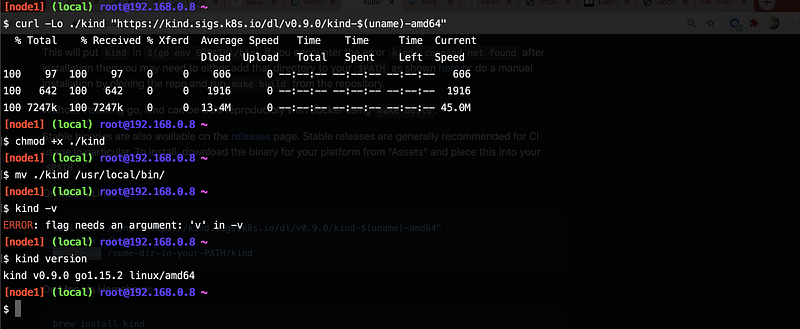
Yassss, kind is now Installed in our machine. Let us now see the magic of kind. Let us create a simple cluster. It is as simple as
kind create cluster — name=medium-cluster
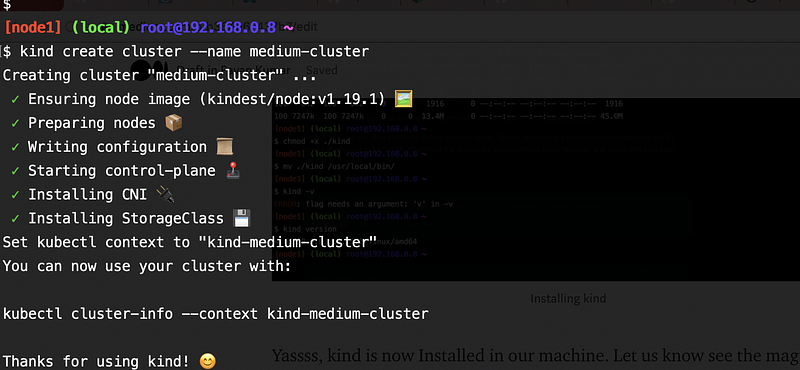
Yes, you've seen it right !! Our Kubernetes Cluster is Installed and now ready :) to serve our workloads !! By default, it will Install the latest Kubernetes version in our cluster. Excited ???

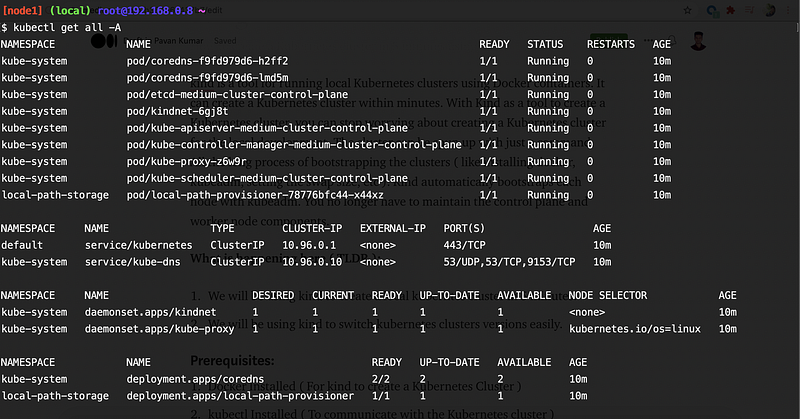
Let’s check the components created with the cluster.
Aargh !!! I just realized that our workloads are compatible with Kubernetes version 1.17. No issues, kind got this covered. You can pass the Kubernetes version in the ( — image ) argument to select the version of the Kubernetes cluster that you want to create. You can check all the Kubernetes versions supported by your kind by checking the releases page.
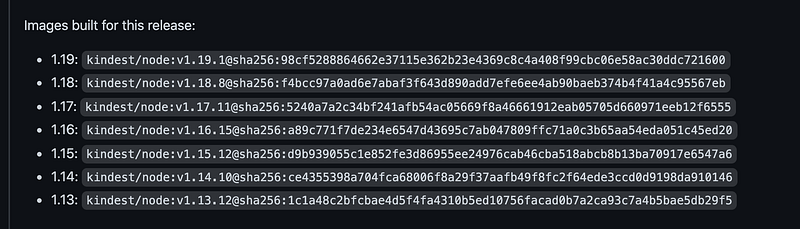
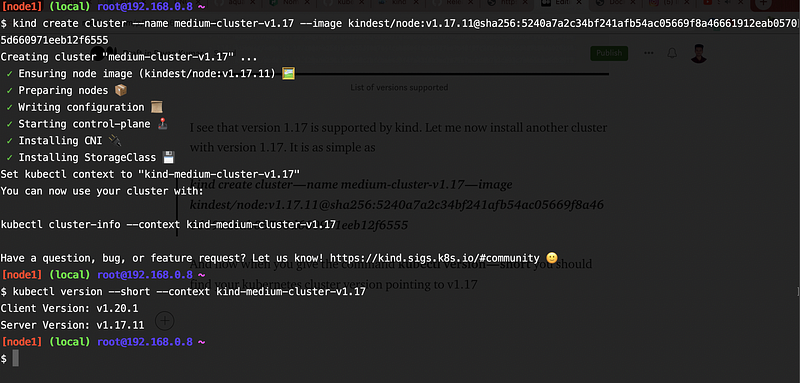
I see that version 1.17 is supported by kind. Let me now install another cluster with version 1.17. It is as simple as
kind create cluster — name medium-cluster-v1.17 — image kindest/node:v1.17.11@sha256:5240a7a2c34bf241afb54ac05669f8a46661912eab05705d660971eeb12f6555
And now when you give the command kubectl version — short you should find your Kubernetes cluster version pointing to v1.17
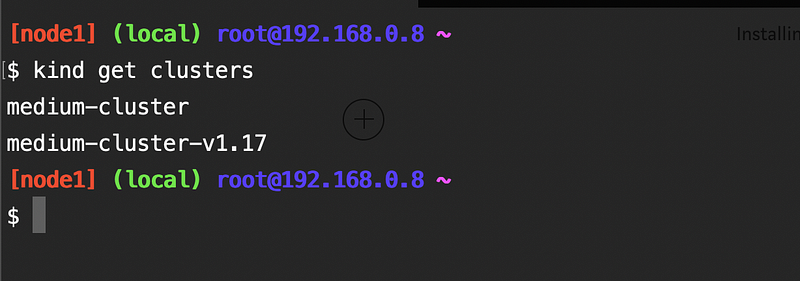
You should now find 2 clusters. One with version 1.19 and another with version 1.17.
If you have noticed by now you realize that the cluster is created with only one node i.e the master node. Is there an option to specify the number of worker nodes? Is there an option to pass the arguments used while creating a cluster with kubeadm? Yes, absolutely!!!! kind got you covered with this too. You can specify the configuration in a file and let kind create a cluster with the same configuration specified in the file.
Let us now see what the file actually does.
- networking.podSubnet: The subnet in which the pods should be created in.
- networking.serviceSubnet: The subnets in which the Kubernetes services should be created in.
- nodes: They specify that the cluster should be created with one control-plane node and two worker nodes. You may specify any number of worker nodes ( Please make sure that your machine has the capacity to host these machines ). role specifies the role of the node ( i.e either control-plane or worker ).
Let us now create the cluster with the aforementioned configuration.
kind create cluster — name medium-params-cluster — config ./kind_config.yaml
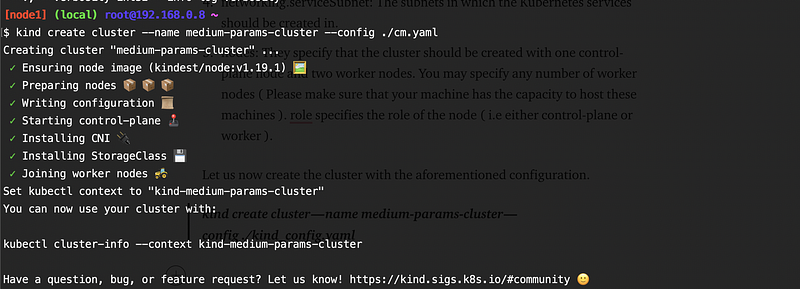
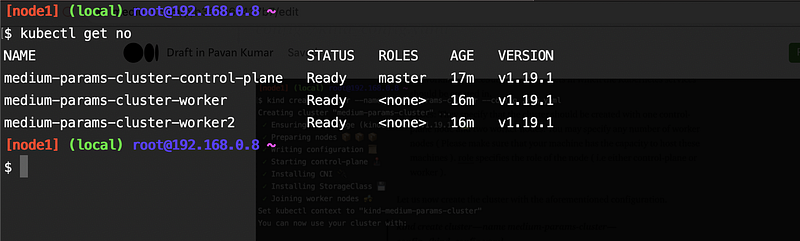
You should now find that the cluster has 3 nodes ( i.e 1 master node and 2 worker nodes )
Conclusion
Thanks for reading my article. Hope you have liked it. Here are some of my other articles that may interest you.


