
Configure HTTPs on server without custom domain
I was working on a quick project recently and I ran into an issue — I wanted to configure HTTPs for my backend API. It was a small project and as such I had no need to purchase a domain name. I just needed a way to configure HTTPs on that server without buying a SSL (Secure Sockets Layer) certificate and without a domain name.
After searching the internet for a bit, I came across Caddy — an open source web server with automatic HTTPs. In this article, I will walk you through how to use Caddy and nip.io to configure HTTPs on your server without getting a custom domain name.
When I ran into this problem and for this article, I will be using AWS EC2 instance, however you can do the same on any Linux server.
Caddy 2 is a powerful, enterprise-ready, open source web server with automatic HTTPS written in Go
— Caddy
Installation
Caddy provides various installation options for various Linux distros. You can check if Caddy is available for your operating system and how to install for your operating system here. As at the time of writing this article, I am using a Linux Server on AWS. Installation is as simple as these commands:
sudo apt install -y debian-keyring debian-archive-keyring apt-transport-https

curl -1sLf 'https://dl.cloudsmith.io/public/caddy/stable/gpg.key' | sudo gpg --dearmor -o /usr/share/keyrings/caddy-stable-archive-keyring.gpg

curl -1sLf 'https://dl.cloudsmith.io/public/caddy/stable/debian.deb.txt' | sudo tee /etc/apt/sources.list.d/caddy-stable.list

sudo apt update

sudo apt install caddy
Setup
Once installation is done, the caddy server should be running already. You can check by simply running:
sudo systemctl status caddy
You should see something similar to this when you run this command
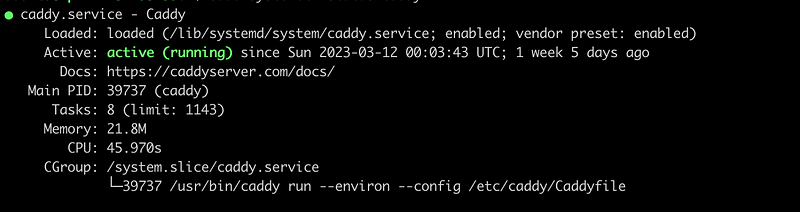
If you caddy server is not running, you can start it by simply running:
sudo systemctl start caddy
From the output of the status command, we can see our Caddyfile configuration can be found under the etc folder just like Nginx. Configuring your Caddyfile is simple, here is a sample from the caddy documentation. For this particular project, I have used a docker image and docker-compose. My caddyfile is as simple as this:
<IP_ADDRESS OR HOST_NAME GOES_HERE>

reverse_proxy localhost:5050
On the first line, I have my IP address (the current public IP of my EC2 instance) and on the second line, I am using reverse proxy to forward requests to the address of my docker container. Thats all! I can restart my server now and test.
Note: You can find more ways to customise your caddy server here.
The next step is to map your IP address to a hostname. However, we do not want to buy a custom domain — Thats where nip.io comes in!
nip.io allows you to do that by mapping any IP Address to a hostname.
nip.io ensures we do not have to edit much. We just need to update our caddyfile to something like this:
<IP_ADDRESS>.nip.io

reverse_proxy localhost:5050
You can restart your Caddy server by running this command:
sudo systemctl restart caddy
And we are all set ! You should be able to see ur web server when you visit https://
I hope you found this helpful!


