
Comprehensive Guide to Python Virtual Environments using Conda for Data Scientists
Guide to Virtual Environments with Conda via Terminal

This article will be a comprehensive guide for Data Scientists towards using Conda to create, export and use virtual environments for your projects. This tutorial will be dedicated towards Python virtual environments in specific. The following outlines the structure of the article.
Table of Contents
- What are Conda Virtual Environments?
- Why use Virtual Environments?
- Conda Installation
- Create a Virtual Environment - Through Command Line - Through Environment File - Activate Environment - Deactivate Environment
- Environment List - List of Installed Packages in Environment
- Export Virtual Environment
- Cloning a Virtual Environment
- Deleting Virtual Environment(s)
- Concluding Remarks
- Resources
What are Conda Virtual Environments?
In simplest terms, a virtual environment is simply a directory located on your computer to run your scripts in an isolated location. You have the capabilities of creating many different virtual environments, each environment will be isolated from each other. This allows you to run your projects & code with various packages in different versions.
There are various services which provide you to create virtual environments, these services vary from coding language to coding language. For Python in particular, the two most common ways of creating and using virtual environments are through the package managers pip and conda . Although their functionalities may overlap, the overall design for each manager is different. The main reason I use conda for managing my virtual environments is because it is robust and adaptable to package installations through conda and pip, it allows installation of different versions of Python and other programming languages and the software was designed and geared towards Data Scientists.
Why use Virtual Environments?
The use of virtual environments is crucial in Data Science, especially when collaborating on projects, handing off the project for productionalization, managing package dependency conflicts, and making it easier to reproduce results. Python isn’t the best tool for managing packages, each package you install on your computer comes with several other packages which the current package relies on. All of those packages are then installed at various versions to make sure the latest installed package is functioning. This becomes problematic without specifying the inspecting the versions associated to the packages you’re installing.
Suppose you’re working on project Y and you’re using version 2.0.1 of pandas , however when working on project X, you were using version 2.0.0 of pandas . Imagine that the differences between these versions comes with the deprecation of various functions on pandas which project X was using. This essentially means that the scripts you wrote for project X which called the deprecated functions will no longer work as the version of your library has updated. This issue might not arise when you’re just beginning your journey into data science and don’t have a lot of projects under your belt, but at some point you will run into this or a very similar problem.
It is best practice to have an independent virtual environment per project you’re working on. This is due to two main reasons; firstly, the dependencies and versions for the projects may differ and you continue to work on more and more projects. Secondly, the production environment would require those dependencies and their associated versions. Older / newer versions might have deprecated or new functions added to the library. When handing off your models to a data / machine learning engineer to place into production, you would provide them the model, a script associated with using the model to generate predictions and a requirements / environment file which holds the packages and versions of those packages necessary to load & run the model.
Conda Installation
Conda has extensive documentation on their installation. Following the guide below will indicate the necessary steps and instructions associated with installing anaconda / miniconda in a Windows / Mac / Linux operating system.
Create a Virtual Environment
Through Command Line
At any path in your terminal / command line after you have conda installed, you can run the following command :
conda create -n <env_name>The -n stands for name and you replace the <env_name> with the name of the environment you want to create. For the purposes of this tutorial, I will create an environment called conda_tutorial through the following command. A good tip is to keep the environment name very similar or related to the project you’re going to be using this environment for.
conda create -n conda_tutorialYou’re also able to specify the version of Python you want to be created with the environment through the following command :
conda create -n conda_tutorial python=3.9Based on the Conda documentation, if no Python version is specified when creating the environment, it will use Python 3.9 by default [3].
Through Yaml File
The following is the structure associated with a conda environment file, typically named environment.yml .
You’ll see later in the article how to create this environment file. Now to use an environment file given to you to create an environment on your computer, you can run the following command.
conda env create -f environment.ymlDo note that this will require you to be in the same path on your command line / terminal where the environment.yml file is located.
When creating these environments it will prompt you to proceed (refer to the image below). Type y and press enter if you do want to proceed, n otherwise.

Activate Environment
After the environment is created, you need to activate the environment. The command to do so is :
conda activate <env_name>Once the environment is activated, you will see it on your command line in parenthesis.

Deactivate Environment
Similarly, to deactivate an environment you can simply run :
conda deactivateOnce the environment is deactivated you will return to your default base environment.

Environment List
You can get a list of all the environments created on your computer by running the following command :
conda env listUpon running this command you will see a list of all the environments created on your computer and the associated path to where those environments can be found. The * refers to the current active environment, the base environment is the default environment.

List of Installed Packages in Environment
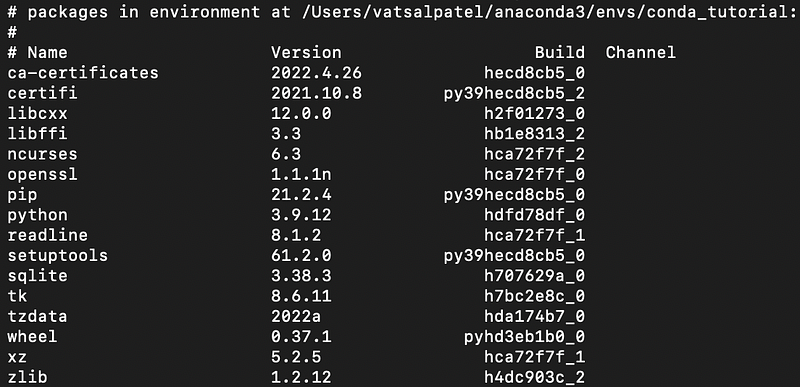
Running the command conda list will showcase all the installed packages in an active conda environment. As you can see from the image below, it showcases the name of the package, version and build.
Export Virtual Environment
Exporting a virtual environment is essential for project hand-offs / collaboration. The following command will allow you to export the current active environment into an environment.yml file. The following command will allow you to export the environment :
conda env export > environment.ymlIt should yield the following file :
Cloning a Virtual Environment
Cloning an environment is a time saver when you know the libraries necessary for a project are the same if not very similar to another project you’ve previously worked on. The following command allows you to clone environments :
conda create --name <clone_name> --clone <existing_env>Where you would replace <clone_name> with the name of the new environment, and <existing_env> with the name of the existing environment you are trying to clone.
Deleting Virtual Environment(s)
For whatever reason, you might at some point want to delete an existing virtual environment. The following command shows you how you can do that. Repeat the process for as many environments you want to delete.
conda remove --name <env_name> --allYou replace <env_name> with the name of the environment you wish to delete.
Concluding Remarks
In essence, this tutorial outlines what virtual environments are, and why you should use them for your next project. Using virtual environments is crucial when working in a team environment for the following reasons:
- Makes collaboration and reproducibility of results easier to manage
- Reduces likelihood of dependency conflicts
- Makes project handoffs easier
If you’re looking to transition into the data industry and want mentorship and guidance from seasoned mentors then you might want to check out Sharpest Minds. Sharpest Minds is a mentorship platform where mentors (who are seasoned practicing data scientists, machine learning engineers, research scientists, CTO, etc.) would aid in your development and learning to land a job in data. Check them out here.
Resources
- [1] https://docs.conda.io/projects/conda/en/latest/user-guide/tasks/manage-environments.html
- [2] https://docs.conda.io/projects/conda/en/latest/user-guide/install/download.html
- [3] https://docs.conda.io/projects/conda/en/latest/user-guide/tasks/manage-python.html#
If you enjoyed reading this article, here are others which I’ve written which you might also find insightful:


