Cloud Armor Setup and Configuration on GKE Hosted Application
WAF & DDoS Protection from Google Cloud Platform
Cloud Armor recently detected and mitigated a 46m HTTPs QPS Attack proving its reliability as an enterprise grade solution. More details can be found HERE.
This article will talks about some basics of what Cloud Armor is and how to set it up in GCP Console. Then i’ll showcase the configurations needed to apply Cloud Armor policies on application hosted on GKE. Check out the Official Documentation from GCP to understand the details of Cloud Armor.
What is Cloud Armor?
Cloud Armor is a network security solution that protects your applications form Layer3/Layer 4 network or protocol -based volumetric DDoS attacks. It is also capable of support layer 7 protection. Cloud Armor is also a Web Application Firewall which can detect and mitigate Vulnerabilities such as common OWASP TOP 10 which are predefined in the security rules. You can protect your application against SQL Injection Attacks, Cross Site Scripting Attacks different DDoS attacks like Protocol Attacks, Application Attack and Volumetric Attacks. Google Cloud Armor works in coordination with External Load Balancer, and contains in build security policies.
Key Features
Some of the Key Features of Google Cloud Armor are:
- Rate Limiting
- Bot Management
- Adaptive Protection
- IP Based & Geo Based Access Control
- Named IP List
Refer the documentation for details on all the supported features.
How to Setup Cloud Armor?
We would be using the GUI method to Setup Cloud Armor. It can be setup using gcloud SDK and API’s as well. IaC can also be used to provision.
Go to GCP Dashboard > Search Cloud Armor > Enable API ( Make sure you are in the correct Project)
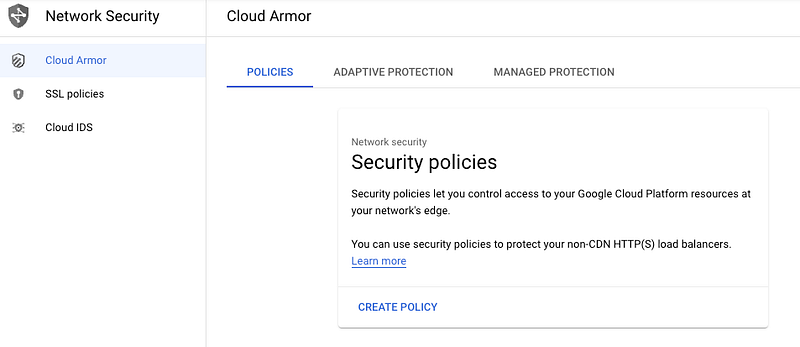
- Create Security Policy
Click on Create Policy, to open the next page. Name the policy.
Select the Policy type as Backend Security Policy as it can be also applied to Edge Location. The default rule can be applied to all requests that are allowed or blocked . Option to choose Deny Status such are 403, 404 or 502. These are the mandatory fields with some more options which can be further configured like Rules and Targets. Rules can be configured and attached to Targets. Options for Adaptive Protection is available, which basically uses backend machine learning models to check traffic anomalies for potential attacks. Upon detection of a anomaly it can create a rule on the fly to block specific traffic. Click on Create Policy.
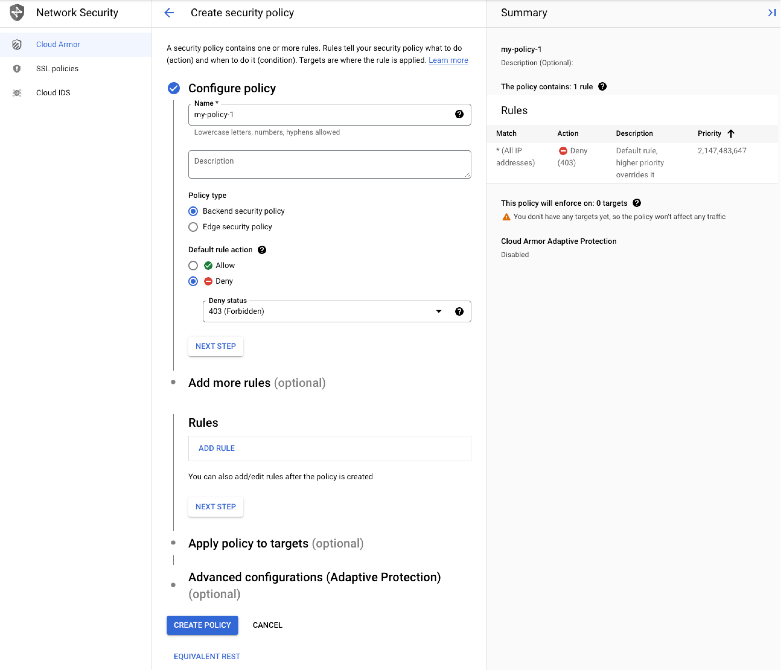
Equivalent gcloud command:
gcloud compute security-policies create my-policy-1 \
--description "Policy for deny"
2. Create Rules
Apart from the default policy base rule, each rule have its own allow and deny action. Usually when the base rule is allow, the policy rule will be deny.
The rule example below specifies to allow a IP Address against the basic policy deny rule, which deny all other requests. This is a Basic rule, similarly you can create more advanced rules. Next is to define a priority based on which rules are evaluated. Higher priority rule is evaluated first.
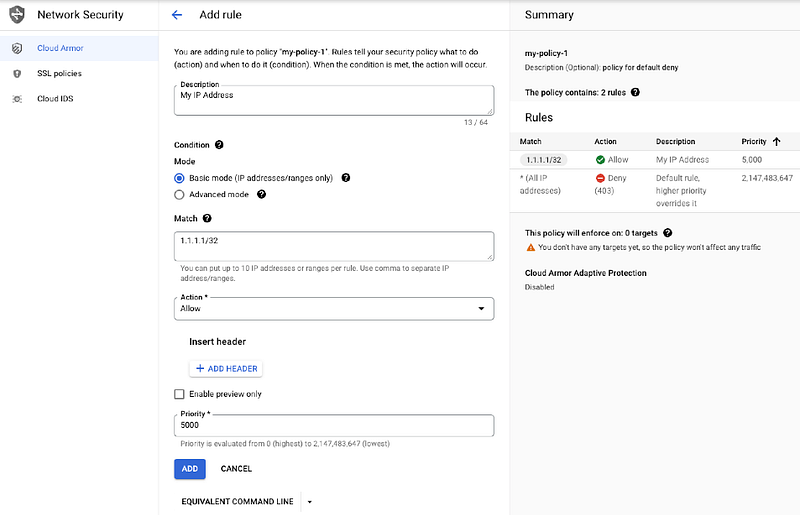
Equivalent command line to configure the rule can be found below :
gcloud compute security-policies rules create 5000 \
    --project=project-a-3410500 \
    --action=allow --security-policy=my-policy-1 \
    --expression=inIpRange\(origin.ip,\ \'1.1.1.1/32\'\)
    --description=My\ IP\ Address
For Example: you want to deny all the requests from China Region, below is the rule to be used. More details can be found HERE.
origin.region_code == 'CN'3. Associate policy with a Target
Once policy is created , you can associate the policy with a target. Target can be any non-CDN HTTP(s) based backend load balancer service. Simply select the “Add Policy to NEW Target” and it would list down the load balancers in the project. You can add multiple Backend targets to sam policy.

Till now we have talked about creating a Cloud Armor policy with different rule and associating with a Backend service which is Load Balancer.
Considering a Scenario where our application is running on GKE Cluster and it is exposed via a service of LoadBalancer type, which eventually created a Load Balancer in GCP. We can update this feature via a Kubernetes object called backend Config by defining a Custom Resource Definition. More details can be found HERE.
Backend Config
Below is a sample backend config which can be used with GKE service to apply Cloud Armor policies to the applications running on GKE. Backend Config is assocaited with Service. You can also configure multiple other parmeters in the Backend Config which can be found HERE.
apiVersion: cloud.google.com/v1
kind: BackendConfig
metadata:
  namespace: cloud-armor-how-to
  name: my-backendconfig
spec:
  securityPolicy:
    name: "my-policy-1"
  healthCheck:
    checkIntervalSec: 30
    timeoutSec: 30
    healthyThreshold: 1
    unhealthyThreshold: 5
    port: 80
    type: HTTP
    requestPath: /health
Once configured, backendconfig can be associated with Service using annotation as below
apiVersion: v1
kind: Service
metadata:
  annotations:
    cloud.google.com/backend-config: '{"default": "my-backendconfig"}'
...
Thats it for this blog, i’ll come with a demo of how Cloud Armor monitors and blocks traffic on GKE hosted application. Happy Learning !!