
How to Generate Your Own Voices with a 12-Second Sampler

This article is about how to generate voice from text prompt on Colab. Before the generation of voice file, a 12-Second voice file was used as basis information.
During the experiment, i trained the model with chinese. The generated voice seems like from another person. Maybe i should try with english or try multitimes.
However, it might make sense to share the experience here.
The solution was inspired by bark-with-voice-clone.
Table of Contents
Use Case
Colab Project
Use Case
By given a text prompt, i would like to have a voice file generated, which should be sound like from me.
Colab Project
Precondition
- Create a folder ”AI_Voice_Lab” and a subfolder “Voice_Output” on Google driver.
- Upload your voice file (.wav) to folder “AI_Voice_Lab”. The voice file must be under 13 seconds.
- Colab account. GPU or CPU can be used for the project.

Colab Project Source Code
You can find the Colab project with output of each code block from my github repository.
Following are related source code:
###############################
# https://medium.com/@datatec.studio/
# https://www.reddit.com/r/singularity/comments/12udgzh/bark_text2speechbut_with_custom_voice_cloning/
# https://github.com/gitmylo/bark-voice-cloning-HuBERT-quantizer
# https://github.com/gitmylo/bark-voice-cloning-HuBERT-quantizer
#
# Install python package
# Install hubert model
# Load HuBERT for semantic tokens
# Load the HuBERT model
# Load the CustomTokenizer model
###############################
!pip install bark encodec torchaudio transformers fairseq audiolm_pytorch
!git clone https://github.com/serp-ai/bark-with-voice-clone
%cd bark-with-voice-clone/
!pip install git+https://github.com/suno-ai/bark.git
from bark.generation import load_codec_model, generate_text_semantic
from encodec.utils import convert_audio
import torchaudio
import torch
device = 'cuda' # or 'cpu'
model = load_codec_model(use_gpu=True if device == 'cuda' else False)
from hubert.hubert_manager import HuBERTManager
hubert_manager = HuBERTManager()
hubert_manager.make_sure_hubert_installed()
hubert_manager.make_sure_tokenizer_installed()
from hubert.pre_kmeans_hubert import CustomHubert
from hubert.customtokenizer import CustomTokenizer
hubert_model = CustomHubert(checkpoint_path='data/models/hubert/hubert.pt').to(device)
tokenizer = CustomTokenizer.load_from_checkpoint('data/models/hubert/tokenizer.pth').to(device) # Automatically uses the right layers
###############################
# mount google driver, prepare .wav file
###############################
from google.colab import drive
drive.mount('/content/drive')
# Please create a folder "AI_Voice_Lab" and a sub-folder "Voice_Output" in your google driver at first.
%cd /content/drive/MyDrive/AI_Voice_Lab/
lab_folder = "/content/drive/MyDrive/AI_Voice_Lab/"
audio_filepath = lab_folder + "ylcn.wav" # the audio you want to clone (under 13 seconds)
voice_name = 'output' # whatever you want the name of the voice to be
output_path = lab_folder + "Voice_Output/" + voice_name + '.npz'
###############################
# Load and pre-process the audio waveform
# Extract discrete codes from EnCodec
# move codes to cpu
# move semantic tokens to cpu
# .npz file will be saved to output_path.
# The output_path will be used later as history prompt when clone your voice.
###############################
wav, sr = torchaudio.load(audio_filepath)
wav = convert_audio(wav, sr, model.sample_rate, model.channels)
wav = wav.to(device)
semantic_vectors = hubert_model.forward(wav, input_sample_hz=model.sample_rate)
semantic_tokens = tokenizer.get_token(semantic_vectors)
with torch.no_grad():
encoded_frames = model.encode(wav.unsqueeze(0))
codes = torch.cat([encoded[0] for encoded in encoded_frames], dim=-1).squeeze() # [n_q, T]
codes = codes.cpu().numpy()
semantic_tokens = semantic_tokens.cpu().numpy()
import numpy as np
np.savez(output_path, fine_prompt=codes, coarse_prompt=codes[:2, :], semantic_prompt=semantic_tokens)
###############################
# Enter your prompt and speaker here
# download and load all models
# simple generation audio array
###############################
from bark.api import generate_audio
from transformers import BertTokenizer
from bark.generation import SAMPLE_RATE, preload_models, codec_decode, generate_coarse, generate_fine, generate_text_semantic
text_prompt = "你们吃了没"
preload_models(
text_use_gpu=True,
text_use_small=False,
coarse_use_gpu=True,
coarse_use_small=False,
fine_use_gpu=True,
fine_use_small=False,
codec_use_gpu=True,
force_reload=False
)
audio_array = generate_audio(text_prompt, history_prompt=output_path, text_temp=0.7, waveform_temp=0.7)
###############################
# generation with more control#
###############################
x_semantic = generate_text_semantic(
text_prompt,
history_prompt=output_path,
temp=0.7,
top_k=50,
top_p=0.95,
)
x_coarse_gen = generate_coarse(
x_semantic,
history_prompt=output_path,
temp=0.7,
top_k=50,
top_p=0.95,
)
x_fine_gen = generate_fine(
x_coarse_gen,
history_prompt=output_path,
temp=0.5,
)
audio_array = codec_decode(x_fine_gen)
###############################
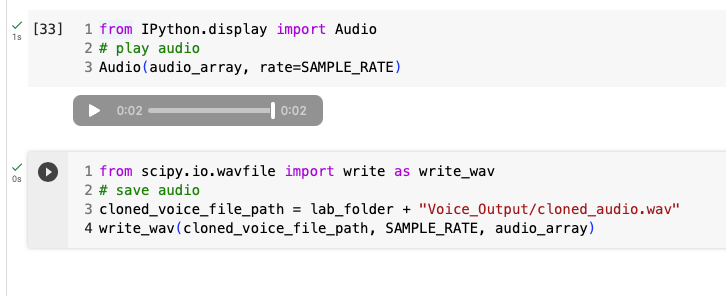
# play audio #
###############################
from IPython.display import Audio
Audio(audio_array, rate=SAMPLE_RATE)
###############################
# save audio to google driver #
###############################
from scipy.io.wavfile import write as write_wav
cloned_voice_file_path = lab_folder + "Voice_Output/cloned_audio.wav"
write_wav(cloned_voice_file_path, SAMPLE_RATE, audio_array)I hope you enjoyed today’s content.
You are welcome to my network:
Follow me on Medium
Your claps 👏 keep me continue writing high-quality articles. Thank you!


