avatarDaeGon Kim

Summary

The web content provides a detailed guide on how to mount a Ceph RBD (RADOS Block Device) image on a client node, ensuring persistence across reboots.

Abstract

The article outlines a two-part process for mounting a Ceph RBD image using the admin client and ensuring that the mount persists after system restarts. Initially, it instructs on creating a Ceph pool and an RBD image within that pool, specifying the creation of a pool named main-block-devices and an image named foo with a size of 1GB. It then guides through setting up a client node by installing ceph-common, copying the ceph.conf and ceph.client.admin.keyring files from a monitor node to the client node, and executing commands to map and mount the RBD image. The article emphasizes the importance of using the correct device reference for unmounting and provides steps to make the RBD image mount persistent through reboots by configuring the /etc/ceph/rbdmap file and updating /etc/fstab.

Opinions

  • The article assumes the reader has a pre-existing Ceph cluster, as described in a linked Medium article.
  • It suggests that using the admin client is suitable for this example, implying that for production environments, different client configurations might be more appropriate.
  • The article implies that the process of mounting an RBD image is straightforward and can be automated for persistence.
  • It advises that it is safer to reference the RBD image by its full path (/dev/main-block-devices/foo) when unmounting to avoid potential confusion or errors.
  • The article promotes the use of system services (rbdmap.service) and /etc/fstab entries to ensure the RBD image is remapped and mounted automatically after a system reboot.

Ceph RBD Image Mount

The article will show how to

  1. Mount a rbd image using the admin client
  2. Make it persist

The Ceph cluster we are using here is described in Ceph Cluster Deploy article.

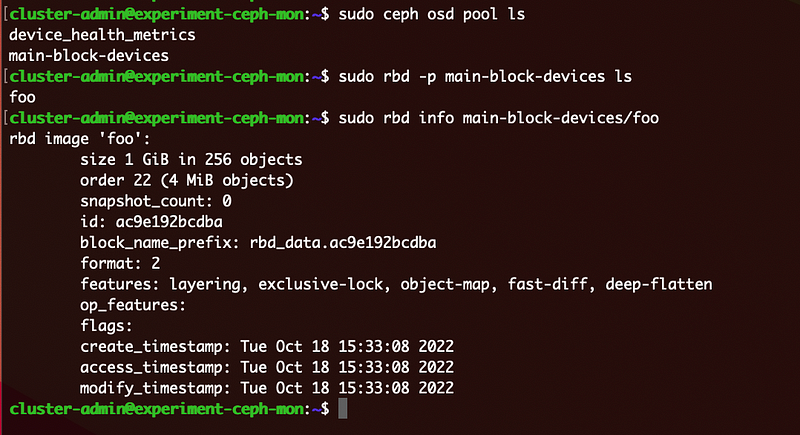
First we need to create a pool and an rbd image in the pool.

These commands will create a pool named main-block-devices and a rbd image foo in the pool. The size of image will be 1GB.

How to retrieve pools and rbd image information

Client Node Set up for RBD mounts

First, install ceph-common on a ceph-client node.

sudo apt install -y ceph-common

This will create /etc/ceph directory on the ceph-client node. Then copy /etc/ceph/ceph.conf from the ceph-mon node to /etc/ceph directory on the ceph-client node.

We also need to copy a client keyring file as well. In this example, we will use the admin client. So, copy the below file from the ceph-mon node to the ceph-client node.

/etc/ceph/ceph.client.admin.keyring

Once these two copies are done, we can run the following commands to mount a rbd image.

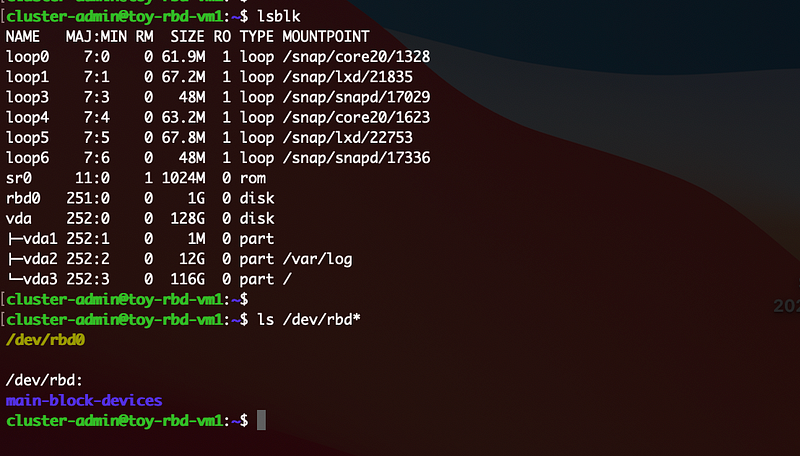
The last command is to unmount the disk. As you see below, when a rbd image is mapped, it appears in two ways: /dev/rbd0 and /dev/main-block-devices/foo. It is safer to use the later one. This screenshot shows when the block device is not mounted.

These map and mount will disappear once the node reboots.

To make the map and the mount persistent over reboots

First we need to add the below line in /etc/ceph/rbdmap.

main-block-devices/foo  id=admin,keyring=/etc/ceph/ceph.client.admin.keyring

This rbdmap file is used by rbdmap.service. Then, restart this service.

sudo systemctl restart rbdmap.service

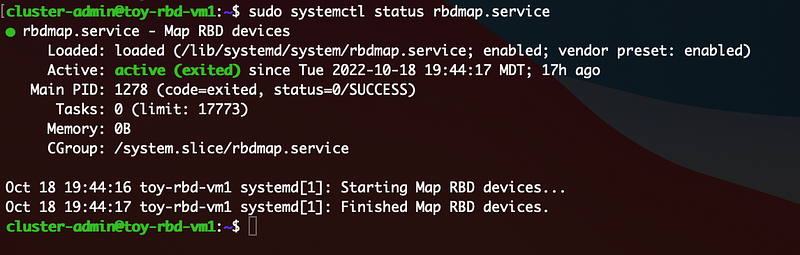
If this service is not enabled, make it enabled.

For mounting the disk, add the following line at /etc/fstab.

/dev/rbd/main-block-devices/foo /mnt/ceph-rbd ext4 defaults 0 0

Finally, run the following command.

sudo mount -a
Ceph
Rbd
Mount
Storage
Recommended from ReadMedium