
Building your own deep learning box
The bumpy road to my first deep learning rig
After completing Part 1 of Jeremy Howard’s awesome deep learning course, I took a look at my AWS bill and found I was spending nearly $200/month running GPUs. It’s not necessary to spend that much to complete his course, but I started working on a few extracurricular datasets in parallel and I was eager to get results.
After talking with fellow students and reading a number of blog posts, I decided to try building my own box. Technology and hardware change so rapidly that I’m afraid much of post will become outdated soon, but I hope my general approach will still be useful for at least a little while.
The 6 Steps To Building a Box
1. Choose parts 2. Assemble hardware 3. Install operating system 4. Install drivers 5. Install libraries 6. Setup remote access
1. Choose Parts
I started by reading a bunch of blogs to get the current consensus on which parts to buy. Since hardware changes to so fast, I’ll leave it to you to research specific parts when the time comes, but in general you’ll need to find the following components: motherboard, CPU, memory (RAM), hard drive (SSD), graphics card (GPU), CPU cooler, power supply, and case.
I strongly recommend creating a parts list on pcpartpicker.com before purchasing. They have a “compatibility check” feature which tells you if your components are incompatible. You can find my list here.
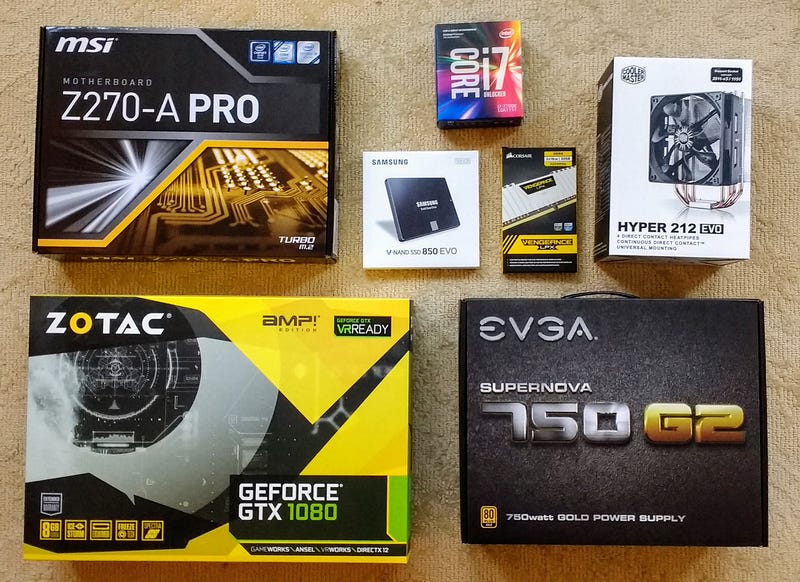
Parts List
CPU — Intel i7 7700k 4.2GHz Quad-Core $343 RAM — Corsair Vengeance LPX 32GB (2 x 16) DDR4–3200 $276 SSD—Samsung 850 EVO-Series 500GB $160 GPU — Zotac GeForce GTX 1080 8GB AMP! Edition $565 Motherboard — MSI Z270-A PRO ATX LGA1151 $114 Cooler — Cooler Master Hyper 212 EVO 82.9 CFM $28 Power Supply — EVGA SuperNOVA G2 750W ATX $100 Case — NZXT S340 (White) ATX Mid Tower Case $70 Total: $1,654
I decided to start with one graphics card (single GPU), but I made sure the MSI board had an additional PCIe slot so I could add another card in the future. UPDATE (May 2017): It turns out the MSI Z270-A PRO has 1 x16e PCIe slot, not 2. It can hold an extra GPU in a x4e slot, but performance will be constrained. Do not buy this if you plan on using multiple GPUs!
In general I would opt for parts with the most customer reviews, even if the reviews aren’t perfect. The more popular the part, the more likely it is to have user-generated how-to-guides and tips. This will save you lots of pain in the next two steps.
Helpful Posts
Build Personal Deep Learning Rig Optimizing a Starter CUDA Build Building a Deep Learning Dream Machine Deep Learning Hardware Guide
2. Assemble Hardware
Now the fun part. I was able to find instructional videos for most of the parts, but there were a few I had to hack based on videos of similar installations. The instruction manuals for the MSI board, CoolMaster and NZXT case were decent, but I had to supplement them with other material. Here are some videos I found helpful:
Learnings
- Buy a nice screwdriver — I had a crappy one and it quickly bogged me down. Do yourself a favor and buy one with a long neck so you can reach into tight spaces.
- Press Harder — Disclaimer: don’t blame me if you break something, but on at least two occasions (CPU and memory) I wasted time by being too gentle on the parts. I was afraid of pushing too hard, so I gave up if the part didn’t snap into place easily. In the case of the memory, I nearly purchased an entirely new set of chips on Amazon. The solution in both cases was to push harder.
- Understand your BIOS — A BIOS is a small piece of software pre-installed on your motherboard that pops up when you first boot your machine. It’s basically a control panel for configuring your hardware and launching an operating system. It’s important to know where your board looks for the “boot drive” (the USB or SSD that holds your operating system) and how it selects which graphics card to use. The MSI manual was sadly vague on these points, but there are some good videos which go into the finer points.
- Your monitor isn’t broken — It took me awhile to figure out how to get the display working with my new box. I read somewhere you needed to connect your monitor to the motherboard initially, because the graphics card wouldn’t work without the Nvidia drivers. When I finally booted up however I couldn’t see anything in monitor. I tried connecting to the graphics card just for fun, but that also didn’t work. Finally I tried removing the graphics card entirely, connecting back to the motherboard and rebooting. That worked! The problem was the MSI board defaults to using its own graphics card only if it can’t find any external cards in its PCIe slots. Since I had the graphics card connected when I first tried to boot, the board tried to use my new card instead. I wasn’t seeing anything because the Nvidia drivers weren’t installed!
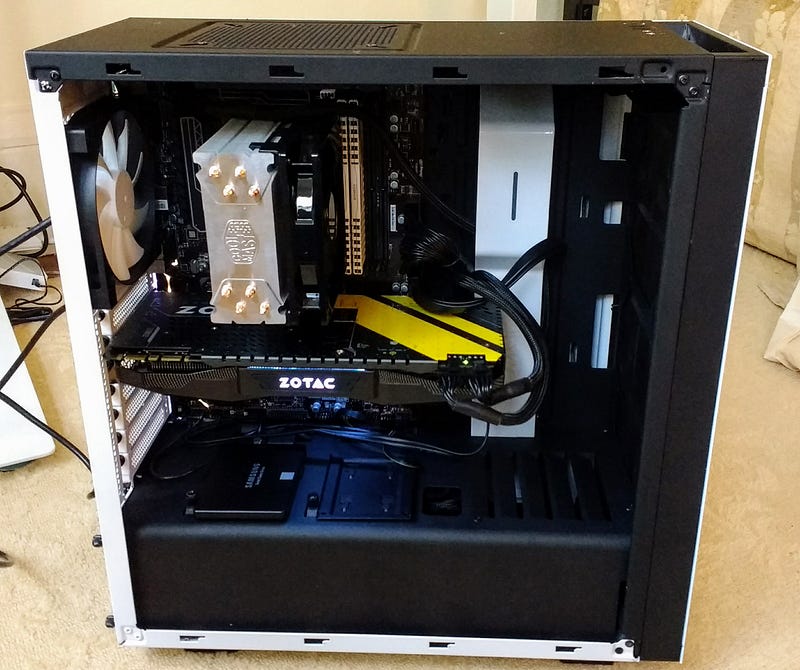
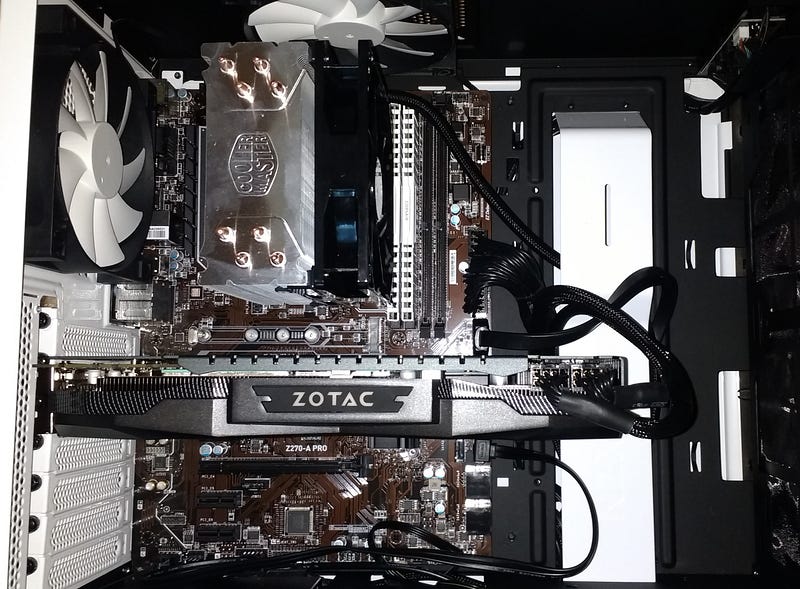
Finally, my masterpiece complete!
3. Install Operating System
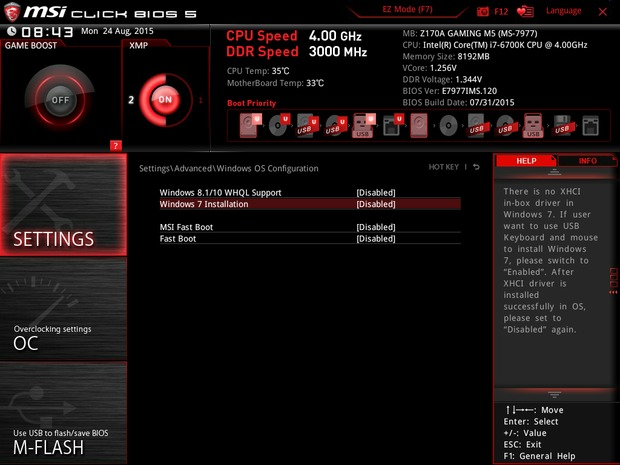
After you get your monitor working, you should see something that looks like this. This is your BIOS. There are two configuration changes I needed to make in order to get everything up and running: change the boot priority and swap the default graphics card.
I planned to use my machine primarily for programming and machine learning, so I decided to install Ubuntu as my operating system. I also hoped to work remotely from my Mac, so I didn’t see the need for Windows, but you can always install both.
Create Bootable USB Drive
I followed these instructions for Mac and downloaded a client called UNetBootin which handles everything for you.
Boot into Ubuntu
In a perfect world, I should have been able to plug in my USB drive, reboot, answer a few questions, and have a fully working version of Ubuntu installed and ready to go. Instead I got this error message:
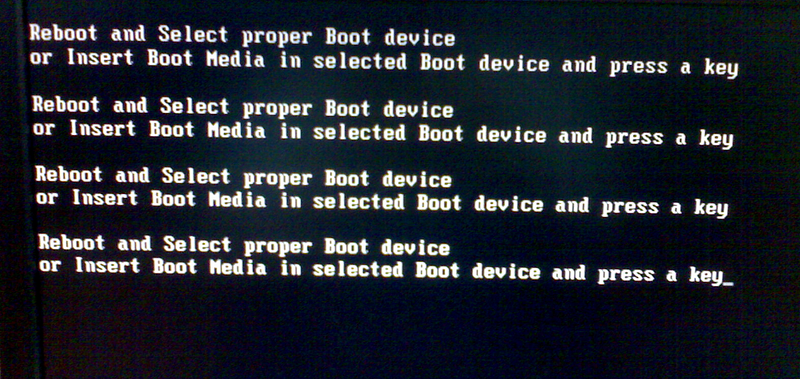
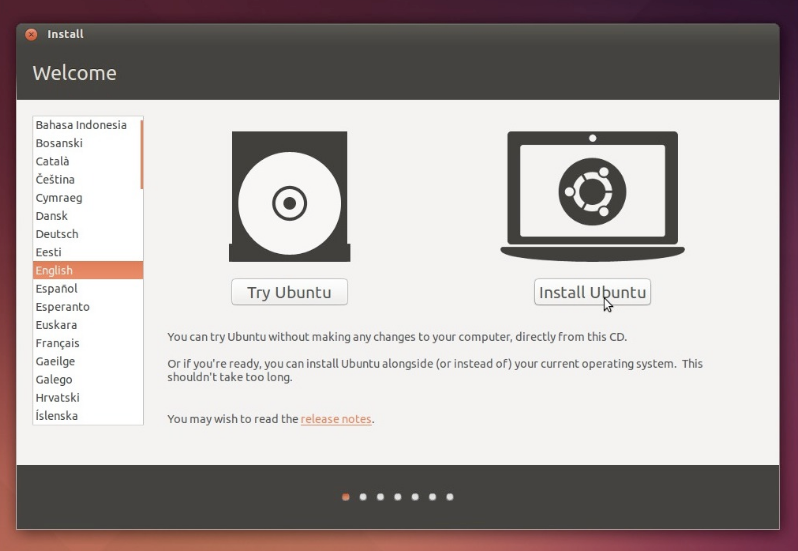
The problem was the default “boot priority” chosen by MSI. Logging into the BIOS again (pressing F11 immediately after power on), I saw the BIOS was configured to try booting from my hard drive first (Samsung SSD), which was empty but probably had enough junk in it to confuse the BIOS. The solution was to drag the USB option to the top of the priority list and reboot. Finally, I saw the friendly Ubuntu setup screen!
After installing Ubuntu and rebooting I was naturally dismayed to find I couldn’t get past the Ubuntu loading screen. It just stalled and eventually timed out. WTF!?!
The problem turned out to be the built-in graphics card on the MSI motherboard (the GTX 1080 was still on my coffee table). It wasn’t compatible with the Ubuntu GUI! This was classic chicken-and-egg. Without Ubuntu I couldn’t install the Nvidia drivers, but without the drivers I couldn’t launch Ubuntu! Enter GRUB.
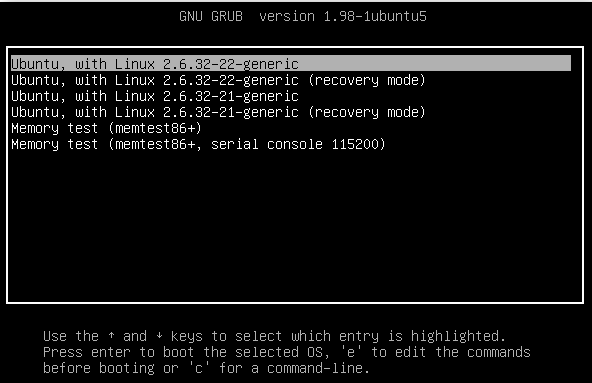
I ended up finding two great posts here and here, which helped me get out of this mess. The solution was to add the nomodeset argument to the boot command. This helped me launch a fairly normal version of Ubuntu and continue on my way.
4. Install Drivers
NVIDIA drivers are notoriously difficult to work with and this one was no exception. Following the lead of other users, I went to the NVIDIA website, downloaded the GeForce driver, and proceeded to install it using the Ubuntu GUI. This was a mistake that was going to cause me great pain.
Can’t detect compatible NVIDIA card
Another chicken and egg. I hadn’t reattached the GTX 1080 because it didn’t work without the drivers. If I reattached it, the MSI board would start using it again and I would be back where I started. The solution was to reboot into the BIOS and change the priority of graphics cards. Instead of opting for the new card by default, I updated the settings to give precedence to the motherboard’s built-in card. This allowed me to reattach the GTX 1080 and login to Ubuntu normally.
You appear to be running X server
I used the instructions here to fix the problem, but initially I couldn’t get past the first step: “Hit CTRL+ALT+F1 and login using your credentials.” When I did that, the screen would go blank again and I would lose connection to the monitor. The solution was to boot Ubuntu into text mode and complete the steps from the command line. You can boot into text mode by editing the boot command in GRUB and changing nomodeset to text.
A Better Way
Eventually I got things working (driver, CUDA, deep learning libraries, etc) and patted myself on the back. But it wasn’t long before I broke things again messing with config files.
After spending what seemed like hours on AskUbuntu it came to my attention that the new CUDA 8.0 Toolbox comes pre-packaged with the NVIDIA driver and lets you install CUDA and driver simultaneously.
I purged the existing NVIDIA libraries, ran the following code, and everything just worked. You can see the full instructions here.
wget http://developer.download.nvidia.com/compute/cuda/repos/ubuntu1604/x86_64/cuda-repo-ubuntu1604_8.0.44-1_amd64.deb
sudo dpkg -i cuda-repo-ubuntu1604_8.0.44-1_amd64.deb
sudo apt-get update
sudo apt-get install cuda
Then add the following to your ~/.bash_profile:
export PATH=/usr/local/cuda-8.0/bin${PATH:+:${PATH}}
export LD_LIBRARY_PATH=/usr/local/cuda-8.0/lib64${LD_LIBRARY_PATH:+:${LD_LIBRARY_PATH}}
export LIBRARY_PATH=/usr/local/cuda-8.0/lib64${LIBRARY_PATH:+:${LIBRARY_PATH}}
Oh, did I mention you can do all this from the command line in Ubuntu text mode? Who needs a GUI!
5. Install Deep Learning Libraries
There are a number of good posts describing the essential deep learning libraries and how to install them (1, 2, 3, 4). The key takeaway here is don’t blindly follow the instructions especially the sections on how to install. Very often these instructions are outdated and there are better examples on the library’s website. Here are the libraries I installed:
CUDA — Parallel computing platform that takes advantage of GPUs cuDNN — Nvidia library for accelerated deep learning Anaconda — Python for data science (numpy, scikit, jupyter..) OpenBLAS — Fast linear algebra methods Tensorflow — Google’s machine learning library Theano — An alternative to Tensorflow Keras— Simplifies working with Tensorflow or Theano
After that I ran some tests to make sure things were working and starting playing with Jupyter notebooks.
6. Setup Remote Access
This is an optional step, but if you plan to work remotely from your laptop here are some ways to do it.
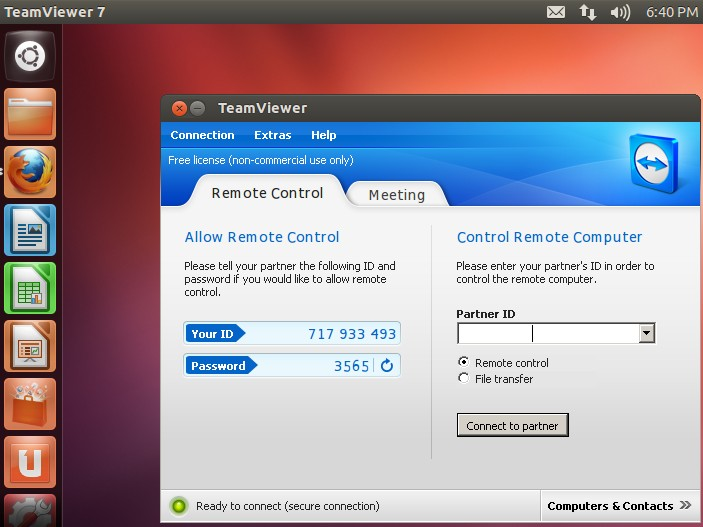
Teamviewer
Teamviewer is screen share software. If you have it installed and running on both machines, you can control your Ubuntu machine from your laptop and vis versa. While this makes certain things more convenient, it can be a little slow and clunky doing everything through screen share.
SSH and Port Forwarding
I wanted to be able to SSH into my new box remotely and interact with it as if it were another tab in my terminal. To do this, I installed OpenSSH on Ubuntu.
sudo apt-get install openssh-server
sudo service ssh status
After that I configured my Comcast router to forward external traffic directly to my host. I followed the Comcast instructions here and to my surprise, things worked! I verified this by checking port 22 at www.canyouseeme.org. Part of the process involves figuring out your public IP address, which you can find by running:
dig +short myip.opendns.com @resolver1.opendns.comRemote Notebooks
Another cool trick if you’re a Jupyter fan is to run your notebook on your deep learning desktop, but view and edit the notebook on your laptop. There is a great tutorial on the technique here, so I’ll just relay the commands:
$laptop: ssh -l bfortuner@DEEPLEARNINGIP
$server: jupyter notebook --no-browser --port=8888
$laptop: ssh -NL 8888:localhost:8888 bfortuner@DEEPLEARNINGIP
Now you can visit http://localhost:8888 in your laptop’s browser and start editing the notebooks on your deep learning machine!
That’s all folks. Feel free to message me with questions!


