
WPE: Building full screen web applications for the Raspberry Pi
For those that didn’t read my previous blog post: WPE WebKit gives you a full screen browser with hardware acceleration on an ARM device like the Raspberry Pi.
After figuring out how to run WPE Webkit on a Raspberry Pi, it was time to take it to the next level and run a web application with some hardware accelerated features on it.
WPE Webkit isn’t available for Raspbian. You will need a build system like Yocto or Buildroot to get it running. The builds it produces contains the bare minimum to run your application. That is quite handy when you want to build a stable production image. However if you want to develop for WPE Webkit, you might run a little short on development tools.
So to make you feel comfortable in a Buildroot linux image, I’m going to show you how to include all the packages you need for development. I’ll make sure you can work with things like like bash, nano, screen, git, node.js, wifi, Bluetooth, serial port communication and so forth.
There will be a lot of “do this, do that” instructions, but it’s important that you understand what’s going on if you want to bake your own Buildroot images in the future. If you just want my prebuilt image to play with, you can get it here and start reading from “Running your image”.
Here we go.
Getting Buildroot
Tip: If you don’t have a Linux machine, like I do, just boot one on DigitalOcean. As you will only use it for a few hours, you can even get a really expensive one that builds really fast.
Get the necessary libraries to build with Buildroot:
apt-get update
apt-get install git build-essential unzip bc mtools libncurses-dev dosfstools -y
Clone the Buildroot fork containing WPE WebKit:
git clone https://github.com/WebPlatformForEmbedded/buildroot.git
cd buildroot
Preparing the Buildroot image
Start from the Pi 3 config:
make raspberrypi3_wpe_defconfigNow let’s fill our image with development tools!
Open the customisation menu:
make menuconfigFirst, you need to make sure Buildroot outputs an image you can burn to an SD Card. To do this, make sure the options in the menu are set as follows:
Also, edit the Raspberry Pi post script:
nano board/raspberrypi/post-image.shMake sure GENIMAGE_CFG reads:
GENIMAGE_CFG="${BOARD_DIR}/genimage-${BOARD_NAME}.cfg"Now enable the following options:
These might seem like a lot of packages but they’ll come in handy later.
Side note: did you know that for git over ssl to work, you need: git, curl and the CA Certificates!
Native Node.js libraries
In my project, I needed noble, a Node.js module to talk to Bluetooth Low Energy devices. As noble uses the usb and bluetooth-hci-socket native module, I had to build these during the Buildroot build process.
To do so, go to Target packages > Interpreter languages and scripting > nodejs and selected Additional modules. Fill in the native modules you would like to use, for example:
usb bluetooth-hci-socket serialport node-hidAs the usb module depends on the native eudev library, I also filled that in under Additional module dependencies:
eudevMake sure you save before exiting the menu.
EPERM exception
While I was building the bluetooth-hci-socket module, it gave me an EPERM exception. It didn’t have permissions to build the module. If you run into this, you can fix this by editing the following file:
buildroot/package/nodejs/nodejs.mkChange:
$(NPM) install -g $(NODEJS_MODULES_LIST)
to:
$(NPM) install -g --unsafe-perm $(NODEJS_MODULES_LIST)Raspbian style bash prompt
I’m a fan of the colourful bash prompt you get when you log into Raspbian:

To enable this, add a .bashrc and a .profile file to the root. To make sure its added to your Buildroot image on compilation, go to:
cd buildroot/system/skeletonCreate a .bashrc file with te following content:
export TERM=xterm-xfree86PS1='\[\033[01;32m\]\u@\h\[\033[00m\]:\[\033[01;34m\]\w \$\[\033[00m\] 'export NODE_PATH=/usr/lib/node_modulesThat last export is there so the native node.js modules get loaded when a node.js app starts.
Also create a .profile file that loads that .bashrc file:
if [ -n "$BASH_VERSION" ]; then
  # include .bashrc if it exists
  if [ -f "$HOME/.bashrc" ]; then
    . "$HOME/.bashrc"
  fi
fi
Building your image
To build your image, simply run
makefrom the /buildroot folder.
This can take a while, so grab a coffee (make sure the coffee house is a 2 hour drive 😉).
If all goes well, you should have an sdcard.img file under output/images.
Burn it to an SD Card, put it in your Pi and boot it. Make sure an ethernet cable is plugged in.
Running the image
Once your Pi is booted, you should see a warm welcoming screen followed by a We’re ready! screen:
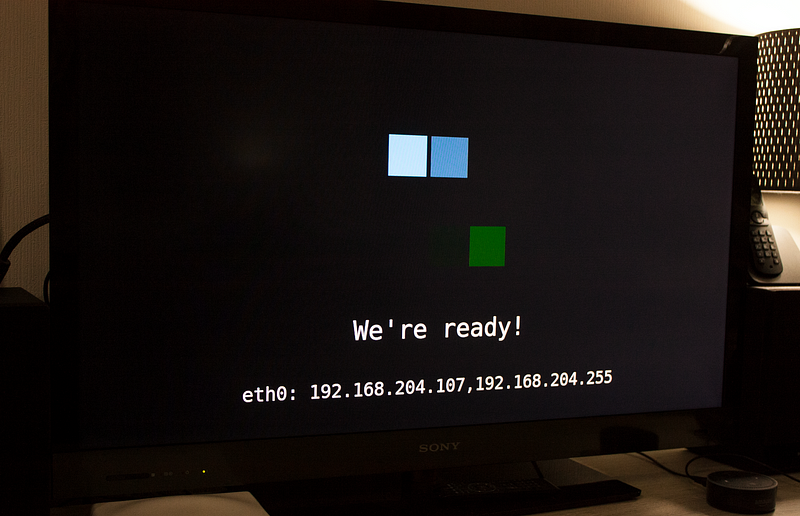
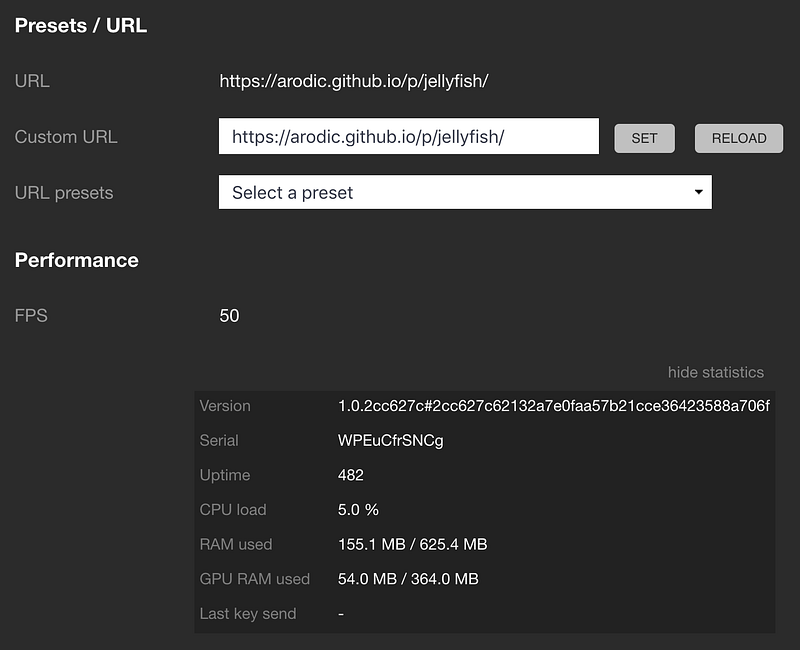
If your ethernet cable is plugged in, you will see the IP address of your Pi on the screen. Start by typing that into your browser. You’ll arrive at an interface where you can easily load new urls in the WPE browser and see the frames per second, memory usage and so on. I tried the jellyfish demo.
Expanding the file system
You can remotely log in to your using ssh and the following username/password combination: root/root
ssh root@192.168.204.107The first you want to do, is expand the file system so you’ll have more space to work with. This is no Raspbian, so there’s no raspi-config to do so. You will have to do it yourself. Luckily you included all the necessary tools for this when you configured your Buildroot image earlier ;-)
Run
sudo fdisk /dev/mmcblk0Type p
This should list your partitions. Make note of the first sector of the second partition:
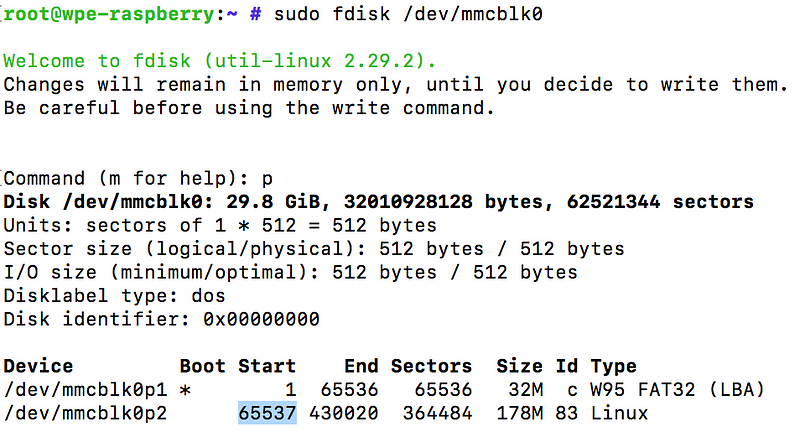
We are going to delete that second partition and recreate it, but make it span the whole SD card.
Type d
This will delete a partition. Delete the second one by typing 2
Type n to create a new partition. Type p to make it primary. Set the partition number to 2. Enter the first sector you noted down earlier. Accept the end sector as is. Type N to leave the signature as is.
Type w to confirm.
Now reboot using
rebootTo complete the file system expansion, ssh back into the pi and type
resize2fs /dev/mmcblk0p2After a few seconds the command should complete and you can check your disk space with
df -h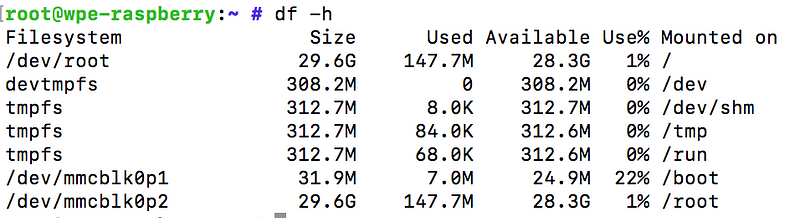
Running a Node.js application
As noted earlier, WPE Framework is running that nice web interface you can use to show urls on the WPE browser. It turns out you can also use its API to make it show your own url. Do so, send a POST to /Service/WebKitBrowser/URL with the url you want to show:
{
"url": "https://arodic.github.io/p/jellyfish"
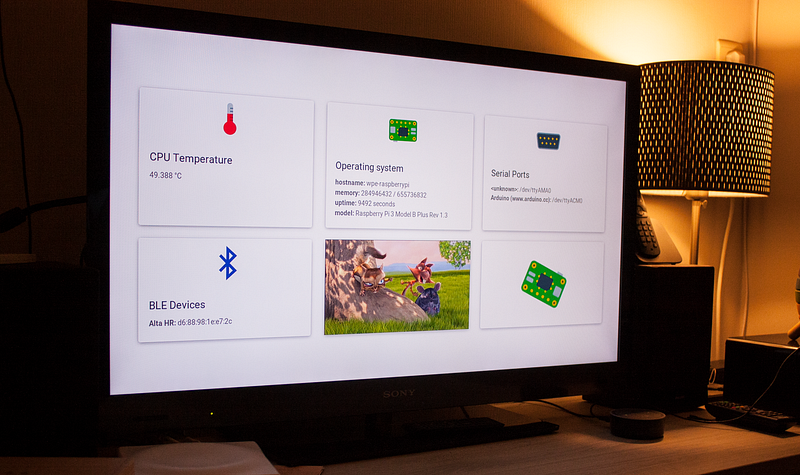
}For this tutorial, I built a Node.js Express.js application that shows you the serial ports, bluetooth devices, cpu temperature, os info, the Big Buck Bunny movie and a CSS3 animation: https://github.com/SamDecrock/wpedemo.git
Using the API described above, it automagically changes your browser to it’s own url.
To run it, SSH into your pi. I have the tendency to store my Node.js in a folder called /apps. so from the root create an /apps folder:
mkdir /apps
cd /apps
Then clone the demo app into it:
git clone https://github.com/SamDecrock/wpedemo.gitNext, go into /apps/wpedemo and install its dependencies
cd /apps/wpedemo
npm install --production
Don’t be alarmed if you see node-gyp errors. This is node-gyp trying to install the native libraries. Which are already installed globally.
To test run the web application, run
DEBUG=wpedemo node app.jsIf all goes well, you should see a bunch of information on the screen as wel as a video playing and a CSS3 animation (the spinning Pi 😊):

Running the Node.js application on boot
When you want your Node.js application to run on boot, you’ll have to create your startup script. As Buildroot still uses init.d, create a new file inside /etc/init.d/
nano /etc/init.d/S95wpedemoThe S95 just makes sure it is run after the WPE framework init script. The content of the file should be something like this:
#!/bin/shexport NODE_PATH=/usr/lib/node_modulesnohup /bin/node /apps/wpedemo/app.js > /apps/wpedemo.log 2>&1The second line set the environment variable telling node where to find the globally installed node.js modules.
Make the script executable with
chmod +x /etc/init.d/S95wpedemoThat’s it. Reboot your Pi with the reboot command and watch your web application boot up!
Complete configuration and image
For those interested in the complete configuration, I committed my fork of WPE buildroot to https://github.com/SamDecrock/wpe-buildroot. If you just want the image I created, you can get it here.
If you have any questions or remarks, please leave a comment.


