
Building Dashboards Quickly with React and Material-UI

Web dashboards are everywhere. Lately, it seems like every new SaaS product that hits the market ships with a smooth-looking management dashboard. Whether its server statistics or sales metrics there’s a high probability you have used one of these dashboards recently. Styles, color schemes and overall themes differ across many modern dashboards, but the overall layout is generally the same. Split pane view, some sort of navigation bar, notification area, etc. So why exactly do all these different products use roughly the same dashboard idea?
The answer is simple: consistency and ease-of-use.
There are exceptions to the rule, but most users want a similar and consistent experience across applications. It’s easier and a more pleasant experience when you know where buttons are located and how simple concepts like navigation should work. This allows users to focus on the actual content of the application, not the figuring out the layout.
In this article, we’ll look at how to build a quick and easy web dashboard using React and Material-UI. There are a ton of different frameworks and libraries that you could use in place of these, but I’ve found this combination to be straightforward and pretty easy to use. If you’ve never used either of these before, don’t worry! We’ll take you from zero to hero quickly and easily. When we’re finished you will have a consistent, repeatable way to prototype new dashboard applications.
Setting up React
For this React project we’re going to use create-react-app instead of rolling our own from scratch. Using this create-react-app let’s you abstract away some of the complex mechanics of React and focus on writing the application code right away. Although this method is fast and simple, if you’re planning on building a production-ready app, I highly suggest taking some time to build a React app from scratch and learn the basics of things like Webpack.
If you haven’t already, make sure you have Node.js and npm installed on your computer. Romil Jain has a fantastic guide available here if you get stuck: The Best Way to Install Node.js, npm and yarn on Mac OSX.
Once the prerequisites are out of the way we can get started creating our new app. Detailed directions are available here if you run into any snags.
npx create-react-app dashboard
cd dashboard
npm start
Once you run the above commands you should see a new browser window open with the following display:

That’s pretty much all it takes to get started with a brand new create-react-app project. As you can see, within a few minutes you’re ready to start writing your dashboard code. In the next section we’ll setup the actual dashboard layout and replace this default React page.
Setting up Material-UI
There is a sea of many different “bolt-on” UI options for React. Many of them exist as entire modules that provide a multitude of functionality in React, while others are purely style focused. For this project we’ll be looking at the first type. Material-UI is a suite of modules for developing simple, elegant user interfaces with React. The layout and style adheres to the design principles of Material Design, which is a set of guidelines originally developed by Google.
If your app is still running go ahead and shut it down momentarily while we add our new modules. Make sure you’re in the newly created dashboard app directory and run the following command to install Material-UI and some dependencies:
npm install @material-ui/core
npm install @material-ui/icons
npm install recharts@2.0.0-beta.6
npm install fontsource-roboto
In order to use the fontsource-roboto package, we’ll need to import it. Edit the src/index.js file and add the following statement underneath the last import line:
import 'fontsource-roboto';Now that we have all the modules installed, we’ll need to pull in our example dashboard components. Head over to the Material-UI GitHub and clone this repository into a separate folder (outside of the new dashboard directory):
cd ..
git clone https://github.com/mui-org/material-ui.git
Now we’ll copy the component .js files into our dashboard app directory (we won’t need the TypeScript .tsx files for now):
cp -r material-ui/docs/src/pages/getting-started/templates/dashboard/*.js dashboard/src/Finally, let’s edit our app to use the new components. Head back into the dashboard app directory and open up src/App.js. Near the top of the file, after the last import statement add another import to pull in the new Dashboard component:
import Dashboard from './Dashboard';Next, remove everything inside of <div className="App"> and replace it with the following:
<Dashboard />Your App.js file should now look similar to this:
import './App.css';
import Dashboard from './Dashboard';
function App() {
return (
<div className="App">
<Dashboard />
</div>
);
}export default App;Last, we need to make one small style tweak so that everything looks correct. Edit the src/Dashboard.js file and change the following line:
theme.palette.mode === 'light'To this:
theme.palette.type === 'light'Great! We should now have all the pieces in place to run our new dashboard app. Go ahead and save the changes and boot up the app:
npm startFinished product
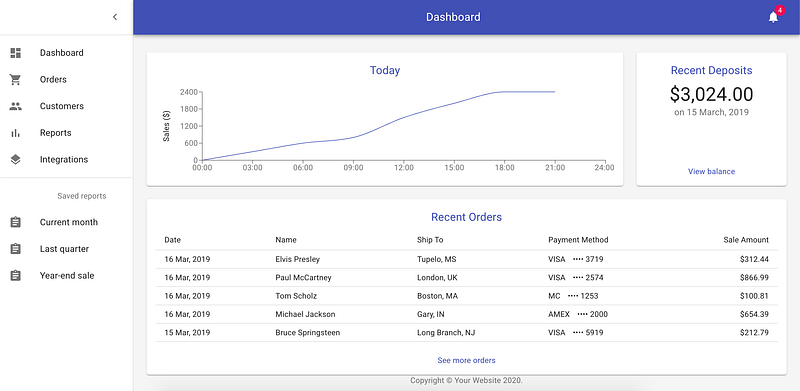
Once the app loads you should see the page displayed above. Congratulations! You now have your very own Material-UI dashboard. Now that all of the proper modules and components are loaded you can begin to customize the existing layout or create a whole new dashboard using the individual pieces of this dashboard.
This dashboard app serves as a nice jumping off point for building your own. I’ve found it is a lot easier to prototype new dashboards when you don’t have to reinvent the wheel and have access to great examples. Using this functional example you can see how to implement Material-UI in React, but also how to organize a dashboard in general.
Thanks for reading! I hope you enjoyed learning about using React and Material-UI together to create quick, simple dashboards. Don’t forget to check out the Material-UI docs for even more great features and examples.