
Building a Real-Time Messaging SPA with Laravel and Pusher
In today’s fast-paced digital world, real-time communication is essential for creating engaging and interactive user experiences. Messaging apps have become a crucial part of our daily lives, and building one with real-time notifications can significantly enhance user engagement. In this article, we will guide you through the process of creating a real-time messaging app using Laravel and Pusher.
To build this we will use Laravel on the backend and Vue.js on the front end. We will use Inertia.js as this will make things easier and speed up the development process. Finally we will use Breeze to scaffold our authentication system and install Tailwind CSS for styling.
Step 1: Install Laravel
If you’re working on a Mac with Docker Desktop, the easiest way to get started is by running the following:
curl -s "https://laravel.build/laravel-messaging-app" | bashChange into the directory and start the containers:
cd laravel-messaging-app && ./vendor/bin/sail upStep 2: Install Breeze
To get things up and running quickly we will use a package called Breeze. Laravel Breeze is a minimal and simple implementation of Laravel’s authentication scaffolding, and will give us a quick and easy way to implement login, registration, email verification, password reset, and password confirmation.
./vendor/bin/sail composer require laravel/breeze --dev
Run the installer:
./vendor/bin/sail artisan breeze:install
Select “Vue with Inertia” Breeze stack.
Laravel
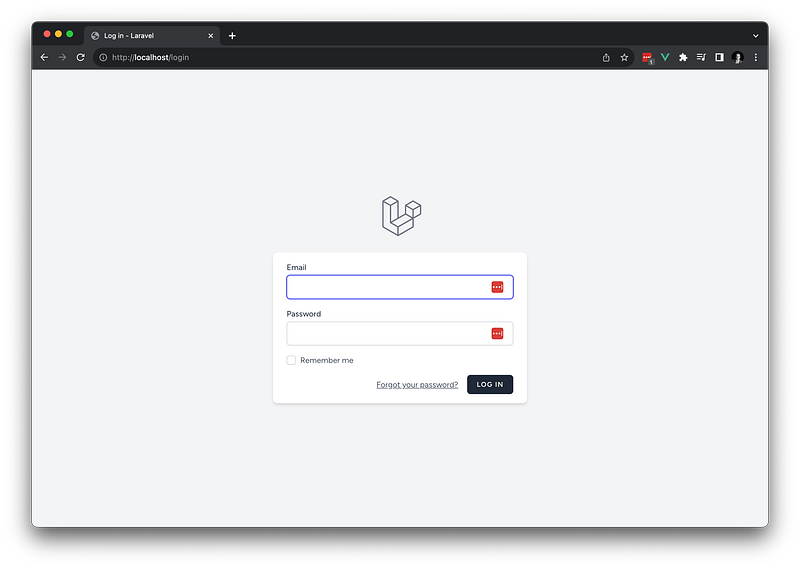
Head over to http://localhost/login to ensure that the installation was successful, you should see the following:
Run migrations to create the tables and then use tinker to Seed a user.
sail artisan migrate

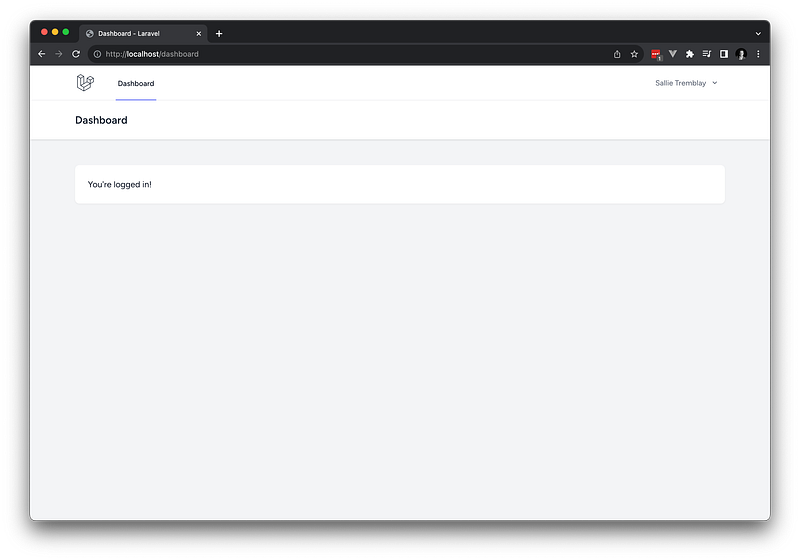
You should now be able to login and you get redirected to the dashboard page.
Step 3: Setup Pusher
Now we’ve got the basics of our app setup, let’s head over to Pusher and get that configured.
Pusher is a cloud-based service that enables you to add real-time functionalities to web and mobile applications. With it you can easily integrate real-time features such as instant messaging, notifications, and live updates into your applications.
If you don’t have an account create one, then create an app in the channels section.
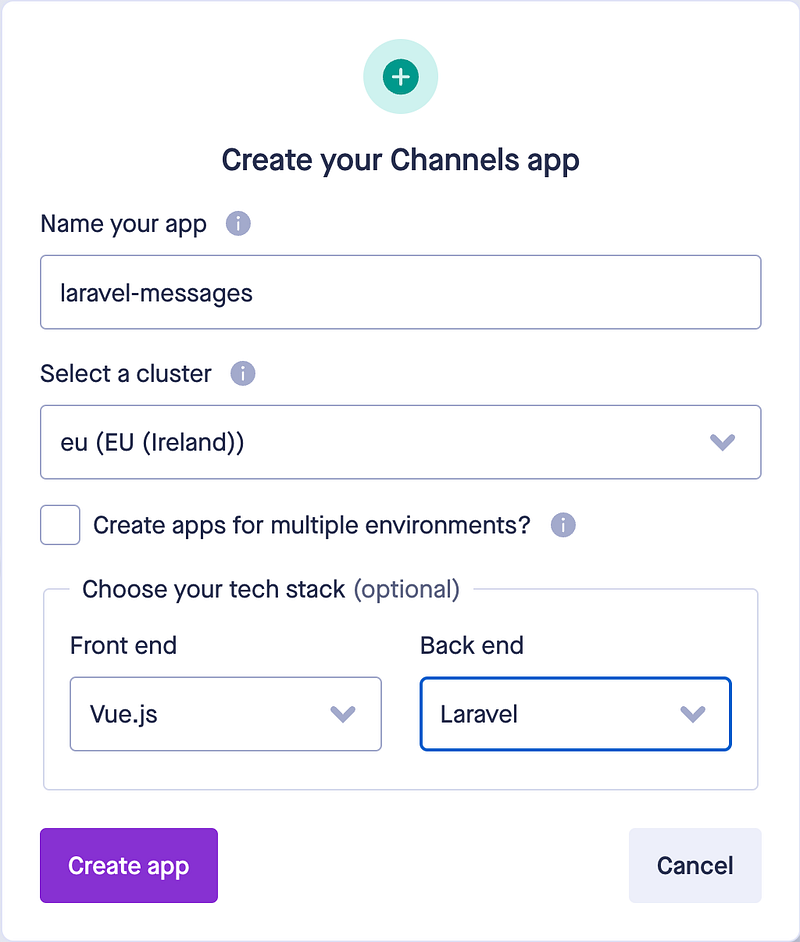
From the App Keys page note down the app_id, key, secret and host as you will need these to connect to your Channels app.
Switch back to your IDE, and uncomment App\Providers\BroadcastServiceProvider::class, in config/app.php. Open .env file and change the BROADCAST_DRIVER from log to pusher. Add the vales from the app you created in Pusher:
PUSHER_APP_ID=
PUSHER_APP_KEY=
PUSHER_APP_SECRET=
PUSHER_APP_CLUSTER=
Next step is to install the Pusher PHP SDK:
sail composer require pusher/pusher-php-server
The last thing we need to do is nstall the front-end dependencies and configure Laravel Echo with Pusher:
- Run the
npmcommand to installlaravel-echoandpusher-js:
sail npm install --save laravel-echo pusher-js
- After the installation is complete, navigate to the
resources/js/bootstrap.jsfile in your Laravel project. - Look for the Pusher configuration section at the bottom of the file. It might be commented out, so you will need to uncomment it. The code should look like this:
import Echo from 'laravel-echo';

import Pusher from 'pusher-js';
window.Pusher = Pusher;

window.Echo = new Echo({
    broadcaster: 'pusher',
    key: import.meta.env.VITE_PUSHER_APP_KEY,
    cluster: import.meta.env.VITE_PUSHER_APP_CLUSTER ?? 'mt1',
    wsHost: import.meta.env.VITE_PUSHER_HOST ? import.meta.env.VITE_PUSHER_HOST : `ws-${import.meta.env.VITE_PUSHER_APP_CLUSTER}.pusher.com`,
    wsPort: import.meta.env.VITE_PUSHER_PORT ?? 80,
    wssPort: import.meta.env.VITE_PUSHER_PORT ?? 443,
    forceTLS: (import.meta.env.VITE_PUSHER_SCHEME ?? 'https') === 'https',
    enabledTransports: ['ws', 'wss'],
});
Make sure that the key and host values are set correctly. You will need to obtain these values from your Pusher dashboard. Now, your front-end should be configured to use Laravel Echo and Pusher.
Step 4: Create Models
We need a table in our database for storing messages. Run the following command to create a model and a migration:
sail artisan make:model Message -m
Update the migration file with the fields we need. We will have a message field to store the contents of the message, a from and a to field to assign the message to the respective user.
public function up(): void
{
    Schema::create('messages', function (Blueprint $table) {
        $table->id();
        $table->timestamps();
        $table->unsignedBigInteger('from');
        $table->unsignedBigInteger('to');
        $table->foreign('from')->references('id')->on('users');
        $table->foreign('to')->references('id')->on('users');
        $table->text('body');
    });
}
Add the $fillable attribute to the Message class, and the relationships to the User model:
class Message extends Model
{
    use HasFactory;

    protected $fillable = [
        'from',
        'to',
        'body'
    ];

    public function from(): HasOne
    {
        return $this->hasOne(User::class, 'id', 'from');
    }

    public function to(): HasOne
    {
        return $this->hasOne(User::class, 'id', 'to');
    }
}
The fillable attribute in a Laravel model is an array that specifies which attributes (i.e., database columns) should be mass-assignable. Mass assignment is a convenient way to create a new model instance and assign attributes to it in a single line of code. However, it can also pose a security risk if not used carefully, as a malicious user could potentially submit data for attributes that they should not be able to control.
In our application a User can have many messages, we just need to add the relationships in the User model to define who they are “from” and who they are “to”.
public function messagesFrom(): HasMany
{
    return $this->hasMany(Message::class, 'from', 'id');
}

public function messagesTo():HasMany
{
    return $this->hasMany(Message::class, 'to', 'id');
}
Finally, update database/seeders/DatabaseSeeder.php
so that we have more users in our database:
public function run(): void
{
    User::factory(10)->create();
}
You can now refresh the migrations and run the seeders:
sail artisan migrate:fresh --seed
Step 6: Create Routes & Controller
Add the following routes to routes/web.php:
Route::prefix('/dashboard')
    ->group(function () {
        Route::get('/{user?}', [MessageController::class, 'index'])->name('dashboard');
        Route::post('/', [MessageController::class, 'store'])->name('message.store');
    })
    ->middleware(['auth', 'verified']);
To make things simple we will use the main dashboard route as the homepage for our messages. The dashboard rout is provided by Breeze. This route will accept an optional parameter for a user to see messages from a another user they select. We will also have a route for sending a message to another user.
Let’s make the controller for these routes, run the following command:
sail artisan make:controller MessageController
Add the following methods:
public function index(User $user): Response
{
    $messages = Message::where( function($query) use ($user) {
        $query->where('from', auth()->id());
        $query->where('to', $user->id);
    })
        ->orWhere( function($query) use($user) {
            $query->where('from', $user->id);
            $query->where('to', auth()->id());
        })
        ->orderBy('created_at', 'asc')
        ->get();

    return inertia(
        'Dashboard',
        [
            'messages' => $messages,
            'users' => User::whereNot('id', auth()->user()->id)->get(),
            'to' => $user
        ]
    );
}

public function store(StoreMessageRequest $request): RedirectResponse
{
    Message::create([
        'from' => auth()->id(),
        'to' => $request->validated('to'),
        'body' => $request->validated('body')
    ]);

    return redirect()->back();
}
The index method gets all of the messsages that have been sent between two users. It also gets a list of other users so the authenticated user can select which user they want to chat with.
The store method simply creates a new message.
Step 7: Create Front end Components
To build the front end I have modified the Dashboard component that comes with Breeze. This contains a list of messages, and a form at the bottom of the page to create a new message.
<script setup>
import AuthenticatedLayout from '@/Layouts/AuthenticatedLayout.vue';
import { Head, usePage } from '@inertiajs/vue3';
import { useForm } from "@inertiajs/vue3";
import { ref } from 'vue'
import Message from "@/Pages/Messages/Message.vue";
import TextInput from "@/Components/TextInput.vue";
import Dropdown from "@/Components/Dropdown.vue";
import DropdownLink from "@/Components/DropdownLink.vue";

const props = defineProps({
    users: Array,
    messages: Array,
    to: Object,
    errors: Object
})

const loading = ref(false);
const page = usePage();

const form = useForm({
    body: '',
    to: props.to.id
})
const store = () => form.post(route('message.store'))
</script>

<template>
    <Head title="Dashboard" />

    <AuthenticatedLayout>
        <template #header>
            <h2 class="font-semibold text-xl text-gray-800 leading-tight">Dashboard</h2>
        </template>

        <div class="h-full py-12">
            <div class="max-w-7xl h-full mx-auto sm:px-6 lg:px-8">
                <div class="flex flex-col bg-white rounded-md h-full">

                    <div class="flex items-center justify-between px-4 py-3 lg:px-6">
                        <div class="relative flex items-center space-x-2">
                            <div class="relative">
                                <Dropdown align="right" width="48">
                                    <template #trigger>
                                        <span class="inline-flex rounded-md">
                                            <button
                                                type="button"
                                                class="inline-flex items-center px-3 py-2 border border-transparent text-sm leading-4 font-medium rounded-md text-gray-500 bg-white hover:text-gray-700 focus:outline-none transition ease-in-out duration-150"
                                            >
                                                {{ to.id !== undefined ? to.name : 'Select a user to chat with' }}
                                                <svg
                                                    class="ml-2 -mr-0.5 h-4 w-4"
                                                    xmlns="http://www.w3.org/2000/svg"
                                                    viewBox="0 0 20 20"
                                                    fill="currentColor"
                                                >
                                                    <path
                                                        fill-rule="evenodd"
                                                        d="M5.293 7.293a1 1 0 011.414 0L10 10.586l3.293-3.293a1 1 0 111.414 1.414l-4 4a1 1 0 01-1.414 0l-4-4a1 1 0 010-1.414z"
                                                        clip-rule="evenodd"
                                                    />
                                                </svg>
                                            </button>
                                        </span>
                                    </template>

                                    <template #content>
                                        <div v-for="user in users">
                                            <DropdownLink :href="route('dashboard', {'user': user.id})">{{ user.name }}</DropdownLink>
                                        </div>
                                    </template>
                                </Dropdown>
                            </div>
                        </div>
                    </div>
                    <div class="flex grow flex-col px-4 pb-8 space-y-4 border-t border-gray-200 lg:px-6">
                        <div class="flex min-h-0 grow basis-0 flex-col space-y-4 overflow-y-auto">
                            <Message
                                v-for="message in messages"
                                :message="message"
                            />
                        </div>

                        <div class="flex items-center pt-3">
                            <img
                                :src="`/images/users/user${page.props.auth.user.id}.jpg`"
                                class="w-12 h-12 mr-3 rounded-full"
                                :alt="page.props.auth.user.name"
                            />
                            <div class="flex-1">
                                <form @submit.prevent="store">
                                    <TextInput
                                        v-model="form.body"
                                        type="text"
                                        class="w-full px-4 py-3 text-sm placeholder-gray-400 border border-gray-200 rounded-md"
                                        placeholder="Send a message"
                                        :disabled="loading === true && to !== null"

                                    />
                                    <span v-if="errors" class="mt-2 text-sm text-red-500 peer-[&:not(:placeholder-shown):not(:focus):invalid]:block">
                                        {{ errors.body }}
                                    </span>
                                </form>
                            </div>
                        </div>
                    </div>
                </div>
            </div>
        </div>
    </AuthenticatedLayout>
</template>
The Message component contains the message body and the user image.
<script setup>
import {usePage} from "@inertiajs/vue3";
const props = defineProps({
message: Object,
to: Object
})
const page = usePage();
</script>
<template>
<div
class="flex items-start max-w-lg pt-3 space-x-3"
:class="message.to === page.props.auth.user.id && 'self-end'"
>
<img
:src="`/images/users/user${message.from}.jpg`"
class="w-12 h-12 ml-3 rounded-full"
:class="message.to === page.props.auth.user.id && 'order-2'"
/>
<div class="flex-1 order-1">
<div
class="px-4 py-4 rounded-md lg:px-6 lg:pb-6"
:class="message.to === page.props.auth.user.id
? 'bg-indigo-400 text-white'
: 'bg-gray-200'"
>
<p class="block text-sm">{{ message.body }}</p>
</div>
</div>
</div>
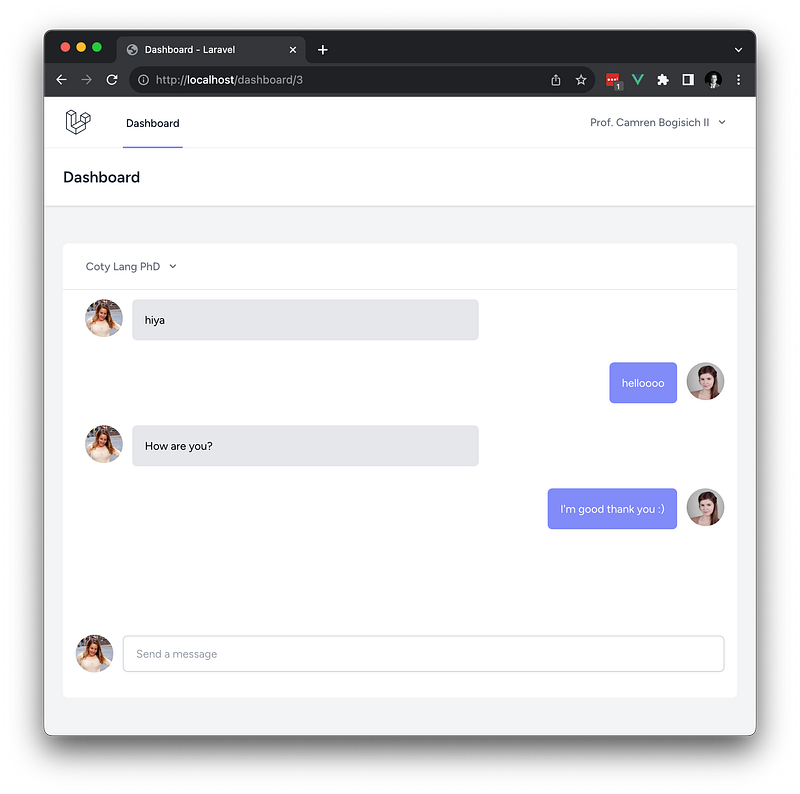
</template>Head over to your browser and you should see this…
Our app is working, but in order to receive messages from another user we have to refresh the page, let’s get Pusher and Echo working so we have real time notifications.
Step 8: Broadcast Events to Pusher
In Laravel, events are typically used to encapsulate actions in your application. When an event is broadcast, it is sent out to the broadcasting system (i.e. Pusher), which in turn sends the event data to the clients that are listening for that event.
To define a broadcast event, you should create an event class and use the Illuminate\Contracts\Broadcasting\ShouldBroadcast interface. You can use the broadcastOn method to define the channels the event should be broadcast on.
Create a new Event with the following command:
sail artisan make:event NewMessageCreated This will create a new file app/Events/NewMessageCreated.php. Update the file with the following:
class NewMessageCreated implements ShouldBroadcast
{
    use Dispatchable, InteractsWithSockets, SerializesModels;

    public function __construct(
        public Message $message
    ) {
    }

    public function broadcastOn(): PrivateChannel
    {
        return new PrivateChannel('messages.' . $this->message->to);
    }

    public function broadcastWith(): array
    {
        return [
            'message' => $this->message
        ];
    }
}
Once you have defined a broadcast event, you can broadcast it using the broadcast function or the event function. Laravel will automatically serialize the event and send it to the broadcasting driver. Update the store method in MessageController class.
public function store(StoreMessageRequest $request): RedirectResponse
{
$message = Message::create([
'from' => auth()->id(),
'to' => $request->validated('to'),
'body' => $request->validated('body')
]);
broadcast(new NewMessageCreated($message))->toOthers();
return redirect()->back();
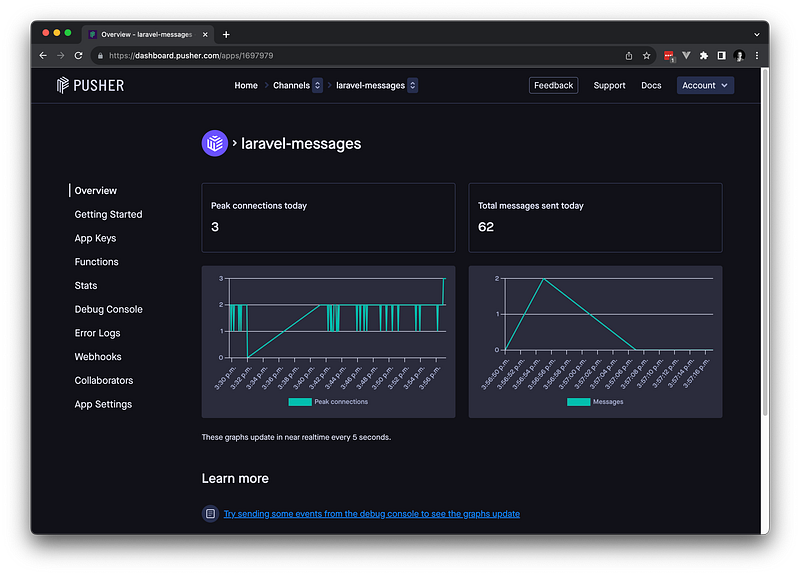
}If you try sending a message from our application you should see a message appear in the channel on Pusher.
Step 9: Listen for Events on the Client
On the client side, you can listen for broadcast events using Laravel Echo, a JavaScript library that provides an expressive API for subscribing to channels and listening for events in Laravel. We have already installed this so we just need to update our Dashboard component to list to Events. Add the following:
onMounted(() => {
    Echo.private(`messages.${page.props.auth.user.id}`)
        .listen('NewMessageCreated', (event) => {
            props.messages.push(event.message);
        });
});
This will listen for incoming messages on the channel for the logged in user, if there is an event it will be added to the messages array.
Let’s test it out!
In the video you can see I am logged in with two different users, one browser is in incognito mode. When I send a message to another user, they are instantly notified.
Conclusion
Broadcast events in Laravel provide a powerful and efficient way to build interactive and dynamic web applications. By leveraging Laravel’s broadcasting system, you can easily implement real-time communication and notifications, improving user engagement and providing a better overall user experience. Whether you are building a chat application, a collaborative tool, or just need to provide live updates to your users, broadcast events in Laravel offer a robust and scalable solution.
Resources
GitHub: https://github.com/shaunthornburgh/laravel-messaging-app
Stackademic
Thank you for reading until the end. Before you go:
- Please consider clapping and following the writer! 👏
- Follow us on Twitter(X), LinkedIn, and YouTube.
- Visit Stackademic.com to find out more about how we are democratizing free programming education around the world.


