Building a Production-Ready MERN Application
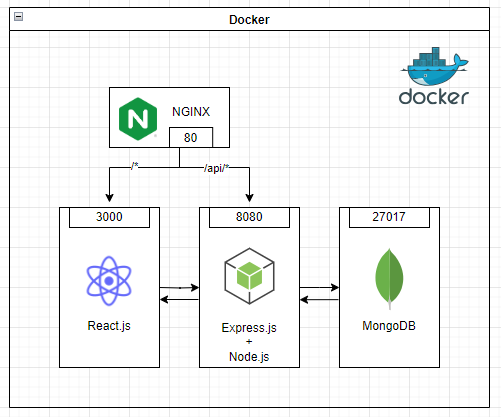
In this comprehensive tutorial, we’ll walk you through the process of building a production-ready MERN (MongoDB, Express, React, Node.js) stack application. The MERN stack is a popular choice for developing full-stack web applications, offering seamless integration between its constituent technologies.
1. Setting Up the React Frontend
To kickstart our project, let’s focus on setting up the frontend using React. React is a powerful JavaScript library for building user interfaces, and it’s a perfect choice for the frontend of our MERN stack application.
We’ll begin by creating a new directory to contain our MERN application. Open your terminal and run the following command:
mkdir docker-mern
cd docker-mern
Inside the main directory, create a subdirectory named frontend where we'll set up our React frontend:
mkdir frontend
cd frontend
Now, let’s initialize a new React project using Create React App. This tool provides a convenient way to set up a React application with all the necessary configurations:
npx create-react-app .
With our React project created, we’ll install additional dependencies required for our frontend:
npm install @mui/material @emotion/react @emotion/styled @mui/icons-material react-router-dom axios
As we build our application, we’ll need to create various components and pages to represent different parts of the user interface. For example, we might create a Dashboard component to display important data to the user.
Let’s create a new folder called components/pages in the src folder. Inside the pages directory, we will create a new file called Dashboard.js.
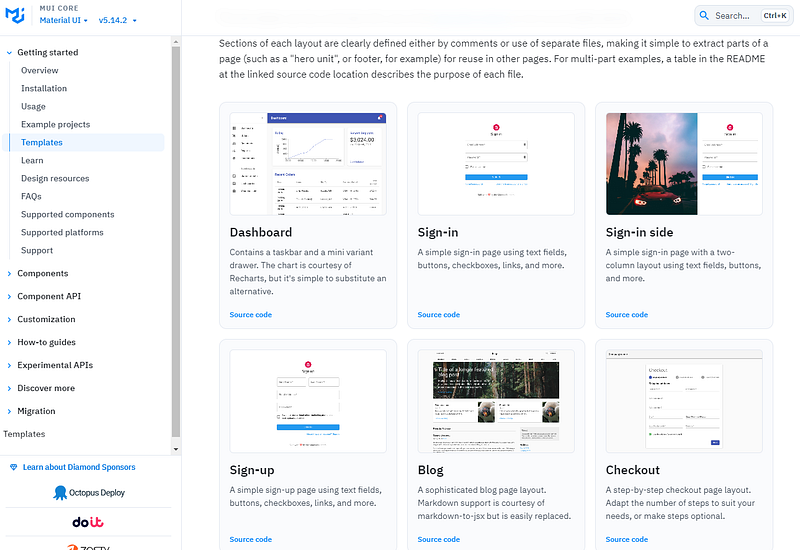
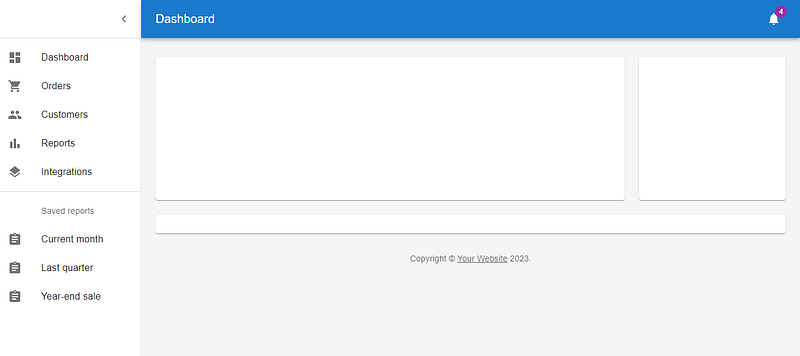
Click on the Dashboard source code, copy and paste the code into Dashboard.js
5. Next, remove the Chart.js, Deposit.js, and Orders.js components from the Dashboard.js file:
To enable navigation within our application, we’ll set up routing using React Router. This will allow us to define different routes for various pages in our application.
Modify the App.js file to include routing. Here is an example of how you can modify the App.js file to include routing:
import React from "react";
import { BrowserRouter as Router, Route, Routes } from "react-router-dom";
import Dashboard from "./components/pages/Dashboard";

function App() {
  return (
    <Router>
      <Routes>
        <Route exact path="/" element={<Dashboard />} />
      </Routes>
    </Router>
  );
}

export default App;
This code will create a simple routing system for your application. The Dashboard component will be rendered when the user visits the / path.
To run the React frontend, we can use the npm start command.
Step 2: Set Up the Node.js Backend
With the frontend configured, it’s time to focus on setting up the backend using Node.js and Express. The backend will handle data storage, processing, and communication with the frontend.
Navigate back to the root directory of your project if you’re not already there, and create a directory named backend to contain your Node.js backend:
mkdir backend
cd backend
Inside the backend directory, initialize a new Node.js project using npm. This will create a package.json file to manage dependencies and settings for your backend:
npm init -y
To build our backend, we’ll need several dependencies including Express for creating our server, Mongoose for interacting with MongoDB, and other utilities:
npm install nodemon express helmet cors mongoose dotenv
Create a config directory within the backend folder, and inside it, create a file named db-connection.js. This file will contain the connection settings for your MongoDB database.
const mongoose = require("mongoose");
const DB_HOST = process.env.DB_HOST;
const DB_PORT = process.env.DB_PORT;
const DB_NAME = process.env.DB_NAME;
const DB_USER = process.env.DB_USER;
const DB_PASSWORD = process.env.DB_PASSWORD;

const DB_URL = `mongodb://${DB_USER}:${DB_PASSWORD}@${DB_HOST}:${DB_PORT}/${DB_NAME}`;

async function connectToDatabase() {
  try {
    await mongoose.connect(DB_URL);
    console.log('Connected to MongoDB successfully!');
  } catch (error) {
    console.error('Error connecting to MongoDB:', error);
  }
}

connectToDatabase();
In the root of the backend directory, create a file named server.js. This file will serve as the entry point for our Node.js server.
require("dotenv").config({
  path: `./.env.${process.env.NODE_ENV}`,
});

const express = require("express");
const cors = require("cors");
const helmet = require("helmet");
// require("./config/db-connection"); comment out this first if no mongodb setup locally.

const app = express();
app.use(helmet());
app.use(cors());
app.use(express.json());

// disable 'X-Powered-By' header in response
app.disable("x-powered-by");
app.get('/api/welcome', function (req, res) {
    res.send("Welcome to my page.");
})

// default case for unmatched routes
app.use(function (req, res) {
  res.status(404);
});

const port = process.env.SERVER_PORT || 4000;

app.listen(port, () => {
  console.log(`\nServer Started on ${port}`);
});
Update the package.json file to add two more scripts: start-prod and start. These scripts will be used to start the Node.js server in production and development mode, respectively.
...
"scripts": {
"test": "echo \"Error: no test specified\" && exit 1",
"start-prod": "NODE_ENV=production node server.js",
"start": "NODE_ENV=development && nodemon server.js"
},
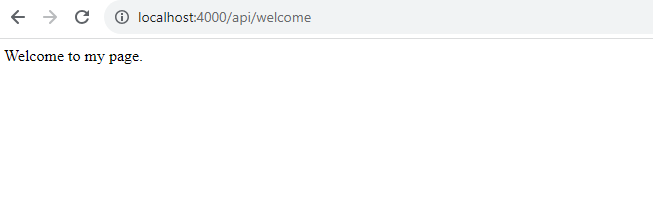
...Run the npm start command to start the Node.js server in development mode. Test the API by accessing the URL http://localhost:4000/api/welcome. This URL should return the text "Welcome to my page."
Step 3: Connecting the Back End to the Front End
To seamlessly connect the backend to the frontend of our MERN application, let’s walk through the necessary steps.
Firstly, we need to import the axios library. Axios facilitates HTTP requests to your backend API, enabling seamless communication between frontend and backend components.
Go to Dashboad.js , create a state variable msg using the useState hook. This variable will store the response received from the backend API, allowing you to dynamically display data fetched from the server.
const [msg, setMsg] = useState("");Next, define a function named fetchMessage responsible for fetching data from the backend API. Utilize Axios's get method to perform a GET request to the /api/welcome endpoint, which corresponds to the welcome message route on the backend.
const fetchMessage = async () => {
  try {
    const response = await axios.get(`${process.env.REACT_APP_API_SERVER}/api/welcome`);
    setMsg(response.data);
  } catch (error) {
    console.error("Error fetching welcome message:", error);
    setMsg("Error fetching welcome message.");
  }
};
Invoke the fetchMessage function within the useEffect hook to ensure that the message is fetched each time the Dashboard component is mounted. This hook runs after the initial render, making it ideal for performing side effects such as data fetching.
useEffect(() => {
  fetchMessage();
}, []);
Create an environment variables file named .env.development in the root directory of the frontend project. Define the URL of the backend API (REACT_APP_API_SERVER) within this file to ensure that the frontend knows where to send requests during development.
REACT_APP_API_SERVER=http://localhost:4000Similarly, create another environment variables file named .env.production. In this file, set the REACT_APP_API_SERVER variable to the URL of your backend API, considering the NGINX proxy routing for incoming requests in a production environment.
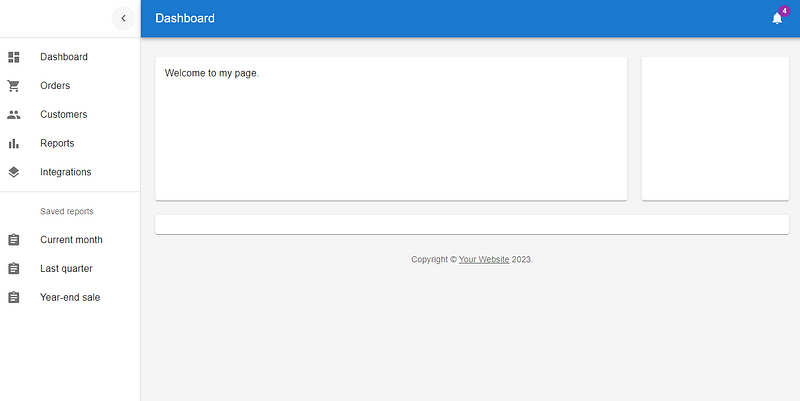
REACT_APP_API_SERVER=http://localhostOnce we have made these changes, we can re-run the React project. We should see the output of the API call, which is the text “Welcome to my page.”
Conclusion
In this tutorial, we’ve covered essential steps to set up both the frontend and backend components, ensuring a robust foundation for our full-stack web application. In the upcoming tutorial, we’ll delve deeper into containerizing our application using Docker and NGINX.
Happy coding! 🎉
- Leave a comment if you need the source code.
- Clap if you find this tutorial useful.
- Follow me to get notified when I publish new tutorials.
- Buy me a coffee to support me.