
Building a NextJS Firebase App with Tailwind CSS: A Comprehensive Guide
In this article, we will go beyond just Firebase integration and cover the step-by-step process of setting up a React app with Tailwind CSS, Firebase, and react-hook-form. This guide assumes you have a basic understanding of React and Node.js.
1. Setting Up Your React Project
Assuming you already have Node.js and npm installed, let’s create a new React app using Create React App. Open your terminal and run:
npx create-next-app@latest my-firebase-app
cd my-firebase-app
2. Installing Tailwind CSS
Next, install Tailwind CSS and its dependencies:
npm install -D tailwindcss postcss autoprefixer
Generate the configuration files for Tailwind CSS:
npx tailwindcss init -pThis will create tailwind.config.js and postcss.config.js in your project's root.
3. Configuring Tailwind CSS in Next.js
Update postcss.config.js to include the tailwindcss and autoprefixer plugins:
// postcss.config.js
module.exports = {
  plugins: {
    tailwindcss: {},
    autoprefixer: {},
  },
};
tailwind.config.js file:
/** @type {import('tailwindcss').Config} */
module.exports = {
  content: [
    './src/pages/**/*.{js,ts,jsx,tsx,mdx}',
    './src/components/**/*.{js,ts,jsx,tsx,mdx}',
    './src/app/**/*.{js,ts,jsx,tsx,mdx}',
  ],
  theme: {
    extend: {
      backgroundImage: {
        'gradient-radial': 'radial-gradient(var(--tw-gradient-stops))',
        'gradient-conic':
          'conic-gradient(from 180deg at 50% 50%, var(--tw-gradient-stops))',
      },
    },
  },
  plugins: [],
}
Create a CSS file for your styles, typically src/styles/tailwind.css, and import Tailwind CSS:
/* src/globals.css */
@import 'tailwindcss/base';
@import 'tailwindcss/components';
@import 'tailwindcss/utilities';
Import this CSS file in your src/layout.js or src/layout.jsx:
// src/layout.js or layout.jsx
import { Inter } from 'next/font/google'
import './globals.css'

const inter = Inter({ subsets: ['latin'] })

export const metadata = {
  title: 'Create Next App',
  description: 'Generated by create next app',
}

export default function RootLayout({ children }) {
  return (
    <html lang="en">
      <body className={inter.className}>{children}</body>
    </html>
  )
}
4. Installing react-hook-form
Install react-hook-form for form handling:
npm install react-hook-form uuidSetting Up Firebase Configuration
The first step is to configure Firebase for your React project. The code in /lib/firebase-config.js handles this by importing the necessary Firebase modules and initializing the app with the provided configuration. Make sure to replace the placeholder values in firebaseConfig with your Firebase project's actual configuration.
// /lib/firebase-config.js
import { initializeApp } from "firebase/app";
import { getApps, getApp } from "firebase/app";
import { getAuth } from "firebase/auth";
import { getStorage } from "firebase/storage";
import { getFirestore } from "firebase/firestore";

// TODO: Add SDKs for Firebase products that you want to use
// https://firebase.google.com/docs/web/setup#available-libraries

// Your web app's Firebase configuration
const firebaseConfig = {
  apiKey: "",
  authDomain: "",
  projectId: "",
  storageBucket: "",
  messagingSenderId: "",
  appId: "",
};

// Initialize Firebase
const app = getApps().length > 0 ? getApp() : initializeApp(firebaseConfig);
const auth = getAuth(app);
const storage = getStorage();
const db = getFirestore();

export { db, auth, storage };
Creating a Form to Submit Data
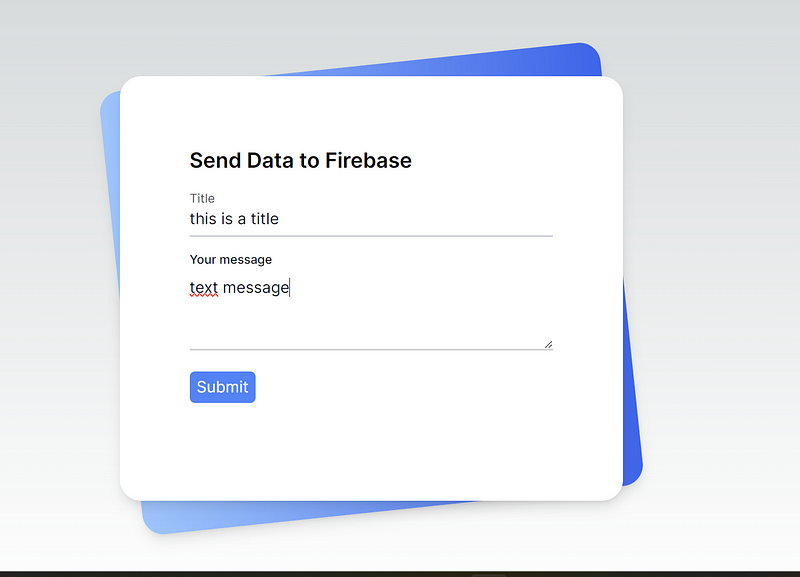
Now that Firebase is set up, let’s create a form component (/src/components/NewPost.jsx) that allows users to submit data to Firestore. This component uses the react-hook-form library for form handling and generates a unique identifier using the uuid library.
// /src/components/NewPost.jsx
"use client";
import { useForm } from "react-hook-form";
import { doc, setDoc } from "firebase/firestore";
import { db } from "../../lib/firebase-config";
import { v4 as uid } from "uuid";
const NewPost = () => {
const { register, handleSubmit, reset } = useForm();
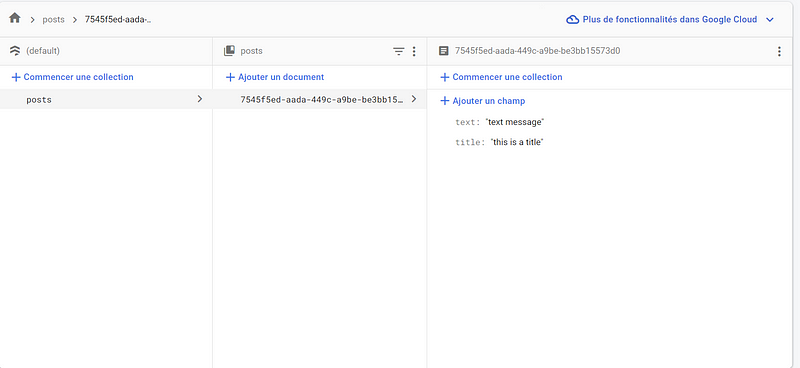
const onSubmit = async (data) => {
const uuid = uid();
await setDoc(doc(db, "posts", uuid), {
...data,
});
// Clear form data and reset input fields
reset();
};
return (
<>
<div className="relative py-3 sm:max-w-xl sm:mx-auto">
<div className="absolute inset-0 bg-gradient-to-r from-blue-300 to-blue-600 shadow-lg transform -skew-y-6 sm:skew-y-0 sm:-rotate-6 sm:rounded-3xl"></div>
<div className="relative px-4 py-10 bg-white shadow-lg sm:rounded-3xl sm:p-20">
<form className="max-w-md mx-auto" onSubmit={handleSubmit(onSubmit)}>
<div>
<h1 className="text-2xl font-semibold">Send Data to Firebase</h1>
</div>
<div className="divide-y divide-gray-200">
<div className="py-8 text-base leading-6 space-y-4 text-gray-700 sm:text-lg sm:leading-7">
<div className="relative">
<input
autoComplete="off"
id="title"
name="title"
type="text"
className="peer placeholder-transparent h-10 w-full border-b-2 border-gray-300 text-gray-900 focus:outline-none focus:borer-rose-600"
placeholder=""
{...register("title")}
/>
<label
htmlFor="title"
className="absolute left-0 -top-3.5 text-gray-600 text-sm peer-placeholder-shown:text-base peer-placeholder-shown:text-gray-440 peer-placeholder-shown:top-2 transition-all peer-focus:-top-3.5 peer-focus:text-gray-600 peer-focus:text-sm"
>
Title
</label>
</div>
<div className="relative">
<label
htmlFor="text"
className="block mb-2 text-sm font-medium text-gray-900 dark:text-white"
>
Your message
</label>
<textarea
id="text"
rows="3"
cols={40}
{...register("text")}
placeholder="write your text..."
className="peer w-full border-b-2 border-gray-300 text-gray-900 focus:outline-none focus:borer-rose-600"
></textarea>
</div>
<div className="relative">
<button className="bg-blue-500 text-white rounded-md px-2 py-1">
Submit
</button>
</div>
</div>
</div>
</form>
</div>
</div>
</>
);
};
export default NewPost;Integrating Firebase in the React App
Now, let’s integrate the NewPost component into our main app (/src/app/page.js). This file acts as the entry point for our React application.
// /src/app/page.js
import NewPost from "@/components/NewPost";
export default async function Home() {
  return (
    <main className="flex min-h-screen flex-col items-center justify-between p-24">
      <NewPost />
    </main>
  );
}
Conclusion
With these steps, you’ve successfully set up Firebase in your React project and created a simple form to submit data to Firebase Firestore. This is just a starting point, and you can extend the functionality by adding features such as authentication, real-time updates, and more. Firebase’s seamless integration with React makes it a powerful tool for building dynamic and responsive web applications. Happy coding!