
Building a Nest-Cam with the Raspberry Pi
How I recorded wildlife with a network-accessible camera and a Raspberry Pi computer
Have you ever wondered what goes on when you aren’t watching? Have you ever wanted to see a bird in its nest, a squirrel in its den, or a package thief on your porch? Here’s how it can be done on the cheap with a motion-activated camera, motionEyeOS, and a trusty Raspberry Pi.
It all started when I was gardening in my backyard and my daughter came over to chat. As we talked, she absentmindedly pulled on a branch from a nearby hedge that I had neglected to trim. Suddenly, a robin darted out from the hedge, chirping aggressively. A quick glance into the hedge revealed a nest with three perfect blue eggs.
I wanted my kids to have a closer look, but I didn’t want to frighten the robins while they were nesting. So I took the next logical step, and decided to solve the problem with electronics. More specifically, I decided set up a camera close to the nest that could bring the video footage straight to my home network. It would be like Big Brother, but for birds.
Spoiler alert: nature is cruel, even to baby birds.
Preparing your set up
Before you get started, you will need the following:
- Raspberry Pi
- USB webcam (or Raspberry Pi Camera Module)
- microSD card
- Ethernet cable
- Power supply and outdoor extension cord
You also need some software — namely, motionEyeOS, a version of Linux that’s customized for video surveillance with single-board computers like the Raspberry Pi.
To get set up, start by downloading the latest version of motionEyeOS from Carlin Crisan’s GitHub page. If you’re using the Raspberry Pi 4, you currently need the developer build of motionEyeOS. If you have an older Raspberry Pi, the stable release has you covered.
Once you’ve downloaded the image for motionEyeOS, you can put it on a microSD card. Before you plug in your Raspberry Pi, make sure you have a camera connected and you have an Ethernet cable connecting your Raspberry Pi to your router.
The next step is to power on your Raspberry Pi. You can check to see if motionEyeOS has booted successfully by logging into your router and checking the connected devices. The client host name should start with “meye” and should be accompanied by an IP address (in my case it was 192.168.0.15).
Using motionEyeOS
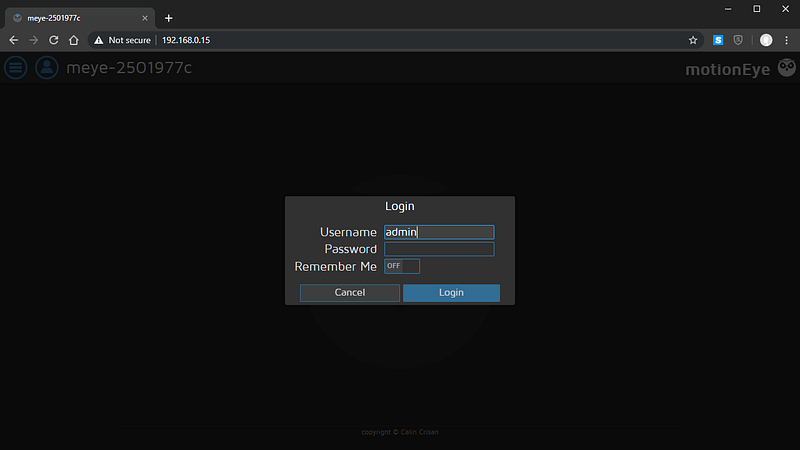
Logging into motionEyeOS is easy. You can use a browser on any computer that’s connected to the same network as the Raspberry Pi. Just type the IP address of the Raspberry Pi into the browser’s address bar.
If you don’t immediately see the login screen (shown below), click on the user icon in the top left corner. The default username is admin, and the password should be left blank. (If privacy is a concern, you can set your own password.)
If there is a camera already plugged into the Raspberry Pi, it should appear as a small window, assuming that it’s supported. The next step is to customize the camera’s settings. You can get to those using the settings button, which is also in the top left corner.
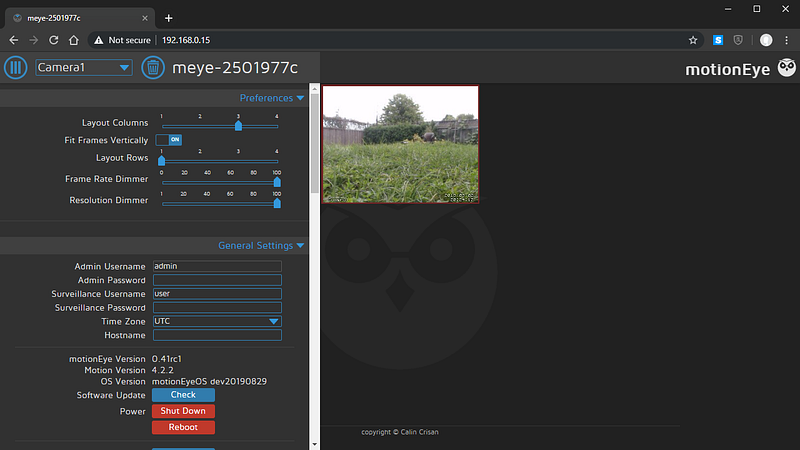
Here are the settings you’ll want to adjust:
- Video devices — Video Resolution: The resolution that you choose depends on the Raspberry Pi board that you’re using. 1280×720 may look smooth on a Raspberry Pi 4, but it will stutter badly on a Raspberry Pi 2.
- Video devices — Frame Rate: Feel free to set this value to the maximum of 30 frames per second. If the Raspberry Pi is unable to push out frames this quickly, the video will be capped at its maximum possible frame rate.
- Movies — Movie Format: The current default setting (H.264/OMX) does not work on the Raspberry Pi 4. Instead you can use H.264.
- Motion Detection — Frame Change Threshold: This value depends on the placement of your camera. If there’s a lot of background movement in the frame, you may need to increase this value.
These are only a few of the available settings, and I encourage you to play around with them.
Next, you should test that videos are recorded when there is sufficient motion. Take a moment and wave at the camera. If your motion is detected, the camera window will change to a red border. Once the video is done recording, the red border disappears. You can then click the play button in the camera window to see what it just recorded.
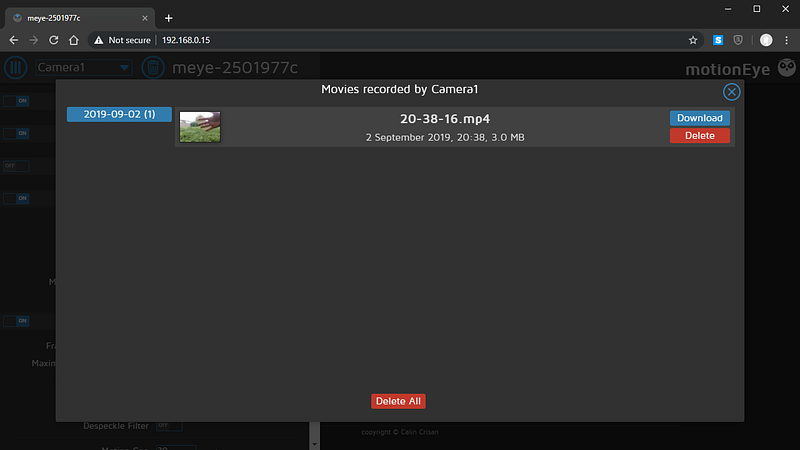
From here the videos can be downloaded or deleted. You are now set to deploy your camera, watch some wildlife, spy on your neighbors (not recommended), record suspicious activity outside your door, and so on!
How big should the microSD card be?
The motionEyeOS image only requires a couple of hundred megabytes, but your video files are going to take much more space. A 3 minute video at 640×480, encoded with H.264 will require approximately 100 MB. This means your microSD card can fill up fast. As long as you’re monitoring your setup, you can download and delete videos regularly.
What Raspberry Pi version should you use?
Even though motionEyeOS will work on any version of the Raspberry Pi, your circumstances may lead you to choose one model over another. The Raspberry Pi 4 is currently the most powerful version, meaning that it produces smoother video at a higher resolutions. The trade-off is that this increased performance comes at the cost of increased power requirements and, more importantly, a greater need for cooling.
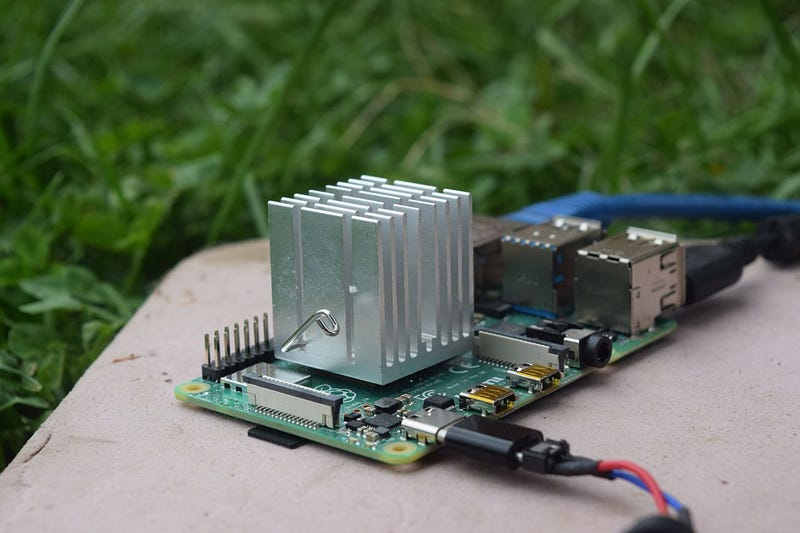
If you can place your Raspberry Pi in your house or a shed, the need for cooling shouldn’t be a problem, as you can use a large heat sink or fan to help cool the CPU.
If the Raspberry Pi needs to be placed outdoors in an enclosure, you should use an older model that doesn’t produce as much heat. In the case of the nest-cam, I placed a Raspberry Pi 2 along with its power adapter in an old peanut butter container. I cut a small hole close to the lid and fed through the Ethernet cable, the extension cord, and the USB wire for the camera. The container provided protection against the rain. I put it at the bottom of the hedge to ensure that the camera could see the nest.

The final footage
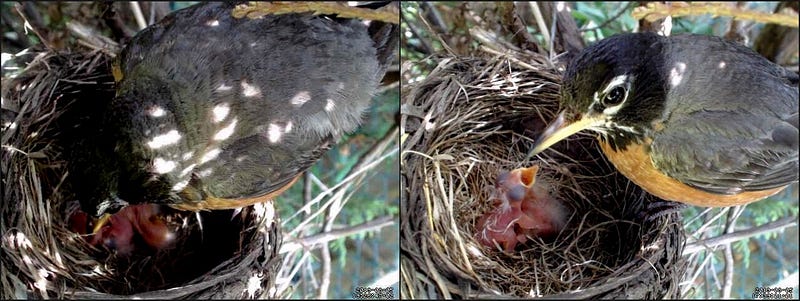
There’s a lot of excitement from capturing a video of an animal living in its natural environment. When I watched the robins with my kids, they had lots of questions — Which one is the dad? Why does the robin keep moving the eggs? For a brief time the robins felt like part of our family, almost like having a pet. My kids named the birds even before they were hatched.
But nature can also be cruel. It wasn’t long before the baby robins in my backyard were eaten by a predator in the night. The mother robin still sat in her nest the following morning, occasionally peering down at where the chicks had been, and then she left for good.
But it’s not all grim. I’ve repurposed my setup to learn more about the groundhog making a home behind my shed, which my daughter has named Fluffy.