
Building a GraphQL Server in NestJS
Basics of GraphQL and best practices of NestJS development

NestJS introduces a modern, stylish way of building backend applications using Node.js by giving it a proper modular and testable structure out of the box. It also provides TypeScript and dependency inject support by default, which greatly increases the code quality in our projects.
Today, we are going to take an in-depth look at how we can build a GraphQL server using the NestJS framework by building a simple database CRUD application using MongoDB.
In addition, you will learn the basics of GraphQL and some best practices of NestJS development.
So, without wasting any further time, let’s get started.
Prerequisites
To follow this piece, I would recommend having basic knowledge about these technologies and install the latest tools:
- A reasonable knowledge of building applications using JavaScript and basic knowledge of TypeScript which you can get by reading this crash course
- Basic knowledge of NestJS and its building blocks, which can be found in this article
- Node.js and MongoDB installed on the local system
- GraphQL basics
If you have no prior experience using these technologies I would recommend using the listed resources to get the basics down before continuing with this post.
GraphQL Basics
GraphQL is a query language and runtime that can be used to build and expose APIs as a strongly typed schema instead of a messy REST endpoint. Users see that schema and can query for what fields they want in particular.
Here is a list of the key concepts you need to know about:
- Schema — Core of GraphQL server implementation. Describes the functionality available to the client applications
- Query — Request to read or fetch values
- Mutation — Query that modifies data in the datastore
- Type — Defines the structure of the data which is used in GraphQL
- Resolver — Collection of functions that generate a response for a GraphQL query
NestJS provides us with two different ways of building GraphQL applications, the schema first and the code first respectively.
- Schema first — In the schema first approach the source of truth is a GraphQL SDL (Schema Definition Language) and the TypeScript definitions of your GraphQL schema will be auto-generated by NestJS
- Code first — In the code first approach you will only use declarators in your TypeScript classes to generate the corresponding GraphQL schema
In this post, I chose the code first approach because I personally find that it would make it easier to understand and follow this tutorial for people with little to none GraphQL experience.
If you want to know more about GraphQL and its concepts I would highly recommend looking at these resources:
- Official documentation
- How to GraphQL — Great beginners learning resources
- GraphQL crash course — Full crash course using GraphQL and React
Installing NestJS and Its Dependencies
Now that we know what we are going to build and why we are using each specific tool and technology, let’s get started by creating the project and installing the needed dependencies.
First, let’s install the Nest CLI and use it to create the project
npm i -g @nestjs/cli
nest new nest-graphql
After that, let’s move into the directory and install the needed dependencies
cd nest-graphql
npm i --save @nestjs/graphql apollo-server-express graphql-tools graphql @nestjs/mongoose mongoose type-graphql
Now that we have everything installed and the basic project setup out of the way, let’s create the files to work in.
Let’s start by creating the Module, Service, and Controller using the NestJS CLI
nest g module items
nest g service items
nest g resolver items
After that, create the files and folders manually so that your structure looks like this:
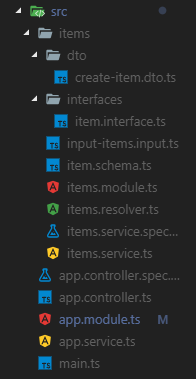
You can also find the structure on my GitHub.
Starting the Server
With the setup process complete, you can now start the server with:
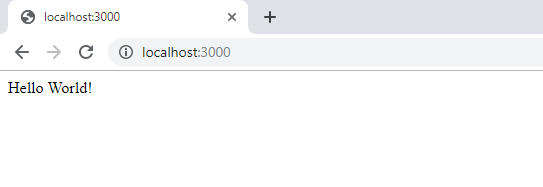
npm run startThis will start the application on the default port of 3000. Now you just need to navigate to http://localhost:3000 in your browser and should see something like this:
Adding GraphQL
Now that we have finished the basic server setup let continue by importing the GraphQL dependencies into our app module:
Here we import GraphQLModule from @nest/graphql, which we installed above. After that, we use it in our imports statement using the forRoot() method which takes an option object as a parameter.
In the options file, we specify the name of the auto-generated GraphQL file that gets created when we start the server. This file is part of the code first approach we talked about above.
Connecting with MongoDB
Next up let's create a connection to the database of our application by importing the MongooseModule into our ApplicationModule.
Here we use the forRoot() function which accepts the same configuration object as the mongoose.connect() function we are used to.
Database schema
The data schema is used to properly structure the kind of data that will be stored in the database of our application:
Here we define a schema by importing mongoose and using mongoose.Schema to create a new object.
Interface
Next, we will create a TypeScript interface which will be used for the type-checking in our service and receiver.
DTO
The DTO (Data transfer object) is an object that defines how the data will be sent over the network.
Importing the schema
Now that we have created all the needed files for our database we just need to import our schema into our ItemsModule.
Here we import the MongooseModule like we did in the ApplicationModule but use the forFeature() function instead, which defines what database model will be registered for the current scope.
Implementing GraphQL CRUD
Let’s continue by implementing the CRUD functionality using the Mongoose database and GraphQL endpoints.
Service
First, let’s create the database CRUD functionality inside of our Service.
Here we first import our database model in our constructor using dependency injection. After that, we continue to implement basic CRUD functionality using the standard MongoDB functions.
Resolver
Now that we have implemented the CRUD functionality inside of our service we just need to create our GraphQL resolver where we define the Querys and Mutations needed for GraphQL.
As you can see we create a class with different methods which make use of the ItemService we created earlier. But this class also comes with some pretty interesting declarators so let’s take a look at them:
@Resolver()— Tells Nestjs that this class knows how to resolve the actions for our items.@Query()— Queries in GraphQL are basically the construct used by the client to request specific fields from the server. The declarator in this case just says that we can query that using the name of our function which we will do later.@Mutation()— Mutations in GraphQL are very similar to Querys but are more about mutating data then querying it.@Args()— Is a helper declarator used to dig out the input parameters
E2E testing the Application
Now that we have completed our CRUD functionality let’s take a look at how we can test our application using the Jest testing library.
If you have never used Jest before I would recommend learning the basics first before continuing with this section.
First, we need to create a new test file using the following command.
touch test/items.e2e-spect.ts After that, we can continue by creating the basic test setup for our module.
In this code block, we create a Nestjs instance with the three modules we need to test our AppController. We also define that the instance will be closed when all test have been completed.
Next up, we create two item objects that will be used in our HTTP requests.
After that, we can create a GraphQL query for testing the item creation functionality and use it in our HTTP request.
Here we create a query and send it to our endpoint using the request function which lets us simulate HTTP request to our server.
Then we can use the expect function to validate the response from the request.
This process can be repeated for all endpoints and leaves us with the following result.
That’s it now we just have to run the tests using the following command.
npm run test:e2eTesting the Application
Now that we have finished building our simple CRUD application let’s test it using the GraphQL playground. For that, let’s start the server and then navigate to our playground:
npm run startAfter starting the server you should be able to see your GraphQL playground on http://localhost:3000/graphql.
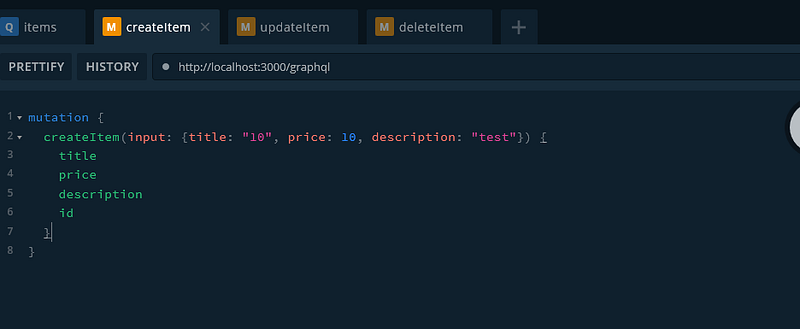
Next, let’s continue by writing a mutation for creating an item.
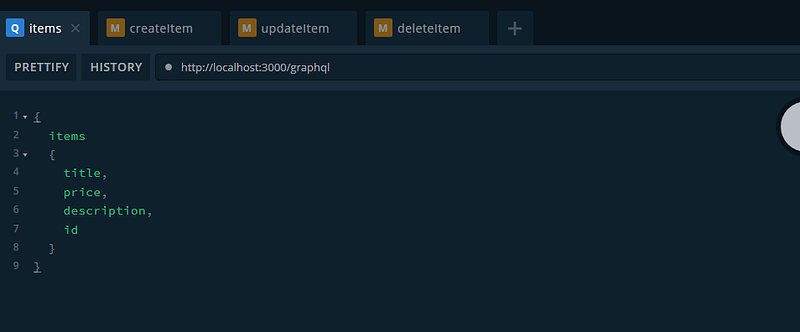
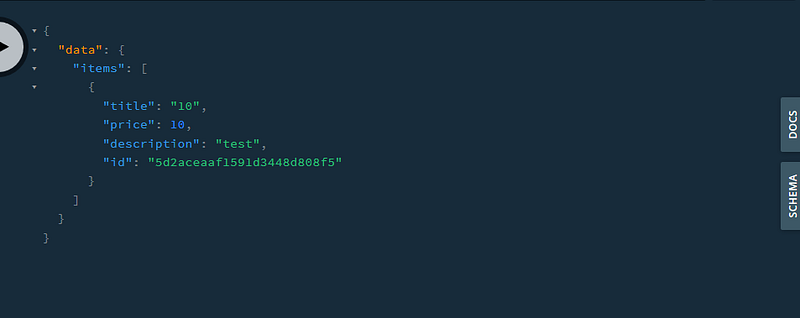
After that, let’s test our get functionality using this simple query:
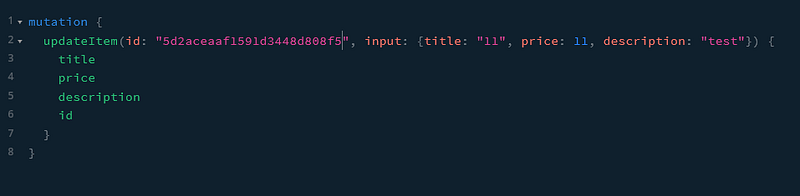
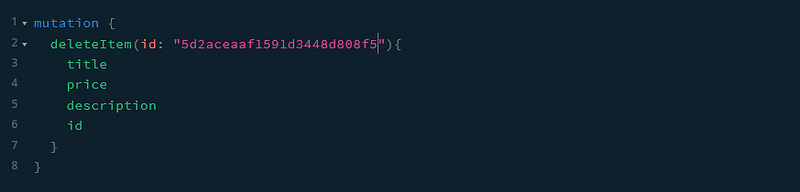
Now only the update and delete functionality remains. For that, we are going to need the id of the item we created earlier which you can get by using our items query.
Now let’s use this id in our next two actions.
The whole project can also be found on my Github:
Recommended Reading
Conclusion
You made it all the way until the end! I hope that this piece helped you understand the basics of GraphQL and how to use it in NestJS.
If you have found this useful, please consider recommending and sharing it with fellow developers. If you have any questions or feedback, let me know in the comments down below.
If you want to get continuous updates about my blog make sure to follow me on Medium and join my newsletter.
Originally published at gabrieltanner.org.


