
Build a Camera App : Flutter In-App Camera
In many apps we need users to upload images by clicking a picture. For that, we can use the default camera app of the device but what if we need to integrate an in-app camera? Well, that is also possible with flutter. The flutter team has developed a package called camera (https://pub.dev/packages/camera) which will let us do exactly this.
Let’s see how can we achieve this by a simple example.
Setting up the project
First of all, install the camera package into your project by adding the following line into pubspec.yaml file.
camera: ^0.8.1+3— IOS Setup
IOS 10.0 or higher is required for this plugin.
Add the following lines in the Info.plist file to set things up.
<key>NSCameraUsageDescription</key>
<string>Can I use the camera please?</string>
<key>NSMicrophoneUsageDescription</key>
<string>Can I use the mic please?</string>
— Android Setup
Change the minimum Android sdk version to 21 (or higher) in your android/app/build.gradle file.
minSdkVersion 21Now that our project set up is complete, we can start coding the app.
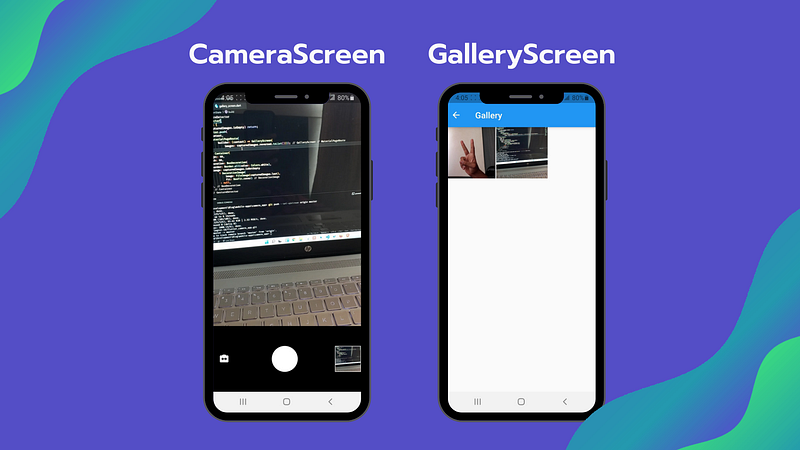
We will create two screens in the app.
1. CameraScreen — This screen will show the camera output and take pictures
2. GalleryScreen — This screen will show captured pictures in a gridview.
Loading Cameras
To show the camera preview, we will need to load the cameras first. For that, go to the main function in main.dart file and these lines above runApp.
WidgetsFlutterBinding.ensureInitialized(); //Ensure plugin services are initializedfinal cameras = await availableCameras(); //Get list of available camerasNow that we have list of cameras, we need to pass those to our CameraScreen.
So, cameras will be passed like this

After all this, this is how main.dart looks.
CameraScreen
The layout of this screen is simple. On top we will show live camera preview and at bottom there will be three buttons (Switch camera, Capture and Show Gallery).
Create a stateful widget called CameraScreen.
We will create four variables,

We have to set selectedCamera = 0, to start with the rear camera. If the device has more than 1 camera then we can switch to it by changing this index.
Now let’s create a method to initialize selected camera.
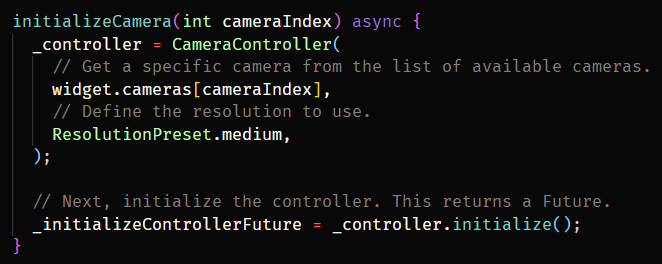
In this method, we will pass the camera index that we want to initialize. Using the list of cameras passed, we will load the specific camera with resolution of our choice.
Using this method, we will initialize the rear camera in initState.

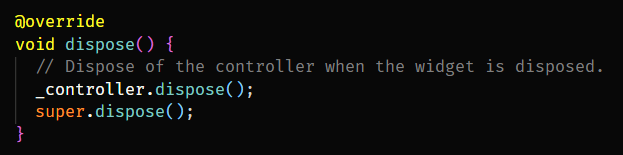
And do not forget to dispose the Camera Controller.
Now let’s build the UI.
To show the CameraPreview we will use the following code. Until the camera loads, we will show CircularProgressIndicator.
FutureBuilder<void>(
  future: _initializeControllerFuture,
  builder: (context, snapshot) {
    if (snapshot.connectionState == ConnectionState.done) {
      // If the Future is complete, display the preview.
      return CameraPreview(_controller);
    } else {
      // Otherwise, display a loading indicator.
      return const Center(child: CircularProgressIndicator());
    }
  },
),
Okay, now we have to show three buttons in a row.
SwitchCamera Button
First is the switch camera icon button. On tapping this, the camera should switch between front and rear.
For that, we will use the same initializeCamera method, but this time the cameraIndex will be dynamic. cameraIndex will be 0 for rear camera and 1 for front camera (if there is front camera).
On click, we will check whether the devices has more than one cameras, if not we will show a snackbar with a message.
IconButton(
  onPressed: () {
    if (widget.cameras.length > 1) {
      setState(() {
        selectedCamera = selectedCamera == 0 ? 1 : 0;//Switch camera
        initializeCamera(selectedCamera);
      });
    } else {
      ScaffoldMessenger.of(context).showSnackBar(SnackBar(
        content: Text('No secondary camera found'),
        duration: const Duration(seconds: 2),
      ));
    }
  },
  icon: Icon(Icons.switch_camera_rounded, color: Colors.white),
),
Capture Button
To show a capture button, I have used a simple white circle with 60 radius. When clicked, we will use the camera controller to take a picture and add it to the captureImages array.
GestureDetector(
  onTap: () async {
    await _initializeControllerFuture; //To make sure camera is initialized
    var xFile = await _controller.takePicture();
    setState(() {
      capturedImages.add(File(xFile.path));
    });
  },
  child: Container(
    height: 60,
    width: 60,
    decoration: BoxDecoration(
      shape: BoxShape.circle,
      color: Colors.white,
    ),
  ),
),
Show Gallery Button
This button is quite simple, we will show the last image taken from the capturedImages array and when clicked, it will navigate to the GalleryScreen.
GestureDetector(
  onTap: () {
    if (capturedImages.isEmpty) return; //Return if no image
      Navigator.push(context,
        MaterialPageRoute(
          builder: (context) => GalleryScreen(
            images: capturedImages.reversed.toList())));
  },
  child: Container(
    height: 60,
    width: 60,
    decoration: BoxDecoration(
      border: Border.all(color: Colors.white),
      image: capturedImages.isNotEmpty
      ? DecorationImage(image: FileImage(capturedImages.last), fit: BoxFit.cover)
      : null,
    ),
  ),
),
As you can see, the GalleryScreen accepts list of images captured so that we can show them in a gridview. Let’s finish that part to see the app in action.
GalleryScreen
This is screen is very straighforward. Get the list of images and show them in a GridView.
One more thing If you liked this story, also check out this new story I posted recently.
Final Product
After building the app, here is the final result.
The Camera Package (https://pub.dev/packages/camera) is also capable of capturing videos. You can use startVideoRecording, pauseVideoRecording and stopVideoRecording methods for that.
Here is the Github link for the project. Hope you find it helpful.
That’s it for this one. Hope you like it.
Thank you for reading until this point. Make sure to leave a comment for any suggestions and 👏 for this story.