Build a Blog Website using Django Rest Framework — Overview (Part 1)
Let’s build a simple blog website using Django Rest Framework to learn how DRF and REST APIs work and how we can add any frontend framework to use the APIs we generate using DRF

Hello folks; I hope you all are doing well! In this article series, we will build a simple blog website with functionalities such as creating blogs, editing them, upvoting them, commenting on them and viewing blogs from a particular user.
We can also implement additional features such as following the authors, customizing the user feed based on who they follow, and suggesting the users to follow new authors based on the type of articles they like to read.
To proceed with this series, you need to have a basic understanding of how Django works. Suppose you would like to learn more about Django and how to build web applications using Django. In that case, I recommend you read my article series on building a social media website using Django and building a job search portal using Django. I have made complete websites to help you implement Django on something more complex than regular to-do applications.
So this first part of the series will only focus on the basics and will be setting up the project basics. We will delve into details of building the models, views and serializers for the different aspects of our application in the following parts.
So, first of all, let’s understand what Django Rest Framework is and why it is a good framework for building the backend for our application.
Why Django Rest Framework?
Django Rest Framework (DRF) is a powerful tool for building web APIs. It is built on top of the popular Django web framework. It allows developers to quickly create APIs that various clients, including web, mobile, and desktop applications, can use. DRF makes it easy to create APIs with complex functionality, such as authentication, permissions, and data validation and provides a rich set of tools for building and testing APIs. With DRF, developers can focus on building their application logic rather than spending time on the details of implementing an API. This makes it an excellent choice for building scalable and maintainable web APIs.
DRF also provides a browsable API interface, allowing developers to test and interact with their APIs quickly. This can be useful for debugging, troubleshooting, and delivering documentation and examples to other developers who may be consuming the API. DRF also supports various serialization options, allowing developers to quickly return data in different formats, such as JSON or XML. Overall, Django Rest Framework is a valuable tool for anyone looking to build robust and reliable web APIs.
If you want to learn more about Django Rest Framework (DRF) and how to use it, the official documentation is the best place to look.
Building the Project
So, let’s start building the project. First, we will make a new folder to start our project. So, I created a parent folder, and inside that, I built two folders named backend and frontend. We will only be doing all our work inside the backend folder. Later, in the following articles, we will build a working frontend and connect it to our backend to have a full-stack working website. But that is for the future; currently, our focus will only be on the DRF (backend part).
So, inside the backend folder, we will create a virtual environment for our project. To create the virtual environment, I prefer using pipenv as I find it easy to use, and it maintains a pip file instead of the requirements.txt file, which makes it easier for Pythonic projects.
The command used to create the virtual environment is given below. If you already have pipenv installed, you should skip the first line.
pip install pipenv
pipenv shell
activate
After creating and activating the virtual environment, we need to install the dependencies for the project. We only need to install Django and DRF for our project for now. If we need any more dependencies, we can install them later on.
pipenv install django djangorestframework
Running the above line of code will install both dependencies in your virtual environment. We are ready to create our application and do the initial setup.
Next, we create our Django project inside the backend folder. To do so, we write the following command on the shell.
django-admin startproject blog .
The dot at the end of the startproject command in Django is used to specify the current directory where the new Django project should be created. This is a standard convention in command-line tools, where the dot (.) refers to the current directory. Using the dot, we tell Django to create the new project files in the current directory rather than in a subdirectory or another location. This can be useful if you want to keep your project files in the same directory for organizational purposes.
Next, we also want to create two apps — users and posts. The first would handle user-related activities, and the other would hold the logic related to the blog posts. In our case, we would primarily use the posts app, and very little logic would go inside the users app since we will use the default Django User model and would not create any user profile or a custom user model. But still, I have kept it separate since if we want to implement follow author feature or something similar in the future, we would then put all those logic in this app.
To create the two apps, we would be writing the following command:
python manage.py startapp users
python manage.py startapp posts
Now, our file structure would look something like this:
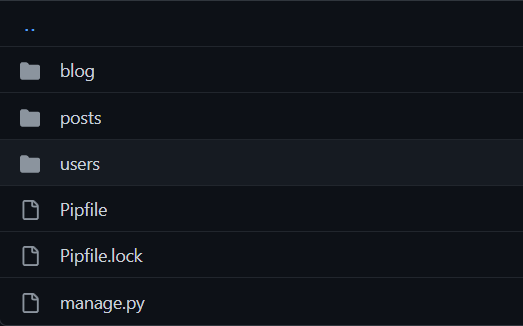
In this part, we would not be going inside the users and the posts folder since this is the setting things up part; we would only deal with the blog folder.
Moving inside the blogs folder, we would find the file structure as such:
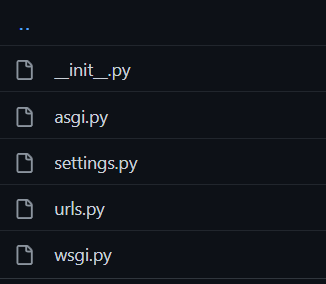
Now, we would only be dealing with the settings.py and urls.py files. First of all, we would move into the settings.py file.
Inside the settings, we would add rest_framework in the INSTALLED_APPS section as such:
INSTALLED_APPS = [
    "django.contrib.admin",
    "django.contrib.auth",
    "django.contrib.contenttypes",
    "django.contrib.sessions",
    "django.contrib.messages",
    "django.contrib.staticfiles",
    "rest_framework",
    "posts",
    "users",
]
As we can see in the above code block, we also added posts and users in the same section, which lets our Django project know we have created these two apps and will be using them in the project.
Next, we will add this block of code in the settings.py file to define the pagination of our APIs.
REST_FRAMEWORK = {
    "DEFAULT_PAGINATION_CLASS": "rest_framework.pagination.PageNumberPagination",
    "PAGE_SIZE": 10
}
Now, let’s move to the urls.py file. We will be adding the browsable API interface URL so we can test our APIs quickly. First, we will import path and include from django.urls which we will be using to define the URLs.
from django.urls import path, includeNext, inside the URL patterns, we will be adding our browsable API path as shown below:
urlpatterns = [
    path("admin/", admin.site.urls),
    path("api-auth/", include("rest_framework.urls", namespace="rest_framework")),
]
The first line in the above code is for accessing the admin panel, which Django provides, and the second line is for the browsable API interface DRF would provide us.
Next, we will migrate the database (Django provides us with an embedded SQLite DB). To do so, we will run the following commands:
python manage.py makemigrations
python manage.py migrate
We could run the following command to fire up the local server and test if everything was perfectly installed.
python manage.py runserver
On running the command, we get a local server for our website, which we can open up to access our website. We would not be getting anything since we have not defined any logic in the app.
So, we are all set to start building our project. From the next part onwards, we would start building the core logic of the project, and we would take two more parts to finish the backend part and then begin the work to build the frontend of the project to make it an excellent full-stack website.
I hope you all are as excited as I am for the following parts as we would look to learn and build a simple blog website using Django Rest Framework and connect it to a working frontend.
The next part of this DRF series can be found here:
Thank you for reading! If you like reading my articles, I would suggest you have a look at my other articles: