
Bracing and Voicing the Top
A Comedy of Errors
Building a guitar is a little like cooking a seven course dinner with the exception that you can take as long as you want; no hungry guests at the table trying to stretch out the hors d’oeuvres while you struggle with the almondine. I finally had the rosette designed, built, and installed, and now it was time to brace and voice the sound board. I know as much about doing so as I know about almondine, but fortunately I have YouTube.
I’ve been following a series by Chris Alvaredo (Driftwood Guitars) as he builds a “3000 year old guitar”. This is a new build but he’s making the top out of wood from a Sitka spruce log buried in a landslide three thousand years ago and unearthed by one of his suppliers during construction of a new mill. Fortunately for all, they immediately realized what they had, and milled many sets of instrument soundboards from the amazingly preserved log, of which Chris bought two.
Gather three luthiers together and you’ll probably get seven different theories about how a guitar top should be braced and voiced. I had a set of plans with outlines of the finished braces and no assembly instructions. I also had Chris’ step by step video demonstration of how he does it. His guitars sound great so I decided to follow his lead.
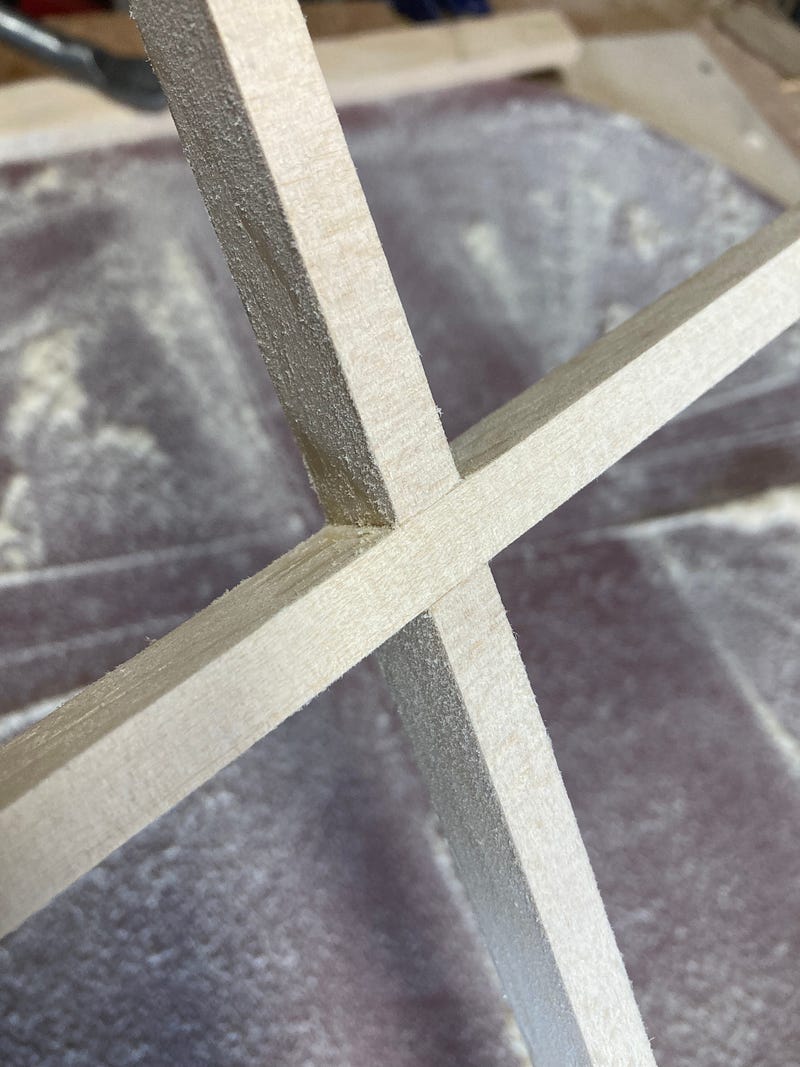
Chris emphasizes tight joinery for the bracing, and I’ve been practicing the necessary steps with my hand tools, so joining the “X” brace was no great challenge. Scribing their overlap with a marking knife I carefully sawed both pieces to the depth of this lap joint, staying inside of the knife scores, and then carefully pared the sides and
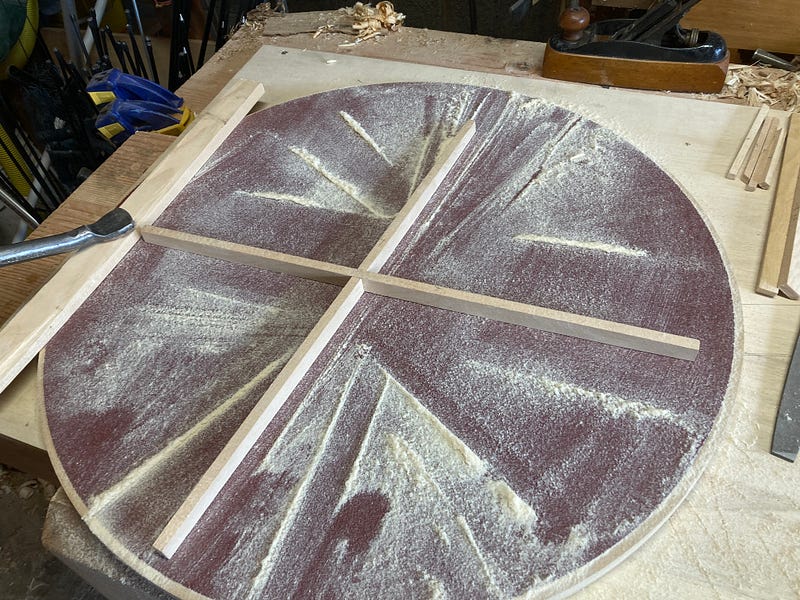
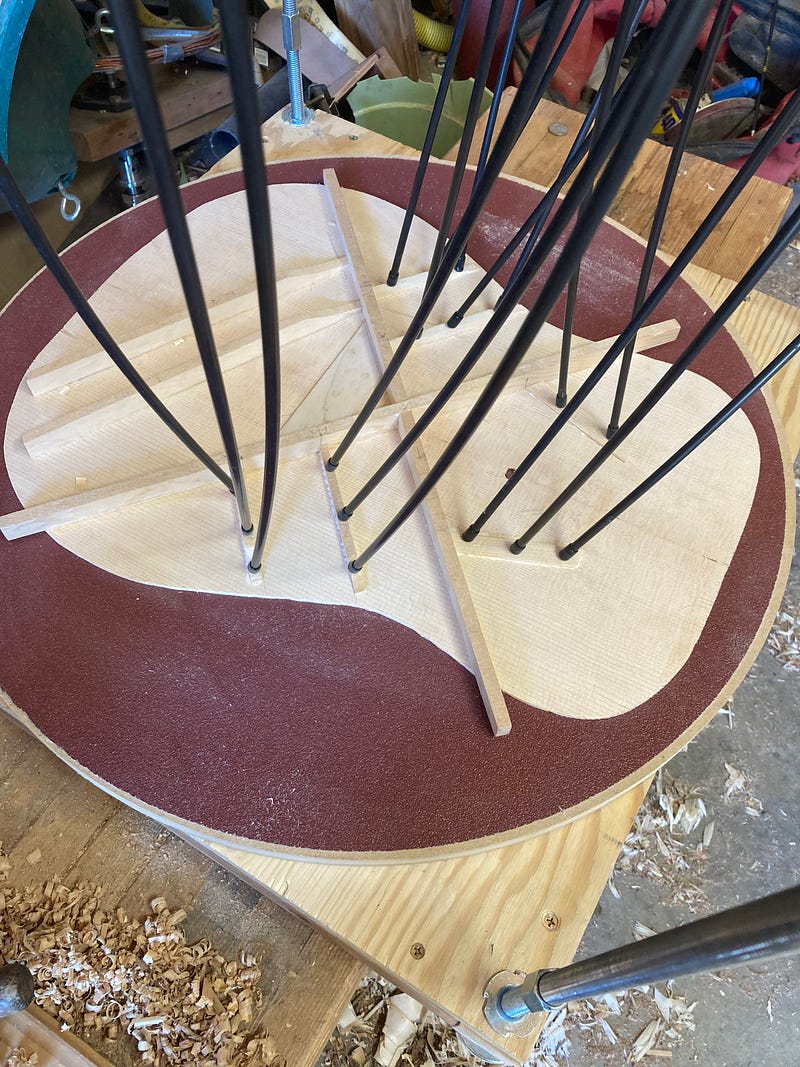
bottoms of the joints with a very sharp chisel. I then glued and clamped the joint. I had stuck a self adhesive 60 grit sanding disc to my 30 foot radius dish, so once the x joint had set the next step was to sand that radius to one side of the joined braces. This didn’t take long, the only challenge was to keep pressure off the center of the assembly so that the ends would sand first.
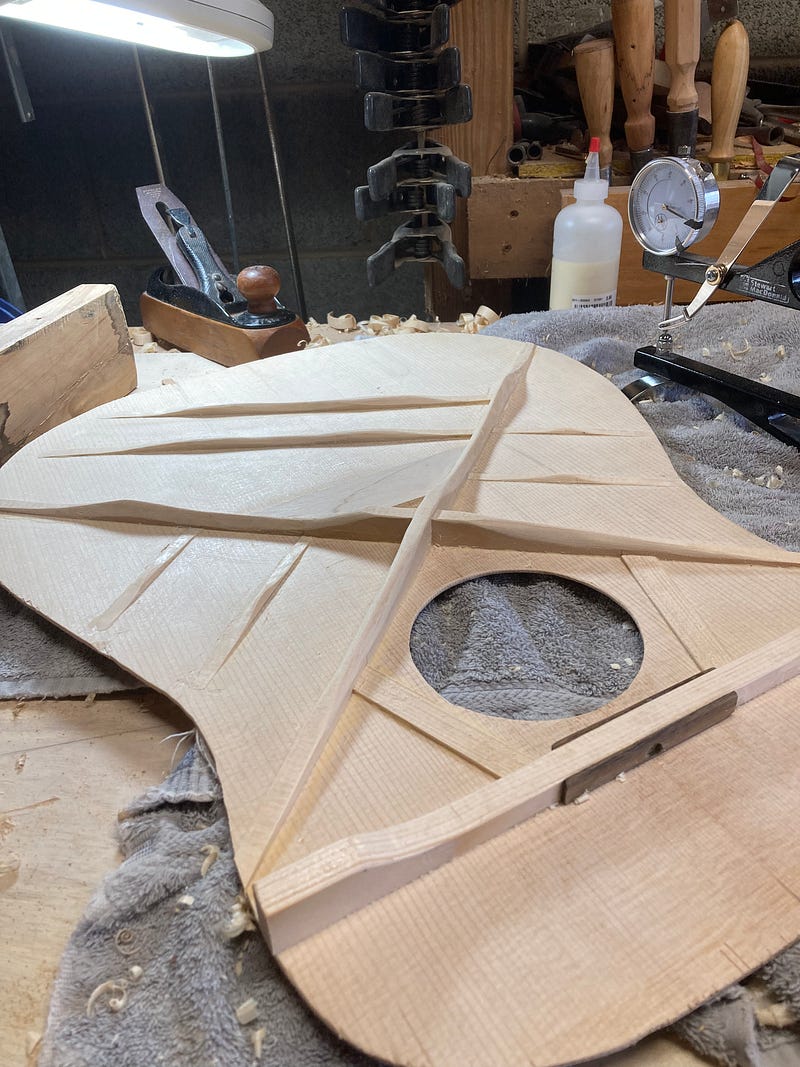
Next I positioned the bridge pin plate, which reinforces the top where the strings connect, and slid the x brace up to it when the glue had set. I then scribed top of the plate to the side of the x brace so that cutting this relief will let the brace slide over and glue to the bridge plate; more careful marking with the knife and work with the chisel. When this fit was snug I glued the brace in place, using go bars to pin it down while the glue set. Now for the tone bars, the finger bars, and the transverse bar.
I had milled these to rough sizes and shapes and once again cut a relief in the x brace so that the tone bars would slide under and glue to it. Chris maintains that the quality of this joinery allows
you to shave the braces to finer profiles, allowing the top to vibrate more freely, while still keeping the assembly strong enough that the 120 or so pounds of string tension doesn’t tear the top apart. I’m taking his word for it.
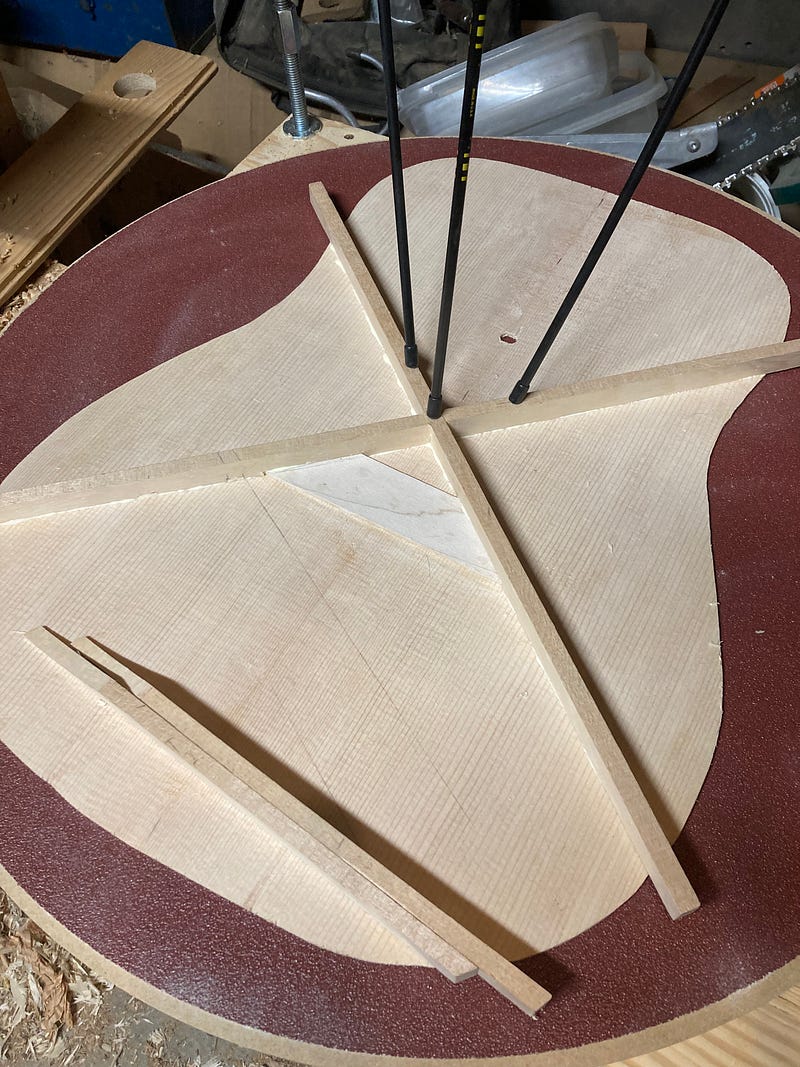
He also says to do a dry fit of all the parts first. I could have done this a lot better. The roof of my go bar deck was too low and the bent go bars were under too much compression causing them to shove the braces around on their slippery glue. After a semi-panic, digging out a crescent wrench and adjusting the roof higher, I could proceed, but there were telltale glue smears on the formerly clean spruce. Now to mess up the transverse

Bar. This bar stiffens the upper “bout” of the guitar and holds it flat…most luthiers think that the lower bout generates the sound. The bar gets drilled for access to the truss rod, installed in the neck to allow you to correct warps or string tension bend, and Chris glues a rosewood strip where the hole will be drilled to protect and reinforce the bar. I mill out a piece and super glue it to the bar, but off center enough that it won’t fit between the sound hole braces. It’s not going to come off without a fight so I flip the bar and glue another one to the other side in the right place, if one is good isn’t two better?
The next morning I start to carve the braces. Theoretically I will chisel and plane their tops down to rough height and then start to
carve them to shape. Chris is very clear about my goal here; shape and relieve the braces until tapping on the top and flexing it feels right, enough complex ring tones and springiness, and after voicing several tops my hands and ears will learn to hear and feel what I’m going for;)
Oh well, I pull out my bargain micrometer and start shaving the tone bars down to height. It has a plunger bar that extends from the end, measuring the distance between the two. I park the end of the mic on top of a brace and extend the rod down to the spruce belly, and though I am measuring often the tone bars start to look too low. I look more carefully at the end of the micrometer and notice a small shoulder 3/16" above the end that is the actual zero point. My braces are, indeed, too low.
Well, this is an art, not a science, right? And I do have them tucked and glued which is supposed to allow all the braces to be lighter. The top has started a little thick, I figured final sanding would take some additional material off, but I’m not feeling the springiness and chime I imagine I am looking for. I flip it over and use a sanding block to take another two or three thousandths off . It’s tapping better when I hear a little pop, and notice that the top has split a little along the grain from my sanding pressure. I start to curse myself out and then remember Willie Nelson’s famous guitar “Trigger”.
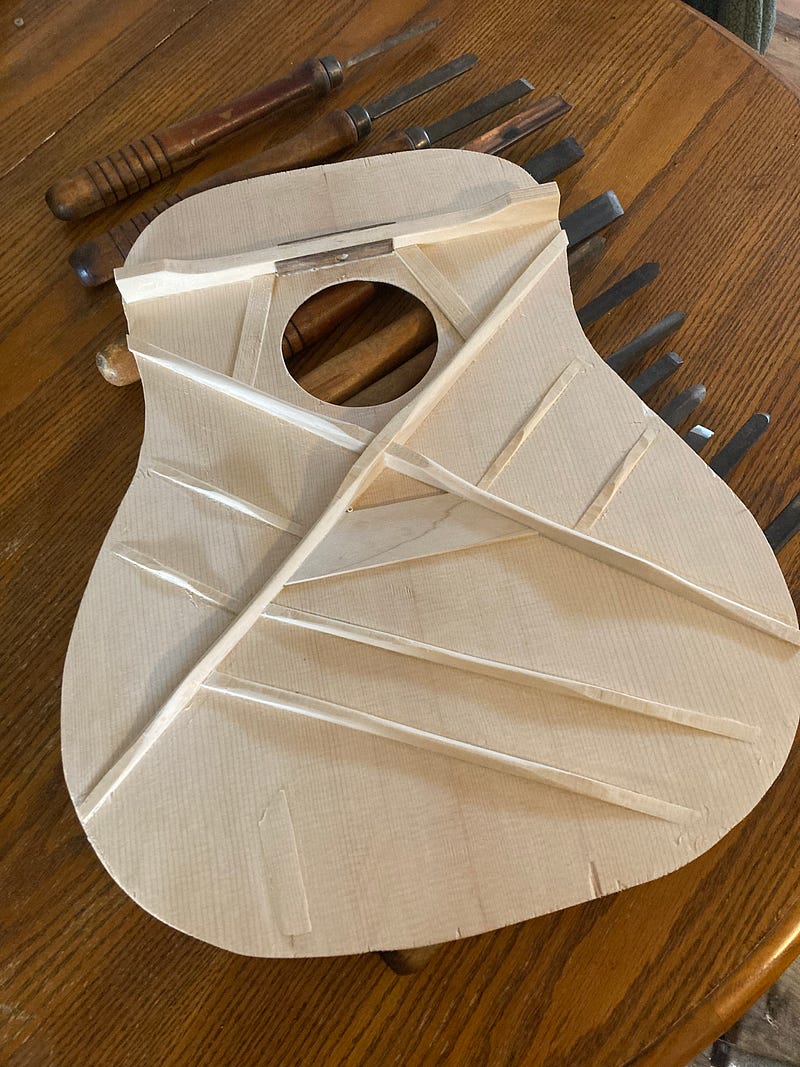
Willie has worn a palm sized hole right through Trigger’s top where the pick guard would normally be. Yearly tune up trips to the luthier have left it more patch than original wood…and Trigger sounds great. I make a patch from the spruce cut offs and glue it in place, then carefully sand it down to near paper thickness. You can see it above in the lower left end of the soundboard, though it is now sanded to near invisibility. You can also see where I chipped the bottom side while sawing out the shape.
Some First Nations weavers are said to leave an imperfection in their weaving so as not to offend the creator, who alone is capable of perfection. I feel pretty confident that my top will not offend any greater power.


