
Best Practices for Security in Laravel Application Development — Part 1
Laravel is a popular PHP web application framework and comes with a rich set of features. However, like all platforms, it’s essential to ensure security when building an application.
In this part we will discuss the following topics:
- Keep Everything Updated
- Use Environment Configuration
- SQL Injection Protection
- XSS Protection
- CSRF Protection
Keep Everything Updated
Always ensure that your Laravel installation, along with all dependencies, are up-to-date. This helps in patching any known vulnerabilities.
Keeping your Laravel application up to date is essential for benefiting from the latest features, performance improvements, and security patches. Regular updates ensure that your application remains compatible with the latest packages and tools, while also minimising potential vulnerabilities.
Here’s a step-by-step guide on how to keep your Laravel application up to date:
- Backup First: - Before updating anything, always take a complete backup of your application, including both the codebase and the database. This allows you to restore your application in case something goes wrong.
- Stay Informed: - Subscribe to the Laravel newsletter or check the Laravel GitHub repository regularly to be aware of new releases and updates.
- Update Composer Packages:
- Run composer outdated to view the list of outdated packages in your application.
- Update individual packages using
composer update vendor/package-name. - To update all packages, you can runcomposer update. However, be cautious as this might introduce breaking changes. - Update Laravel Framework:
- Check the Laravel upgrade guide. Each version will have specific instructions and potential breaking changes to be aware of.
- Update the Laravel installer globally using
composer global require laravel/installer. - Update the Laravel framework in your project usingcomposer require laravel/framework. - Database Migration:
- If there are new migrations after an update, run
php artisan migrateto apply them. - Review Deprecated Features: - Each new Laravel version might deprecate some older features. It’s vital to review and replace any deprecated features in your application. The Laravel upgrade guide will usually list these.
- Update Configuration: - Newer versions of Laravel may introduce new configuration options or changes. Compare your current config files with the new version and merge any differences. Avoid overwriting your config files directly.
- Update Frontend Dependencies:
- If you’re using Laravel Mix, make sure to update your Node.js packages by checking the
package.jsonfile and runningnpm installoryarn install. - Run Tests: - If you have tests in place (and you should!), run them to ensure the updates didn’t break anything. Address any test failures before deploying your updates.
- Check for Deprecated or Abandoned Composer Packages: - Over time, some composer packages might be abandoned or might not be compatible with newer versions of Laravel. It’s a good idea to replace such packages with active and well-maintained alternatives.
Use Environment Configuration
Never hardcode sensitive information like database credentials or API keys. Instead, use Laravel’s .env configuration file, which is automatically ignored by Git, ensuring these secrets aren’t pushed to repositories.
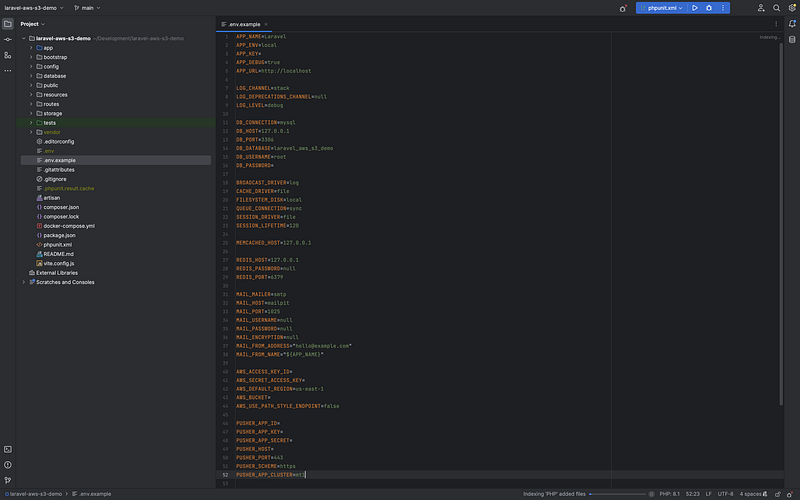
In Laravel, environment configuration is essential for managing settings that vary between deployment environments. Different environments like local development, staging, and production can have different configurations. Laravel uses .env files and the config function to help manage these settings.
- .env File: This is where environment-specific settings are stored. It’s typically located at the root of your Laravel application. When you first install Laravel, it includes a
.env.examplefile. This file can be copied to create a.envfile. - Configuration Files: These are located in the
configdirectory. Laravel's configuration files are designed to use theenvfunction to retrieve values from the.envfile. This provides a flexible way to access environment-specific values and fall back to a default if the value is not present in the.envfile.
For example, in config/database.php you might see something like:
'mysql' => [
    'driver' => 'mysql',
    'host' => env('DB_HOST', '127.0.0.1'),
    // ...
]
Here, DB_HOST is retrieved from the .env file. If it's not available there, 127.0.0.1 is used as a default.
Setting .env Values: In the .env file, settings are defined as key-value pairs:
DB_HOST=localhost
DB_DATABASE=my_database
DB_USERNAME=my_user
DB_PASSWORD=my_password
Accessing Config Values in Code: Use the config helper function. For instance, to get the DB_HOST value, you'd use:
$host = config('database.connections.mysql.host');Caching Configuration: For performance reasons, you might want to cache configuration. This is particularly useful in production. Use the command:
php artisan config:cache
Be cautious: Once configuration is cached, changes in .env won't take effect until the cache is cleared. If you update .env values or configuration files, remember to clear the cache.
Environment Detection: Laravel’s environment is determined by the APP_ENV variable in the .env file. By default, there are three environments: local, staging, and production.
Environment-specific Configuration: You can also create environment-specific configuration files. For example, if you want a specific configuration for your local environment, you can create a config/local/app.php file. This will override the default config/app.php values when the app is running in the local environment.
Remember:
- Never commit your
.envfile to version control. It may contain sensitive information. - You should commit the
.env.examplefile, with placeholder values, so that other developers know what keys are required.
SQL Injection Protection
SQL injection is one of the most common forms of web application security vulnerability. It occurs when an attacker is able to insert malicious SQL code into a query, which can potentially allow unauthorised viewing of data, corrupting or deleting data, and in some cases, executing administration operations on the database.
We can look at a basic example of an SQL injection attack. Let’s say there’s a login form on a website where users input their username and password. When they submit the form, the web application checks their credentials by executing an SQL query like:
SELECT * FROM users WHERE username = 'INPUT_USERNAME' AND password = 'INPUT_PASSWORD';If a user inputs the username john and the password doe123, the executed SQL would look like:
SELECT * FROM users WHERE username = 'john' AND password = 'doe123';An attacker can exploit this system if it doesn’t properly sanitise the input. Instead of inputting a regular username, they might input:
' OR '1'='1' --If you plug this into the SQL query, you’d get:
SELECT * FROM users WHERE username = '' OR '1'='1' -- ' AND password = 'INPUT_PASSWORD';The -- is an SQL comment, so everything after that gets ignored. This modified query essentially returns all the records from the users table, as '1'='1' is always true. The attacker would be granted access even without knowing a valid username or password.
This is a simplified example. In real-world scenarios, attackers can use SQL injections not just to bypass logins, but to read sensitive data, modify data, and sometimes even execute arbitrary commands on the server.
Luckily for us, Laravel comes with several built-in mechanisms to prevent SQL injection. Here’s how you can ensure SQL injection protection in Laravel:
Eloquent ORM (Object Relational Mapping): Eloquent, Laravel’s own ORM, automatically uses PDO parameter binding, which prevents SQL injection. When using Eloquent or the query builder, each value passed as a parameter is automatically escaped.
$user = User::where('email', $email)->first();In this example, even if $email contains malicious input, the value will be properly escaped by Eloquent.
Use Prepared Statements with the Query Builder: Just as with Eloquent, the query builder also uses PDO binding.
$results = DB::table('users')->where('name', '=', $name)->get();Raw SQL Queries: There are cases where you might need to use raw SQL statements. In those cases, always use named or positional parameter bindings.
$results = DB::select('select * from users where id = :id', ['id' => $user_id]);This ensures the user-provided data is safely bound to the query and not executed directly.
Avoid Using the DB::raw() Method Carelessly: The DB::raw() method allows for the direct input of raw SQL. It should be used with caution, and never with user input unless it's properly sanitized.
$results = DB::table('users')->orderBy(DB::raw('column_name DESC'))->get();Validate and Sanitise Input: Always validate and sanitise input data before using it in any database operation. Laravel provides a robust validation mechanism to validate user inputs. By defining validation rules, you can ensure that only valid data reaches your database operations.
$validatedData = $request->validate([
    'name' => 'required|max:255',
    'email' => 'required|email',
]);
Limit Database User Privileges: As a best practice, always assign the least privilege to your database users. For example, if an application only needs to retrieve data from a database, the associated database user should only have SELECT privileges.
XSS Protection
Cross-Site Scripting (XSS) is a type of vulnerability where attackers can inject malicious scripts into web pages which are then viewed by other users. This can lead to a variety of attacks, such as stealing session cookies, performing actions on behalf of the user, or malicious redirections.
Let’s say there’s a website with a comment section where users can post comments that will be displayed to other users. If this comment system doesn’t properly validate and escape input, it’s vulnerable to XSS.
- An attacker posts the following “comment” on the website:
<script>alert(‘Hacked!’);</script> - An unsuspecting user visits the page to read comments.
- When the page loads, the browser doesn’t recognise the attacker’s input as mere text. Instead, it interprets the input as actual JavaScript code due to the
<script>tags. - The script runs and displays an alert box with the message “Hacked!”.
While this example is simplistic and merely pops up an alert box, real-world attacks can be much more malicious. Attackers can use XSS to:
- Steal users’ cookies or session tokens, leading to account compromise.
- Deliver malware or malicious actions to the user’s browser.
- Capture keystrokes, revealing sensitive data such as passwords.
- Redirect the user to another site or spoofed pages for phishing.
One of the primary ways Laravel combats XSS is through its Blade templating engine. By default, Blade escapes any data rendered in its templates. This means that if you use the {{ $variable }} syntax to print out a variable in a Blade view, it will automatically be escaped.
{{ $userInput }} // This will be escapedIf, for some reason, you need to display raw (unescaped) data (which is dangerous and generally not recommended), you would use:
{!! $userInput !!}Remember to use this with caution, only when you’re absolutely sure that the data is safe from any malicious input.
So remember to always escape output where possible. Laravel’s Blade templating engine does this by default when you use {{ }} syntax. For cases where you must not escape content, be very certain of its security.
CSRF Protection
Cross-Site Request Forgery (CSRF) is a type of attack that tricks the victim into submitting a malicious request. This attack primarily targets web applications and can potentially lead to malicious actions performed on the website on behalf of the authenticated user without their knowledge or consent.
Suppose you are logged into your online banking website, bank.com, which unfortunately is vulnerable to CSRF attacks. While you're still logged in, you visit another website or even just receive an email which contains a malicious link crafted by an attacker.
Malicious Site Creation: The attacker sets up a site or email that contains the following malicious HTML:
<img src="https://bank.com/transfer?toAccount=123456&amount=1000" width="0" height="0" border="0">Or the attacker could use a form that auto-submits:
<form action="https://bank.com/transfer" method="POST" name="maliciousForm">
    <input type="hidden" name="toAccount" value="123456">
    <input type="hidden" name="amount" value="1000">
</form>
<script>
    document.maliciousForm.submit();
</script>- Victim Interaction: When you, the victim, load the attacker’s website or view the malicious email, the browser will try to load the image, which is actually a request to your bank’s website. If you’re logged into
bank.comand ifbank.comdoesn't properly check for CSRF tokens, then the request will go through and you'll unknowingly transfer $1000 to the attacker's account (123456 in this example). - Attack Success: The bank website processes the request thinking it’s legitimate because it came from a logged-in user (you), and the funds are transferred without your knowledge or consent.
The banking website should implement CSRF tokens. This means that every form on the banking website will include a hidden CSRF token, which is tied to your session. When a form is submitted, the server checks that the CSRF token is present and valid.
Using the example above, the attacker’s form wouldn’t work because the CSRF token is missing or incorrect. The server would recognise this and reject the request, protecting you from the CSRF attack.
In reality, CSRF attacks can be more sophisticated than this simple example, but this gives a basic idea of how they operate and why CSRF tokens are important for protection.
Here’s how Laravel handles CSRF protection:
CSRF Tokens: Laravel automatically generates a CSRF token for each session. This token is used to verify that the user making the request to the application is the one who actually made the request.
Blade Directives: When you are building form elements in your Blade templates, you can easily include this CSRF token by adding @csrf within your form, like:
<form method="POST" action="/example">
    @csrf
    <!-- Other form fields here -->
</form>
This will generate a hidden input field with the CSRF token.
Middleware: Laravel uses a middleware named VerifyCsrfToken to verify the token on every POST, PUT, DELETE, or PATCH request. If the token in the request does not match the one stored in the session, the request will fail with a 419 HTTP response.
Excluding URIs: Sometimes, you might need to exclude certain URIs from CSRF protection (e.g., when receiving webhooks from third-party services). You can exclude such URIs by adding them to the $except property of the VerifyCsrfToken middleware.
protected $except = [
    'webhook/*',
];
CSRF in AJAX: If you are making AJAX requests, you should also send the CSRF token as a request header. With libraries like jQuery or Axios, you can set up a global configuration to automatically send this header with every request.
$.ajaxSetup({
  headers: {
    'X-CSRF-TOKEN': $('meta[name="csrf-token"]').attr('content')
  }
});
Make sure to include the meta tag in the head of your HTML:
<meta name="csrf-token" content="{{ csrf_token() }}">Customising Token Response: If you want to customize the response that’s returned when a token mismatch occurs, you can override the tokensMatch method in the VerifyCsrfToken middleware.
Remember to always Use the CSRF Token. Even if you feel a certain form or endpoint doesn’t require protection, always include the CSRF token. It’s a good habit that ensures consistent security throughout the application.
Conclusion
I hope you found this useful, as always, please comment if you have any suggestions or questions.
Resources
Laravel upgrade guide: https://laravel.com/docs/10.x/upgrade