
Beginner’s Guide to Building Your First Worm Farm — Garden Survival Guide
5 YEARS, 291 DAYS, AND COUNTING DOWN — that’s how much time remains before we cross the perilous threshold of the climate tipping point. The headlines are filled with stories of environmental damage and the daunting reality of climate change. It’s natural to wonder, “What can I do?” and, at times, question if our efforts are even worth it.
But here’s the truth: we must make these changes, and the clock is ticking. We’re not powerless; in fact, it takes just 30 days to form a new habit. We can change the course of our planet’s future, and it starts with you.
One small yet impactful step you can take is to embrace the world of worm farming. Unlike traditional compost bins, worm farms offer a sustainable solution that can even thrive indoors. How, you ask? Because these remarkable creatures play a vital role in breaking down organic waste, turning it into fertile soil for your plants.
In this guide, I’ll not only show you why it’s a crucial part of the bigger picture in combatting climate change. But also how to start your own worm farm. Let’s dive in and discover how you can make a meaningful difference, one wriggling friend at a time.


Enhanced Soil Health:
- Vermicompost contains a rich community of beneficial microbes that boost plant growth and resilience.
- It reduces the need for chemical interventions against pests and diseases.
- The slow release of nutrients prevents leaching and overfeeding.
- It promotes eco-friendly gardening by reducing reliance on commercial and synthetic fertilizers.
High-Quality Fertilizer:
- Worm castings, the product of vermicomposting, provide nutrient-dense fertilizer.
- Abundant living microorganisms in castings nourish plant roots, resulting in robust and high-yielding plants.
- Encourages microbial and fungal activity, creating an environment suitable for diverse plant species.
- Versatile applications include using it as a top dressing for lawns, incorporating it into organic fertilizers and potting soils, or using it as a soil conditioner for indoor plants.
Waste Diversion:
- Vermicomposting diverts organic waste from landfills, mitigating landfill-related environmental issues.
- It contributes to a circular, sustainable approach to waste management.
Cost-Effective Solution:
- Once established, worm farms are cost-effective to maintain, offering long-term benefits without significant ongoing expenses.
Fun and Educational:
- Vermicomposting engages and educates gardeners of all ages.
- It provides an opportunity to connect with nature, observe ecosystems in action, and learn about decomposition and nutrient cycling.
Reduced Carbon Footprint:
- Worm farming minimizes greenhouse gas emissions compared to traditional waste decomposition methods, such as landfill disposal.
Water Pollution Mitigation:
- Vermicompost, free from synthetic chemicals, reduces the risk of water pollution associated with chemical fertilizers and pesticides.
Biodiversity Enhancement:
- Encouraging microbial and fungal activity enriches the soil’s biodiversity, creating a more resilient and balanced environment for a variety of plants and beneficial organisms.

Now, let’s move from theory to practice and dive into the exciting process of creating your own worm farm. Here’s what you’ll need:
- A suitable worm bin (we have Can-o-worms by Tumbleweed, not sponsored, just works for our current needs).
- Bedding materials like shredded newspaper, cardboard, or coconut coir (coconut coir came with our worm farm).
- Approximately 1,000 worms (a good rule of thumb is 1,000 worms per person, but start small and scale as needed).
- 5 liters of water (plus access to a hose or spray bottle to maintain bedding moisture).
- A bucket or container (one for soaking bedding material and a smaller one to catch worm liquid from the tap).
- Paper bags or a worm blanket to cover your worms.
- Kitchen scraps, including fruit peels, vegetable leftovers, coffee grounds, and eggshells.
Now, let’s set up your worm farm step by step:
Step 1: Assemble Your Bin
- Install the tap, if your bin has one, for easy liquid drainage.
- Attach legs to the collector tray, if required.
- Place one working tray atop the collector tray; set aside the second working tray, you won’t need it for a few months.
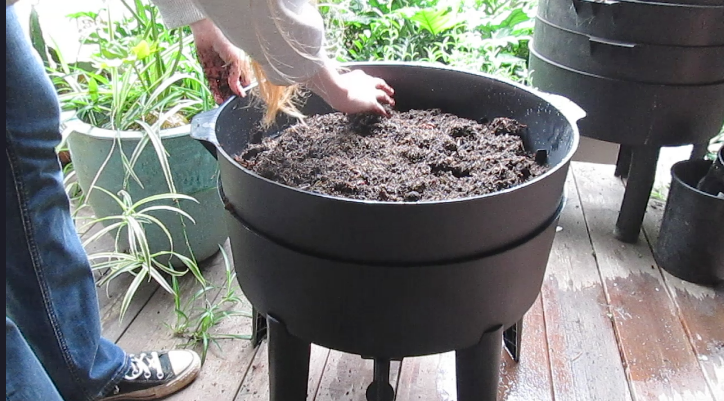
Step 2: Prepare Bedding
- Line the working tray with damp cardboard, paper bags, or packaging material from your bin. Ensure it’s moist but not overly wet.
Step 3: Hydrate Coconut Peat
- In a bucket, place coconut peat and cover it with 5 liters of water. Allow it to absorb the water for about 15–20 minutes.
Step 4: Add Bedding to Working Tray
- Spread the hydrated coconut peat (bedding) evenly into the working tray, over the lining of cardboard or paper.
Step 5: Introduce Your Worms
- Place your worms into the working tray on top of the bedding, then cover them with damp paper bags or a worm blanket.
Step 6: Let Your Worms Settle In
- Allow your worms about a week to acclimate to their new environment before introducing kitchen scraps.

Worms: You’ll need around 1,000 compost worms to start. These are special worms like Tigers, Reds, Indian Blues, Gardeners Friend, and nightcrawlers.
Position: Find a cozy spot for your worm farm. Worms like it just right — around 18 to 25 degrees Celsius. If it gets too hot or cold, they slow down or eat less. On hot days, try freezing a water bottle wrap in newspaper and putting into the top of the working tray. On cold days, cover your farm with a towel or carpet to keep them warm.
Food: Feed your worms a mix of greens and browns, and don’t forget to add some garden soil, eggshells, or vacuum dust. They need a bit of grit in their diet. The more variety in their meals, the better the quality of their castings.
Aeration: Worms breathe through tiny holes in their skin, so they need air to live. Each time you add scraps, give the working tray a little shake or stir. This helps your worms breathe and thrive.
Drainage: Keep your worm farm damp but not swimming in water. Keep the tap open to let excess water flow out. If it looks dry, add some water; if it’s too wet, toss in some browns.
Darkness: Worms love the dark. Cover the top working tray with a worm blanket or a thin paper bag to keep them covered and to help regulate moisture and temperature.
When to Add a New Tray: When your current working tray is about 5 cm from the top and most of the scraps are gone, it’s time to add a new one. Stack the new tray on top of the old one, taking a few handfuls of bedding from the previous tray into the new one. This encourages your worms to move up. The new tray is where you’ll add fresh scraps. More trays mean more worm power!

Worms are fantastic recyclers, and they thrive when they get a balanced diet. Just like us, they enjoy a variety of foods to stay healthy. Here’s what you can feed your worms:
Nitrogen ‘Greens’ (70% of Their Diet):
- Fruit and veggie scraps
- Tea leaves
- Tea bags (without plastic or metal)
- Coffee grounds
- Eggshells
Carbon ‘Browns’ (30% of Their Diet):
- Cardboard
- Shredded paper
- Toilet paper rolls
- Egg cartons
- Dry leaves
Small Amounts:
- Onions
- Citrus
- Avocado pits
- Bread
Avoid These Foods:
- Meat
- Oil and fats
- Chili
- Dairy products

Harvesting Worm Liquid: Collect your worm liquid every few days to keep it from getting stinky. Dilute it with water (10 parts water to 1 part worm liquid), like making a very weak tea. Use it to water your garden or spray your indoor plants. If you want to make special worm tea, add some sugary liquid like molasses and bubble air through it (you can use an aquarium pump for this). This makes the microbes super happy and healthy. Then, you can water it into your garden.
Harvesting Worm Castings: First, make sure you have at least two working trays stacked on top of each other. The top tray, the one you’ve been adding scraps to, should have been in use for at least 3–4 months. Check the bottom tray, if you can’t see any food scraps, and it looks like your worms have worked their magic, it’s time to harvest. When the castings in the bottom tray have turned a rich, dark chocolate brown, it’s a sign that they’re ready to be collected.
As we’ve explored the potential of worm farming, remember that even one small act can ripple into something far greater. Whether you’re a seasoned gardener or a budding eco-enthusiast, consider embracing worm farming as a sustainable way to contribute to a brighter, greener future.
As you build, feed, maintain, and ultimately harvest from your worm farm, you’ll not only witness the transformative magic of nature but also play an active role in preserving our precious environment. Together, we can create a legacy of environmental stewardship that ensures a brighter, more sustainable tomorrow.
Happy worm farming, and may our efforts thrive as we nurture the Earth we all call home.
If you have any questions or want to share your gardening experiences, newbie or experienced, feel free to leave a comment. I would love to hear from you.
Become a member of Medium.com and you’ll get full access to every post that I write, your reads directly supports myself and thousands of other writers.
Connect with me:
Take a photo or screen shot and use the hashtag #ADGIGABLOG and tag me on Insta, let’s connect!
https://www.instagram.com/simis_garden_ventures/
If you enjoyed this post, you’ll love my other posts. Subscribe and follow to have updates delivered to your inbox. I would love to have you here.
As always,
Keep nurturing your plants and watch them grow. Until next time,
With a little bit of soil, a lot of love, and two green thumbs.


