
How to beautify your linux terminal to get hot girls
A guide to set up a minimal and functional linux terminal.
It’s a well known fact that men with pretty terminals get all the girls. Moreover, if you are like me who needs to sit in front of their computer for a long period of time, it should look and feel just the way you want it to.
Requirements
Before we begin, let’s set the requirements we want to fulfill with our terminal. We want our terminal to be:
- Clutter free: keep only the things you need, remove others
- Functional: display information and set up shortcuts that make usage more convenient
- Pretty: A terminal that’s a 10 on looks and personality
Programs
Keeping those requirements in mind, we will use the following programs:
- Tilix: terminal emulator that supports border-less window
- Zsh: a bash shell replacement
- Typewritten: a minimal zsh prompt
- Zsh-z: changing directories like a chad
Putting things together
Let’s start installing and setting up the above mentioned softwares. I will be giving tips and guiding you to configure these softwares more than installing them. Remember, girls like when you do your own research and choose what’s right for you.
Note: You can find all the files and folders we’ll be making in the coming section in my github.
Tilix
First install tilix using your package manager. You can get details on installing from the tilix website.
Once tilix is installed, open it and run tilix — preferences which will open a preferences window for your tilix like such.
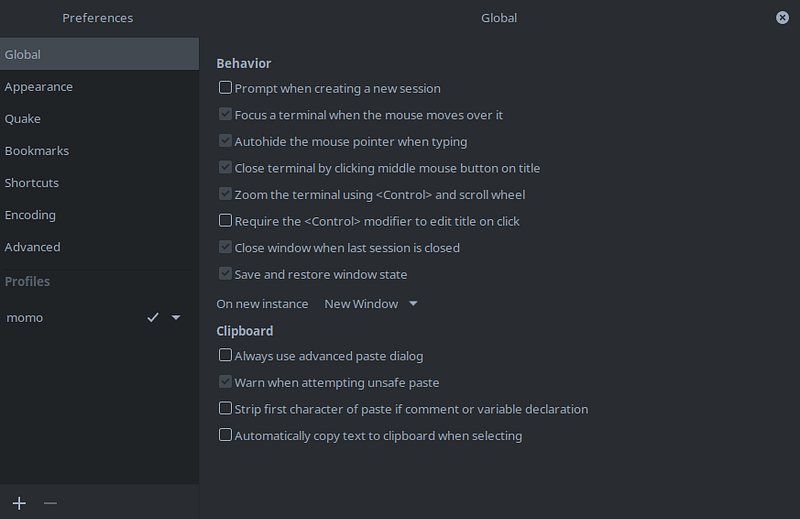
Here, you can play around with all the different settings to your liking.
Profile
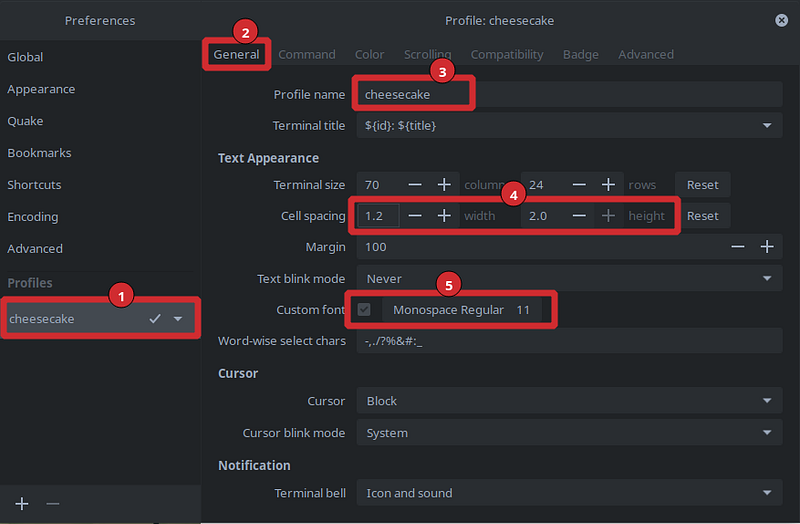
You can set up your profile in Profile > {{profile name}} > general. Settings for our end result are highlighted in the screenshot below. In the screenshot, our profile name is cheesecake. You can set these values as you like.
Remember girls love tall boys. Based on that, max out the height of cell spacing: 1.8–2 (number 4 in screenshot), and use a monospace font.
Window style
For our setup, set appearance > window style > borderless and restart tilix.
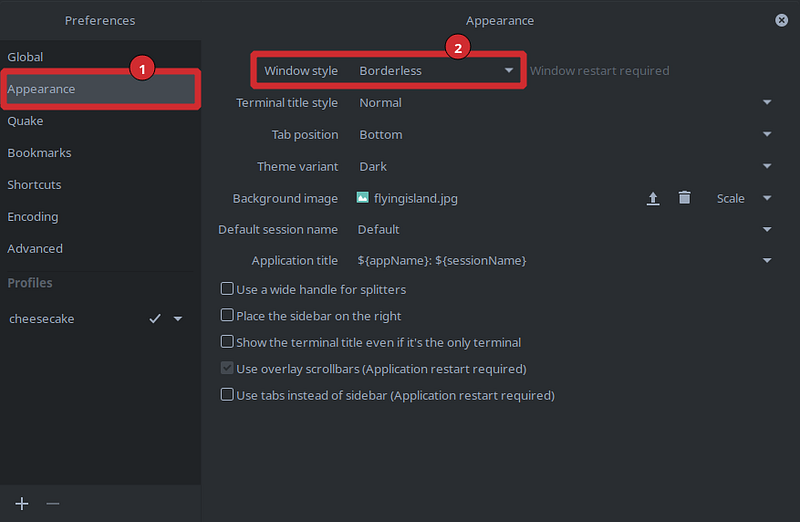
I personally like borderless windows, but you can choose any one you like. With borderless you lose the ability to use the mouse to minimize, maximize or close tilix but you can use the keyboard for that. Your OS will most probably have some sort of shortcut for each of them.
I’ve a custom setup like such:
- Move window: hold alt + double click and drag (tilix default)
- Full screen: F11 (tilix default)
- Minimize: Win + z
- Maximize: Win + x
- Close: Win + c or run command
exit
You can search for the corresponding shortcuts for your OS.
Background
Next we set the background of our terminal. With tilix, you have two options for your background: image background and/or color background.
Image
Go to Appearance > Background image and select an image you like. You also have the option to choose how it fits your terminal. I have set it to scale.
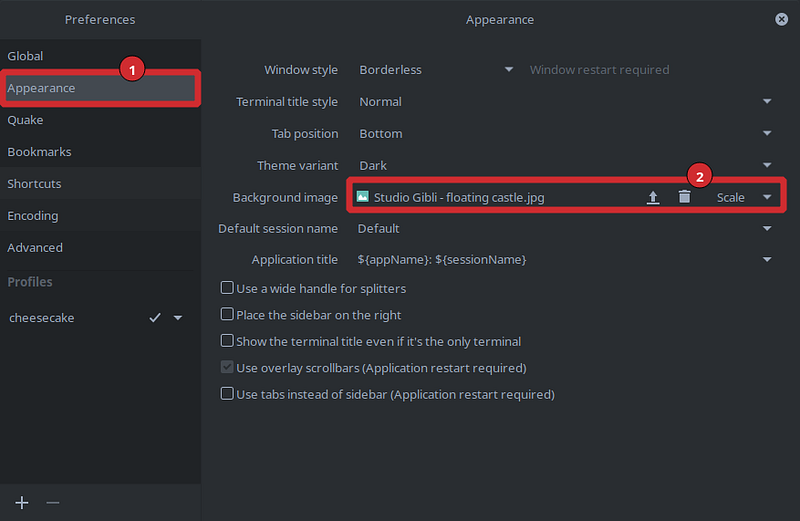
I got my background from wallpapercools.com. Your background image might not be immediately visible in your terminal. This can be because you have opaque color overlay. We will set this next.
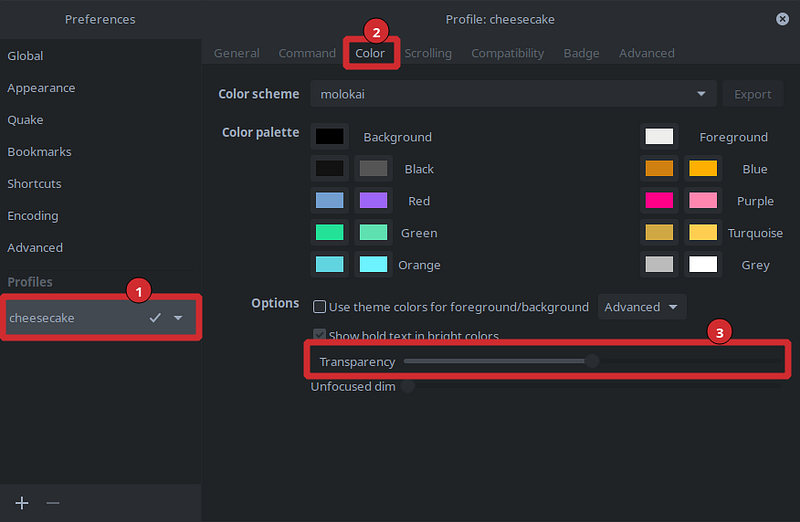
Color overlay
For color overlay, go to your profile > color > transparency and set it to your liking, I’ve set it to about 50%. The color of your background is set from color palette > Background. I recommend a shade of grey. Because girls love all the 50 shades of grey.
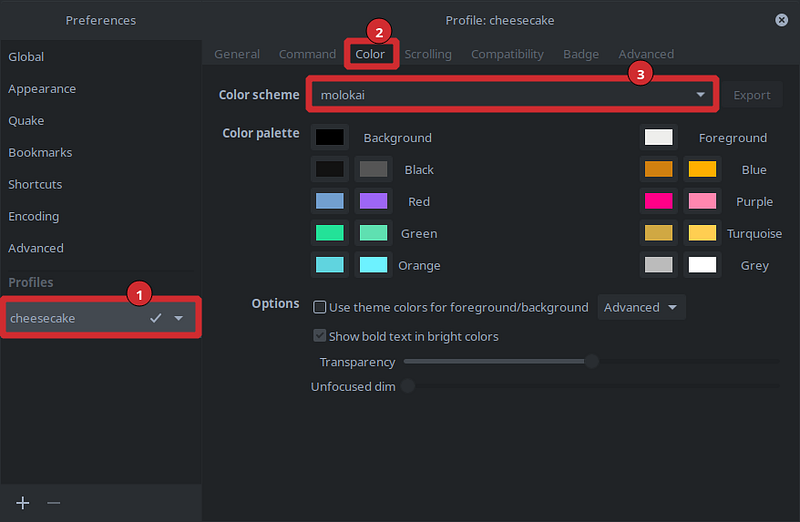
Color scheme
Our final terminal has a beautiful golden and red color palette. To set that, make a folder path ~/.config/tilix/schemes if not exist. In the schemes folder, we add JSON files with color palette information we want.
Make the JSON file in ~/.config/tilix/schemes/molokai.json and copy-paste the content of molokai.json.
There are tons of more available color schemes in this repository. You might want to try other themes. For that, clone/download the repository and copy the json files in schemes.
Once you have the json file inside schemes folder, it should show up in tilix preferences under your profile > color > Color scheme. Choose the one you like.
You can also change some individual color from the palette and export and replace the original json file.
Padding
The goal terminal has a gap inside. It adds more to its aesthetics. For that create a file ~/.config/gtk3/gtk.css and add the line below:
VteTerminal,
TerminalScreen,
vte-terminal {
    padding: 25px 30px 0 30px;
    -vteterminal-inner-border: 25px 30px 0 30px;
}
Once you open tilix again or restart your computer, you should be able to see gaps.
ZSH shell
By default you probably have bash shell. We’ll use zsh instead because it has more features and bigger PP.
Install zsh using your package manager and set it as default shell by running command chsh -s $(which zsh).
There is a good guide here if you need it. It also guides you to install oh-my-zsh but don’t install that. Oh-my-zsh is bloated but girls are into fit terminals :v
Finally, make a .zshrc file in your home folder and restart your computer. The next time you open tilix, zsh shell will open instead of bash.
You can reference my .zshrc. Just be careful what you are copying.
Alias and exports
If you have existing aliases or exports in your ~/.bashrc, we need to copy them to ~/.zshrc. I recommend keeping your aliases and exports in a separate file and sourcing that file in .zshrc.
For that, make a folder ~/shell and make files ~/shell/aliases and ~/shell/exports and keep your aliases and exports there.
You can reference my aliases and exports.
Typewritten
Typewritten is a minimal zsh prompt that supports asynchronous git status.
I recommend installing typewritten manually to folder ~/shell/typewritten. For this, clone the typewritten repository to ~/shell with the following command git clone https://github.com/reobin/typewritten.git ~/shell. We then need to point to the path where we installed typewritten in our .zshrc. Paste the following at the end of your .zshrc.
fpath+=$HOME/shell/typewritten
autoload -U promptinit; promptinit
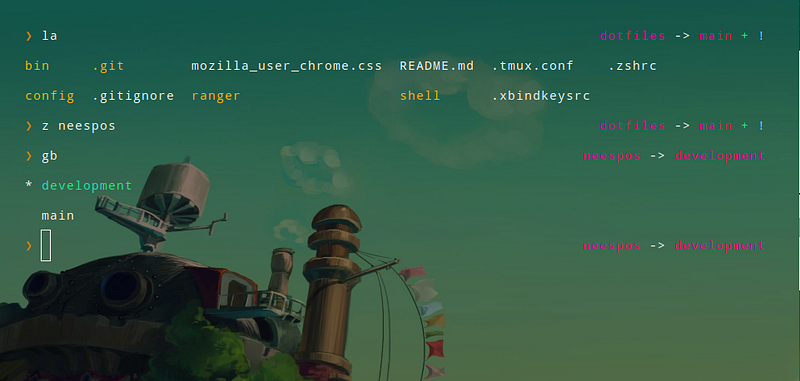
prompt typewrittenThe next time you restart your terminal, typewritten should be loaded. It looks sick! You can further customize the prompt to your liking as per their guide.
Zsh-z
Finally, we install zsh-z for jumping between directories quickly. Looks wise it’s optional, but you will feel cool and more confident with this. Especially useful if you use a terminal to navigate between folders often.
Zsh-z keeps an index of your frequently visited directories and changes directory based on that. Install this the same way you installed typewritten.
git clone https://github.com/agkozak/zsh-z.git ~/shell/
Append to your .zshrc following lines
source “$HOME/shell/zsh-z/zsh-z.plugin.zsh”
zstyle ‘:completion:*’ menu select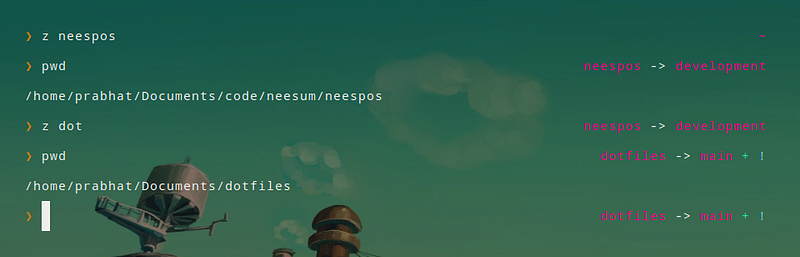
Conclusion
Congratulations, with this we are done setting up our terminal to get hot girls, just remember to be a gentleman and apologize for wetting too many panties.