
AKS + Gitlab CI — A Short Guide to Integration
How to create an AKS cluster using Azure CLI and integrate it on Gitlab CI

Hello all, for who is first arriving on my medium articles, I am sometimes writing some hands on tutorials on software development field. I also have a full Express tutorial which can be found here.
In this article, I am trying to resume an initial approach to create a Kubernetes cluster in Azure with azure cli, then integrating it into Gitlab CI.
I am expecting a minimum knowledge about what is Kubernetes and basic usages, as well as a basic understanding on Azure services, Docker and Gitlab, then we can avoid a lot of content and go straight to the point: how to configure it fast.
For this project I will also be simulating an ExpressJS project but since I currently cannot maintain the Kubernetes on at azure, I won’t be adding a project neither a link that works for the public readers. Hope you guys can understand it.
Hands on!
Make sure that you have your azure account working and with at least one resource group that you can use, then download and install the azure cli on your operational system. The link is here.
If you are lost on resource group, please add one following their docs that it can be found here.
Now, with your terminal opened, let’s do the first task:
az loginYou will be redirected to do your azure login and then to be able to work on the terminal. If everything is ok, you should see the following:
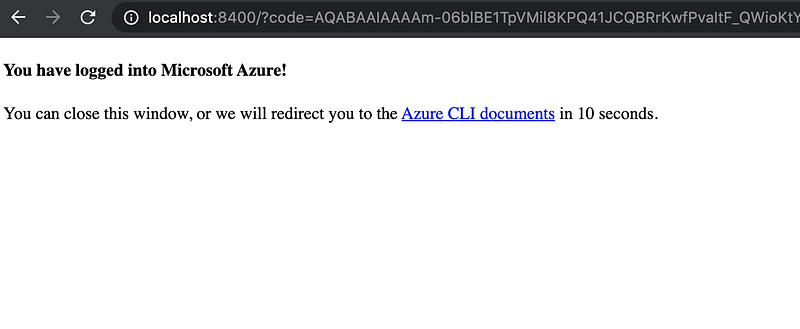
Also, in your terminal something like “You have logged in. Now let us find all the subscriptions to which you have access…” will appear.
Next command:
az ad sp create-for-rbac --skip-assignmentThat will create a service principal and configure its access to Azure resources.
Next command:
az aks create --resource-group YOUR_RESOURCE_GROUP_HERE --name THE_NAME_OF_YOUR_NEW_CLUSTER --node-count 1 --generate-ssh-keysPlease note that you should change YOUR_RESOURCE_GROUP_HERE to the resource group that you have and want to use. THE_NAME_OF_YOUR_NEW_CLUSTER can be any name such like “my-new-cluster”. It will create just one node with the basic configuration but you can change it as you might need.
This command might take a while to run, but after running you can run the following:
az aks get-credentials -n THE_NAME_OF_YOUR_NEW_CLUSTER -g YOUR_RESOURCE_GROUP_HEREIt will merge and allow you to be using the created cluster.
Now we need to get your created secret
kubectl get secretsCopy the one that appear for you that might be like: default-token-ccZZ9
With the name copied, run
kubectl get secrets default-token-ccZZ9 -o jsonpath="{['data']['ca\.crt']}" | base64 --decodeRemember that you need to change my fake default-token-ccZZ9 to the one that appeared to you running kubectl get secrets
It will appear to you something like the following:
-----BEGIN CERTIFICATE-----
MIIEyTCCArGgAwIBAgIQbF5jlFxYUX3WEdEX+ryJNTANBgkqhkiG9w0BAQsFADAN
MQs...
-----END CERTIFICATE-----
Copy everything and we will use later on.
On my project I had a folder called kubernetes. In you terminal, in your project folder, create one folder called kubernetes as well. Once you understand what is happening, feel free to change the folder name or remove it as the way you please.
At the kubernetes folder, create a file called: gitlab-admin-service-account.yaml and add the following:
apiVersion: v1
kind: ServiceAccount
metadata:
  name: gitlab-admin
  namespace: kube-system
---
apiVersion: rbac.authorization.k8s.io/v1beta1
kind: ClusterRoleBinding
metadata:
  name: gitlab-admin
roleRef:
  apiGroup: rbac.authorization.k8s.io
  kind: ClusterRole
  name: cluster-admin
subjects:
  - kind: ServiceAccount
    name: gitlab-admin
    namespace: kube-system
Now, at the kubernetes folder add another file called: gitlab-admin-cluster-role-binding.yaml and add the following:
apiVersion: rbac.authorization.k8s.io/v1beta1
kind: ClusterRoleBinding
metadata:
  name: gitlab-admin
subjects:
  - kind: ServiceAccount
    name: gitlab-admin
    namespace: kube-system
roleRef:
  apiGroup: rbac.authorization.k8s.io
  kind: ClusterRole
  name: cluster-admin
---
apiVersion: rbac.authorization.k8s.io/v1beta1
kind: ClusterRoleBinding
metadata:
  name: gitlab-managed-apps-admin
subjects:
  - kind: ServiceAccount
    name: default
    namespace: gitlab-managed-apps
roleRef:
  apiGroup: rbac.authorization.k8s.io
  kind: ClusterRole
  name: cluster-admin
We want to create the permissions to gitlab. To make it work, now we need to run at your root project folder the following (or remove kubernetes/ and run it on the kubernetes folder):
kubectl apply -f kubernetes/gitlab-admin-service-account.yaml
and then:
kubectl apply -f kubernetes/gitlab-admin-cluster-role-binding.yamlWith the service created, we are now able to collect the token that Gitlab will ask. Please do the following:
kubectl -n kube-system describe secret $(kubectl -n kube-system get secret | grep gitlab-admin | awk '{print $1}')the answer is something like the following:
Name: gitlab-admin-token-hh6nbNamespace: kube-systemLabels: <none>Annotations: kubernetes.io/service-account.name: gitlab-adminkubernetes.io/service-account.uid: 5172066f-946a-44e8-ad61-b0ec17291bb4Type: kubernetes.io/service-account-tokenData====token: eyJhbG...t47cbe7opgW5dB1gnW7s9aF_WDdKE27nYWSmtZwWT_XlZUynvvifpQtlSu5R-rm1pHC-81oDQ0ca.crt: 1720 bytesnamespace: 11 bytesCopy all the content of the token that in this case is shorten as this:
eyJhbG...t47cbe7opgW5dB1gnW7s9aF_WDdKE27nYWSmtZwWT_XlZUynvvifpQtlSu5R-rm1pHC-81oDQ0We will use it later.
Now, before going to Gitlab, let’s test the cluster and access it via dashboard. We need to first create a role for that:
kubectl create clusterrolebinding kubernetes-dashboard --clusterrole=cluster-admin --serviceaccount=kube-system:kubernetes-dashboardGreat, now open the dashboard with the following command:
az aks browse --resource-group THE_NAME_OF_YOUR_NEW_CLUSTER --name THE_NAME_OF_YOUR_NEW_CLUSTERWe are expecting now to have the dashboard open on our browser, at the default namespace:
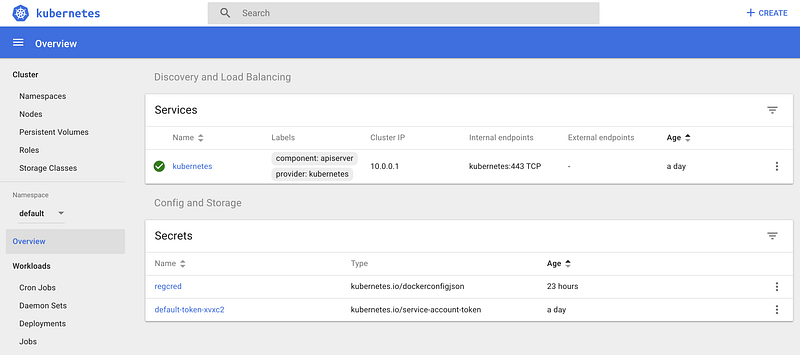
After some trials when using gitlab, I got some permission errors that I could fix with the following run that we will run:
kubectl create clusterrolebinding permissive-binding \
 --clusterrole=cluster-admin \
 --user=admin \
 --user=kubelet \
 --group=system:serviceaccounts
Great, now we have everything to integrate to Gitlab.
We will need the created endpoint from your new cluster that can be found here.
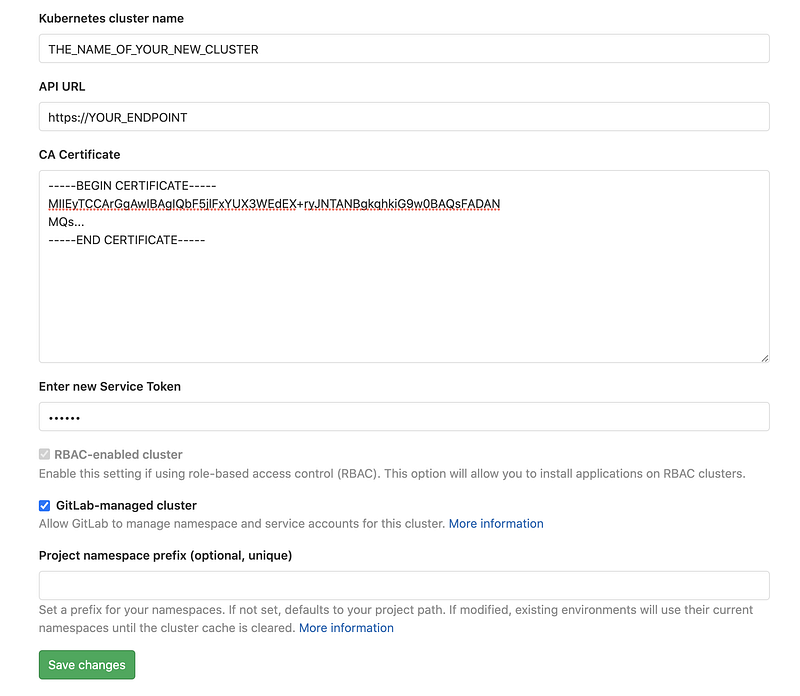
Open your gitlab project, click in the add kubernetes, select the external option and now paste all what you got.
- Cluster name should be the name of your new created cluster
- API url should be the created url that you can see in your azure aks portal (remember to add https://)
- CA Certificate is the one you already copied
- Service Token is the one like “eyJhbG…t47cbe7opgW5dB1gnW7s9aF_WDdKE27nYWSmtZwWT_XlZUynvvifpQtlSu5R-rm1pHC-81oDQ0”
- A namespace is nice to add if you want to deploy everything to the same namespace, or it will be auto generated.
Once configured, make sure to install Helm Tiller with one click button at the applications tab:
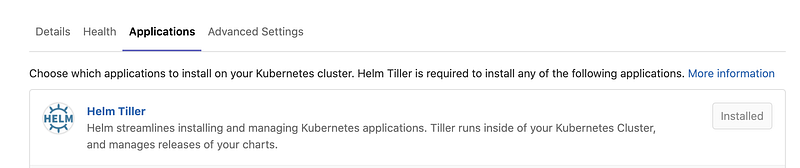
After, you must install the gitlab runner at the same page:

Now we have everything integrated. To be sure it is working we can add the .gitlab-ci.yml file at the root of your folder with the deploy configuration such as:
services:
  - name: docker:dind
    entrypoint: ["env", "-u", "DOCKER_HOST"]
    command: ["dockerd-entrypoint.sh"]
variables:
  DOCKER_HOST: tcp://docker:2375/
  DOCKER_DRIVER: overlay2
  DOCKER_TLS_CERTDIR: ""
  K8S_STABLE_VERSION_URL: https://storage.googleapis.com/kubernetes-release/release/v1.15.11/bin/linux/amd64/kubectl

stages:
  - build
  - deploy

cache:
  paths:
    - node_modules/

build-master:
  stage: build
  script:
    - docker login -u "$CI_REGISTRY_USER" -p "$CI_REGISTRY_PASSWORD" $CI_REGISTRY
    - docker build --pull -t $CI_REGISTRY_IMAGE:staging_$CI_COMMIT_SHA .
    - docker push $CI_REGISTRY_IMAGE:staging_$CI_COMMIT_SHA
  only:
    - master

deploy_staging:
  stage: deploy
  environment:
    name: staging
  image: alpine
  script:
    - apk add --no-cache curl
    - curl -LO $K8S_STABLE_VERSION_URL
    - chmod +x ./kubectl
    - mv ./kubectl /usr/local/bin/kubectl
    - mkdir ~/.kube
    - cp $KUBECONFIG ~/.kube/config
    - kubectl cluster-info
  only:
    - master
In this particular file we are building with docker at the project but feel free to change for your current project needs. At the deploy_staging that will run at the master branch, you can check if everything is working. After kubectl cluster-info you should get no errors. If that will run without errors, then you can add your deployment file and apply there.
Optional: If you got no errors so far, congratulations! I will add an extra step step here that regards builded containers in gitlab registry to be working on your Kubernetes as well. You might face this issue like I did.
Please create a token at your kubernetes with the gitlab credentials that you have:
kubectl create secret docker-registry regcred --docker-server=registry.gitlab.com --docker-username=YOUR_USER_NAME_GOES_HERE --docker-password=YOUR_PASSWORD_HEREChange YOUR_USER_NAME_GOES_HERE to your gitlab username credentials, then change YOUR_PASSWORD_HERE to your gitlab password. Also regcred is the name you give to it, so you can change also if you want. That will create the secret at your default namespace. You can either copy it in your dashboard to another namespace or add namespace=YOUR_NAMESPACE. I won’t go further on explanation here to not avoid the purpose of this article.
Now in your deployment spec you can add the following:
spec:
  imagePullSecrets:
    - name: regcred
You should be able to pull images from your Gitlab repository on your Azure kubernetes cluster.
In this article I showed one of several ways to integrate a kubernetes cluster into Gitlab to use with continuous integration (CI). I avoided the deployment topic because it would generate so much extra content that could go for a new article just to write about it.
This article was also a resume of a lot of mistakes that I commit some days ago meanwhile I switch from working on AWS to use Azure to a new client. I used all the steps to create a fresh cluster and integration and it worked as expected. If you got any issues and/or suggestions please let me know at the comments.
Want to learn how to build a REST API with TypeScript? Start here:
More content at plainenglish.io