
Azure: How to switch domains for environments via ASMC
If you’re tired of azurewebsites.net domains, make your own in a few clicks.

This article is going to explain how to go about switching domain names for your existing apps. It mainly covers these topics:
CNAME records, custom domains, certificates, SSL bindings, CORS updates.
Let’s say you don’t want to use azurewebsites.net domain anymore for your app and you want to switch from *.azurewebsites.net to *.yourdomain.com. Azure recently came out with App Service Managed Certificates (ASMC) feature which allows you to add a custom domain for your app service in a few clicks.
Follow the below step by step guide to complete the domain switch.
Note: This feature is in preview mode currently.
STEP 1: Create CNAME records for the new domain
- In the portal, Go to DNS Zones and select the zone that you want your app to be hosted on
Example: test.yourdomain.com domain for an app service you want to eventually call xyz.test.yourdomain.com
- Click on + Record Set to add a CNAME record (CNAME = Alias)
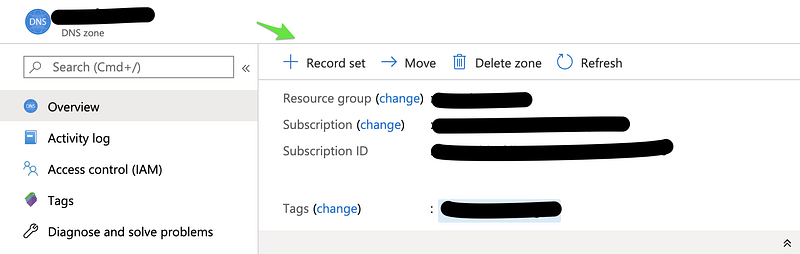
- Choose the new alias/name you want for you app and Azure will check if those domains are available and verified, hence wait for the green tick to appear.

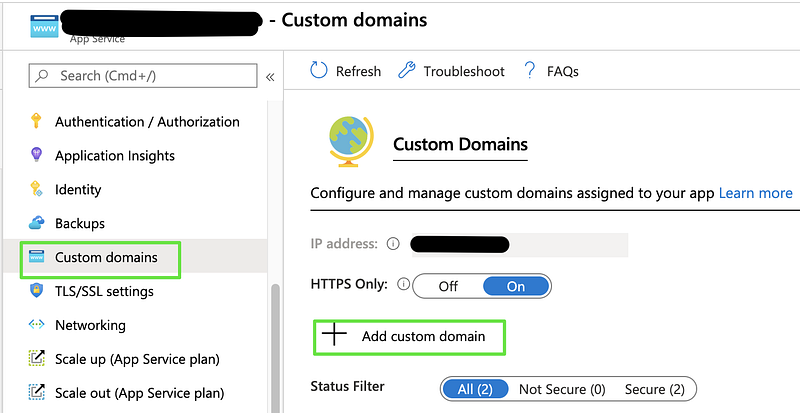
STEP 2: Add custom domain for the app service
- Go to the App Service > Custom domains
- Add a custom domain with the same name as the CNAME record you created in Step 1 —
xyz.test.yourdomain.com.
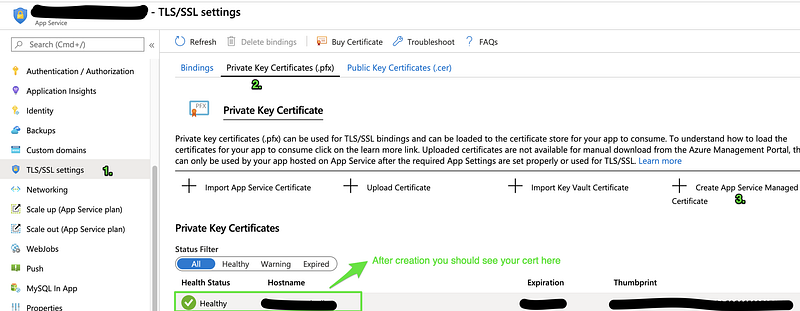
STEP 3: Create SSL certificate via App Service Managed Certificates (ASMC)
- Go to App Service > TLS/SSL settings
- Click on Private Key Certificates
- Click on + Create App Service Managed Certificate option & create a new certificate for the custom domain —
xyz.test.yourdomain.com
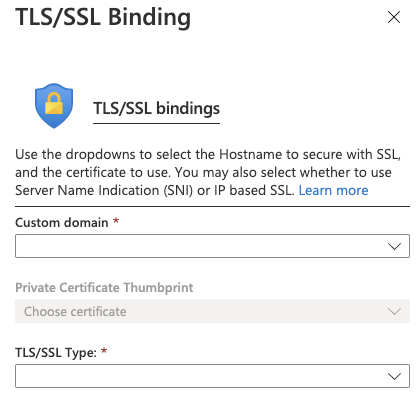
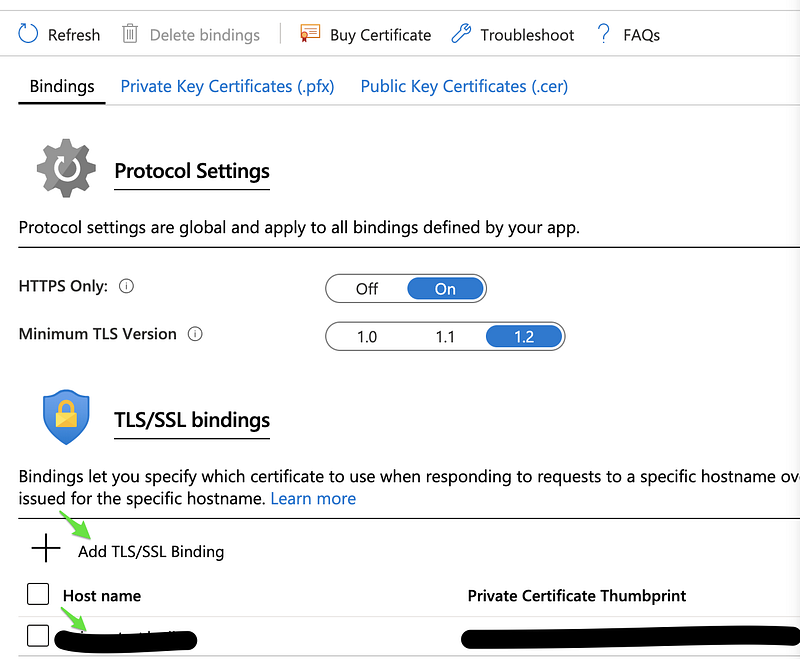
STEP 4: Bind the new certificate with your domain
- Go to App Service > TLS/SSL settings
- Click on Bindings > Add TLS/SSL Binding and bind the custom domain with the new certificate you just created.
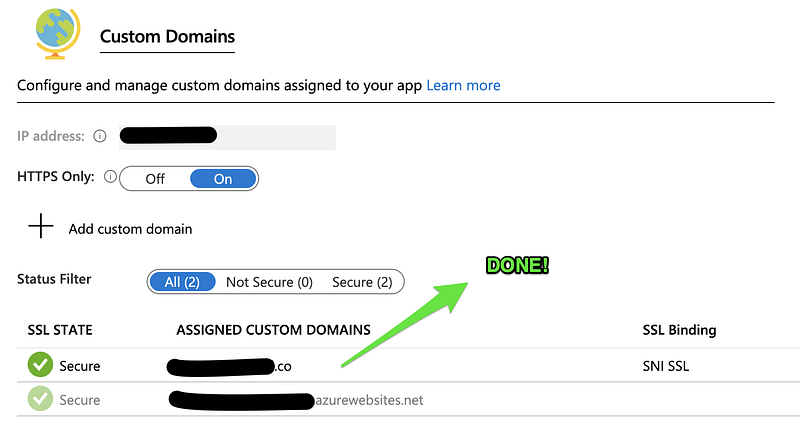
STEP 5: Ready!
- The new domain
xyz.test.yourdomain.comshould now be live! You should be seeing something similar under custom domains page.
STEP 6: Update all references for this domain
In order to get the new environment (domain) fully up and running, update the app service references at the below places to point to the new domain xyz.test.yourdomain.com.
- Update OAuth URL’s if any — Google, Microsoft or any 3rd party OAuth
- Update Application setting references — Point to the new domain url because apps communicate with each other via host name & urls.
- Update any references to the domain name in the application code
FAQ’s
1. Prevent CORS errors!
Once all steps are completed, we need to prevent those frustrating CORS errors. You need to update CORS settings for your app, if any.
2. CORS errors, still?
Further, if you still see CORS errors in the browser remember those are not always related to CORS and you need to confirm if the app service itself is up & running via POSTMAN or Application Insights.
3. Advantages
ASMC is a free service which makes sure your certificates are valid and auto-renew after expiry. This reduces manual efforts to renew certificates and prevents us the headache of setting up Let’s Encrypt for automating this.
4. Limitations
It doesn’t support — Wildcard certs, naked domains or A records.
5. Automate?
I was pretty disappointed with the fact that we cannot yet automate this with Azure CLI or PowerShell scripts.
As ASMC is still in preview mode their CLI commands are still work in progress.
Final Thoughts
Once Azure allows us to automate this whole process, automated environment provisioning will be possible!
Share or 👏 if you found this article helpful.