
AWS — Deploying Angular With NodeJS App On Elastic Beanstalk
A step by step guide with an example project

AWS provides more than 100 services and it’s very important to know which service you should select for your needs. If you want to deploy an application quickly without any worry about the underlying infrastructure, AWS Elastic Beanstalk is the answer. Elastic Beanstalk reduces management complexity without restricting choice or control. You simply upload your application, and Elastic Beanstalk automatically handles the details of capacity provisioning, load balancing, scaling, and application health monitoring.
In this post, we are going to deploy Angular application with nodejs environment. There are other technologies or environments that AWS supports such as Go, Java, NodeJS, .Net, etc.
- Introduction
- Example Project
- Prerequisites
- Build the Project
- Deploy on Elastic Beanstalk
- Debugging and Update the Deployment
- Route 53
- Cleaning Up
- Things To Consider
- Summary
- Conclusion
Introduction
If you want to deploy an application without worrying about the underlying infrastructure, Elastic Beanstalk is the solution. When you build the app and upload the app in the form of zip or war, Elastic Beanstalk would take care of provisioning underlying infrastructure such as a fleet of EC2 instances, auto calling groups, monitoring, etc.
The infrastructure provisioned by Elastic Beanstalk depends on the technology chosen while uploading your app. For example, we are going to deploy the Angular with NodeJS backend on Elastic Beanstalk so we need to choose the NodeJS environment. If you want to know more about Elastic Beanstalk here is the link.
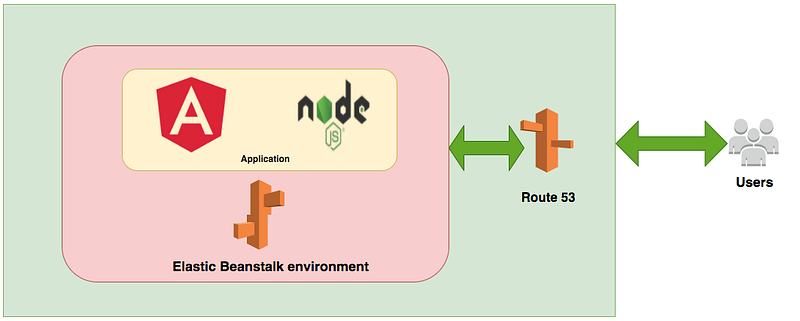
As you see in the above figure, we build our project and create a zip. Once we build the zip, we upload that zip on the Elastic Beanstalk environment. If you have a custom domain you can point that to the elastic beanstalk URL so that your app can be accessible to the public through that URL.
Example Project
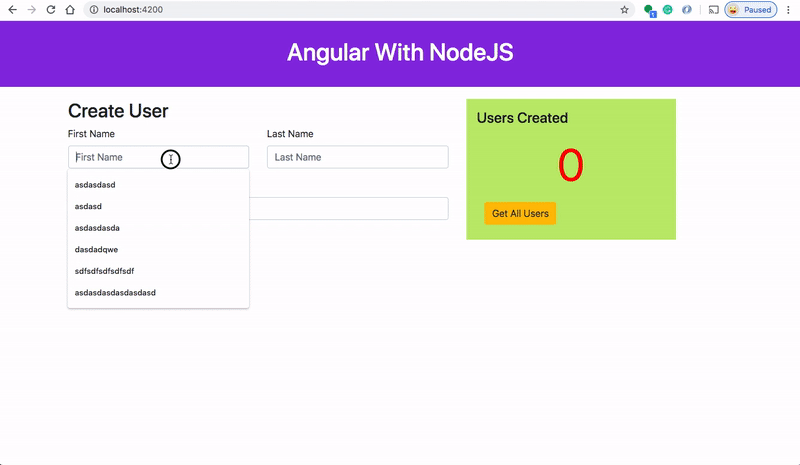
This is a simple project which demonstrates developing and running Angular application with NodeJS. We have a simple app in which we can add users, count, and display them at the side, and retrieve them whenever you want.
If you want to practice your own here is a Github link to this project. You can clone it and run it on your machine as well.
// clone the project
git clone https://github.com/bbachi/angular-nodejs-eb.git
// install Angular dependencies and start
cd my-app
npm install
npm start// install server side dependencies and start
npm install
npm run devPrerequisites
- If you are new to the Angular please go through the below link on how to develop and build the Angular project with NodeJS backend.
- AWS account setup: AWS offers a free tier for one year here is the link to set it up.
- Once you set it up you have a root account. It's not a best practice to use your root account to do any tasks instead you should create an IAM group that has permissions to deploy on Elastic Beanstalk and add a user to it and log in with that user.
- Gulp for building the project and zip it.
Build the Project
Once you clone the above project and run it on your local machine, its time to build the project and get it ready for the deployment in the Elastic Beanstalk environment. We are using gulp to automate building the project and these are the following steps we should automate with a gulp.
- Clean the directory if exists
- Create a directory if not exists to put all the production build
- Build Angular code with ng build
- Place the Angular code into production directory
- Build the server code with the webpack
- Place the server code into production directory
- Finally, zip all the code.
Here is the file gulpfile.js in which we created tasks for all the above points.
All we need to run this command gulp at the root of the application and it creates the final zip file under the prod-build directory.

Deploy on Elastic Beanstalk
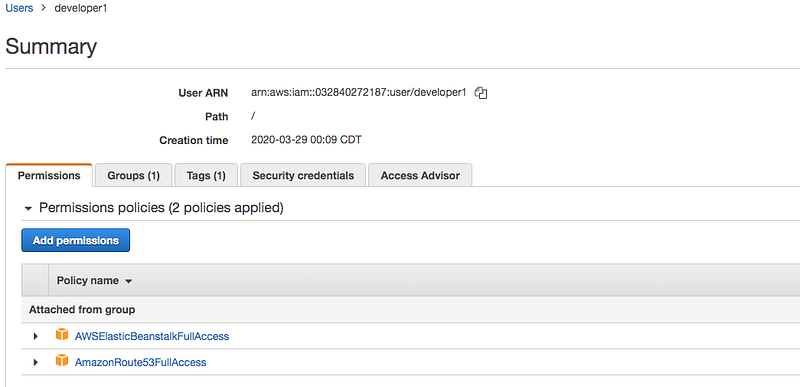
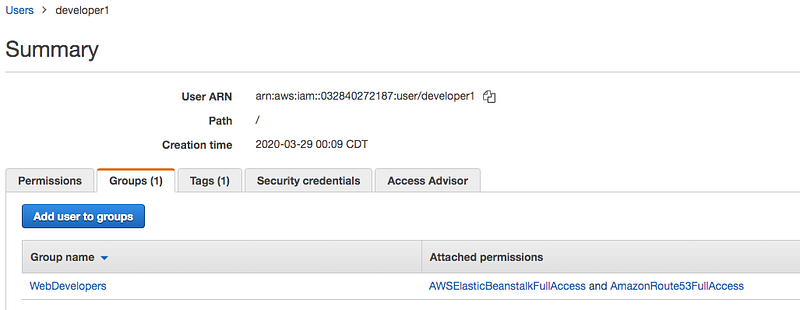
Once you have the zip file ready it’s time to deploy this zip file to Elastic Beanstalk environment. First, we need to create an IAM user which has access and permissions to deploy on an Elastic Beanstalk environment.
I created an IAM user called developer1 and added to the group WebDevelopers which has permission AWSElasticBeanstalkFullAccess and AmazonRoute53FullAccess.
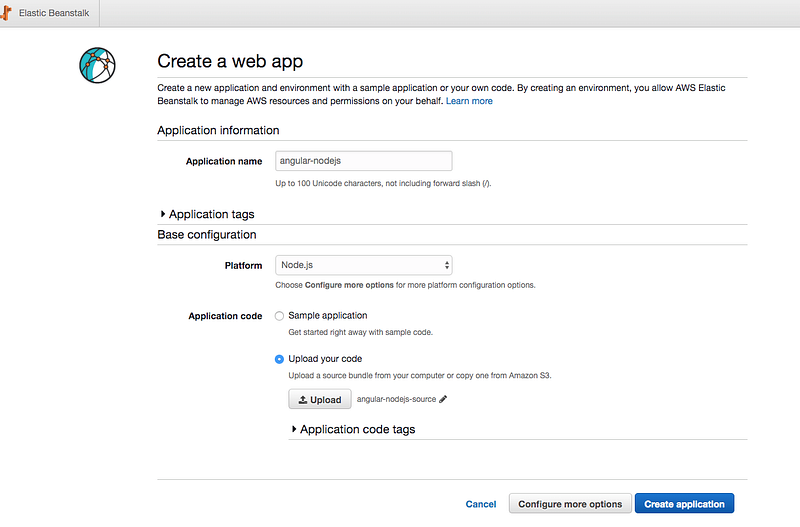
Let’s login to AWS console with that IAM user and you can go to Elastic Beanstalk and create an application. Since it’s nodejs project we have to choose a platform as Node.js and upload the zip archive that we have created in the above step.
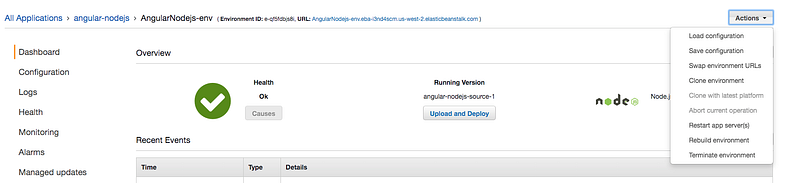
Once you click on the create application it will take a few minutes to set up the environment. Once it is deployed and if everything goes well you can see the following screen.
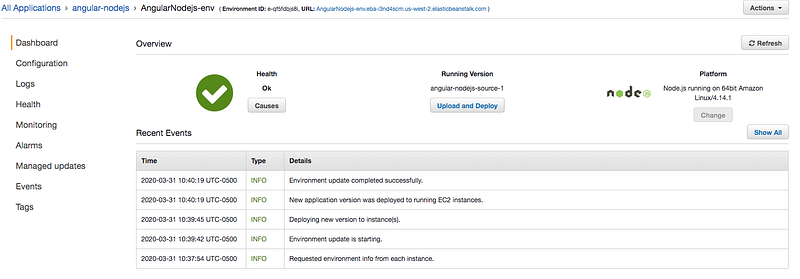
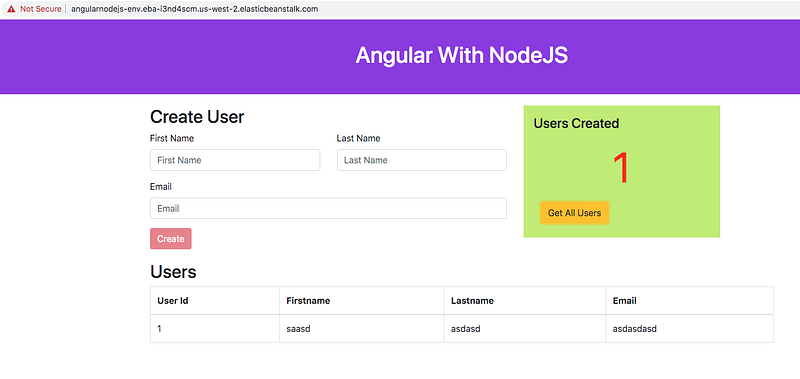
You can see the URL for this application on the top. Just copy that URL and hit it in the browser and you can see your app running on AWS.
Debugging and Update the Deployment
Debugging
When you deploy the application sometimes it might go wrong. Let’s how we can debug the deployment. First, if something goes wrong you can see the deployment environment as red.
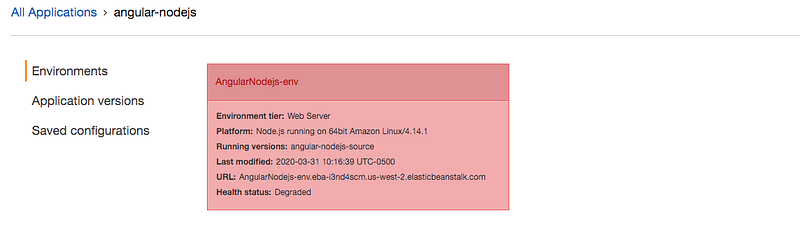
If you can click on that you will be redirected to a details page with the status Degraded. We can see what is the error here it is actually missing package.json in the zip archive.
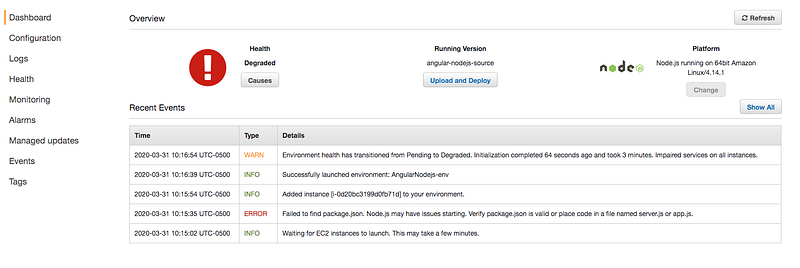
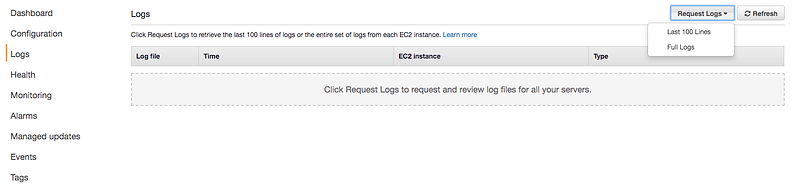
In this scenario, we caught the error on the details page itself. But, this is not the case all the time. We can request logs to go into more details about the application.
Update the deployment
Updating the deployment is very easy all you need to do is upload the new zip file with the version label so that you can go back to the versions later. For example, if something goes wrong and not working properly with the latest deployment you can always go back to a specific version.
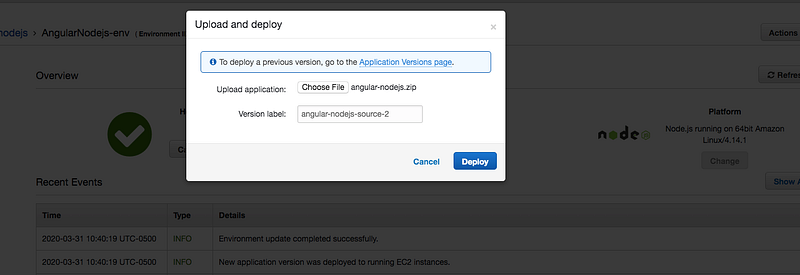
You can actually see the versions here and you can select and deploy a specific version.

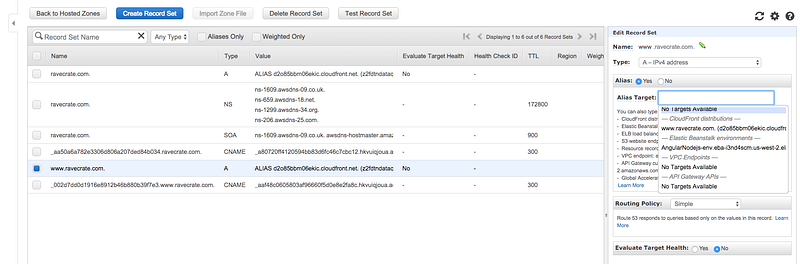
Route 53
Amazon Route 53 is a highly available and scalable cloud Domain Name System (DNS) web service. You can explore more about this here.
If you have a domain you can map your elastic beanstalk environment to the recordset. For example, I have a domain already let's map our environment like below.
Cleaning Up
You should clean up all the resources if you don't want to incur any charges. When it comes to Elastic Beanstalk all you need to do is terminate the environment as you see in the following figure. It will take a few minutes to terminate.
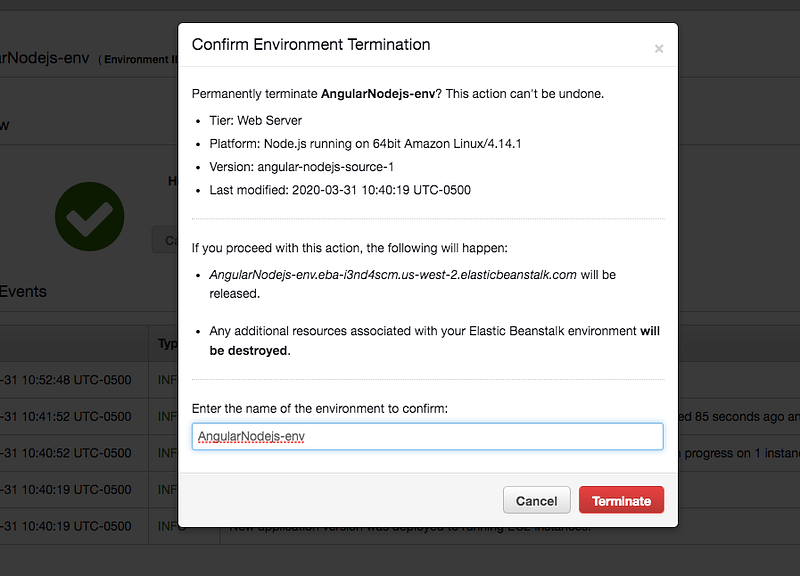
Once it is terminated it will remain for an hour.

Things To Consider
I just want to mention some points here which anybody can encounter these and saves you a lot of time. You can always change these settings in the configuration section.
Zipping
When you are zipping all the files make sure you zip the files, not the entire folder. We tend to right-click on the folder and compress it but you should select all the files inside that folder and compress it.
Package.json
Make sure you have a package.json file in that archive. As soon as you upload the zip file elastic beanstalk unzips it and looks for the package.json to install any dependencies.
start command in the package.json
Make sure you have a start command in the package.json and it is pointing to the right file.
Express port
On the NodeJS server make sure you are listening on the port 8080. You can configure this port by using the PORT environment variable in the application code like this process.env.PORT. Check out this link for Configuring the proxy server
Summary
- If you want to deploy an application quickly without any worry about the underlying infrastructure, AWS Elastic Beanstalk is the answer.
- Elastic Beanstalk would take care of provisioning underlying infrastructures such as a fleet of EC2 instances, auto calling groups, monitoring, etc. when you upload the zip or war file.
- Once you create an AWS account, do not use root credentials. It’s always best practice to create an IAM group with limited permissions and add a user to that group.
- Use gulp to build the project and create a zip archive for the upload.
- Choose an appropriate platform while uploading your zip archive. It will take a few minutes to set up the Elastic Beanstalk environment.
- You can debug the environment if something goes wrong on the details page or you can request logs.
- You can update and deploy the environment with version labels. You can deploy any version by selecting that specific label.
- Cleaning up the resources is very easy all you need is to terminate the deployment.
- You need to have package.json in the zip archive and make sure the nodeJS server listens on the port 8080 or you can configure the port using environment variable PORT in the application code.
Conclusion
Elastic Beanstalk is the right solution if you want to deploy web apps quickly without worrying about any underlying infrastructure.


