
AWS CodePipeline for Amazon ECS, Part 2: A Blue/Green Deployment Type
In this tutorial, I would like to explain to you how to create an AWS CodePipeline for ECS with a Blue/green deployment type.
This is the second part of the tutorial on AWS CodePipeline for ECS. I highly recommend that you read the first part here. In part 2 I focus on how to create the CodePipeline. Here I assume that you already have an ECS cluster, an Elastic Load Balancer with at least one Target Group, an ECR repository with a Docker image, a task definition that uses this image, and an AWS CodeBuild project.
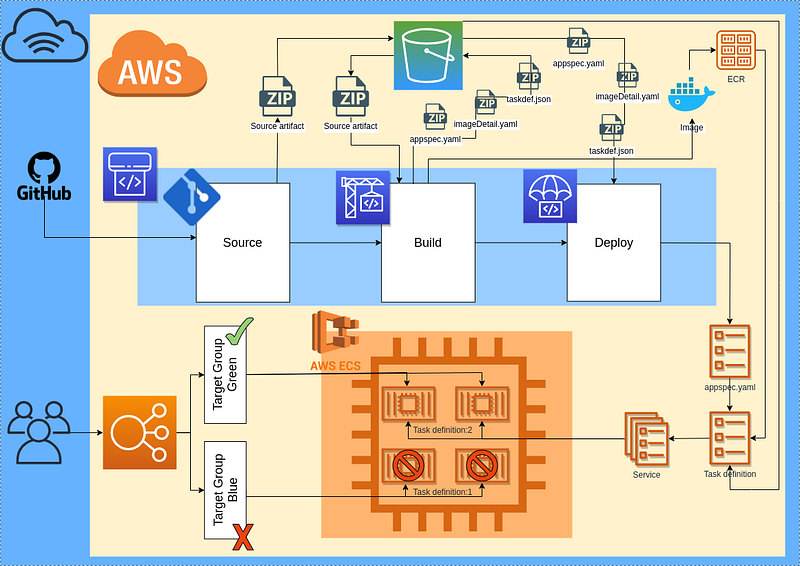
The diagram below shows how the AWS CodePipeline integrates with the AWS ECS with a blue/green deployment type.
1. Source code
The source code for this example you can find here. For CodePipeline to work properly a root directory of a source code of an application has to have 3 files: appspec.yaml, buildspec.yaml and taskdef.json.
The appspec.yaml is very simple and should look like the example below. Just fill up ContainerName and ContainerPort. Both of these configurations you can find in a task definition.
The buildspec.yaml file has instructions on how to build the app (it depends on the programming language) and the instructions on building a Docker image and uploading it to AWS ECR.
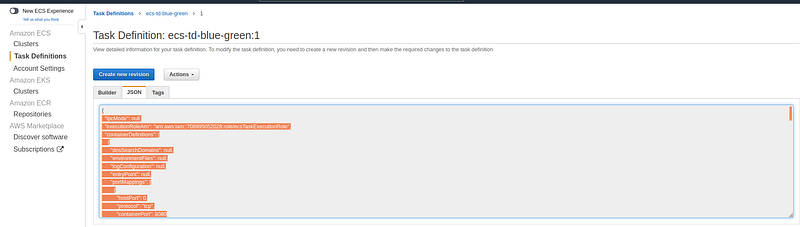
Create taskdef.json in a root directory of an application, go to Amazon ECS -> Task Definitions select Task definition on the JSON tab copy content, and past it in the file. In the file put a value of container definitions.image as “
2. Create service role for code deploy
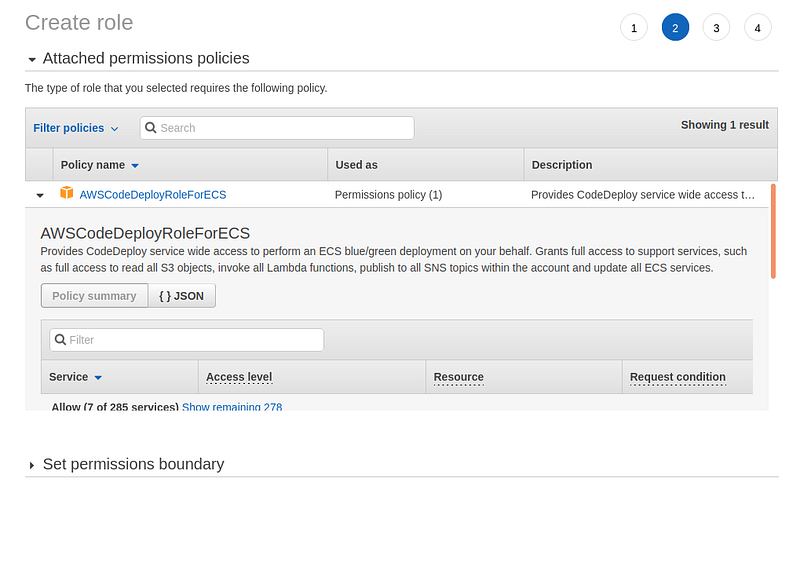
For the ECS service that uses Blue/green deployment, we have to create a service role. The ECS service uses it to make API requests to authorized AWS services. Go to IAM -> Role -> Create role. Select type of trusted entity as AWS service, choose service name as CodeDeploy and press Next: Permission. On the next screen attach Permission policy AWSCodeDeployRoleForECS. Just for the demonstration, I've used an AWS-managed policy, but it is always good to create your own with specific permissions.
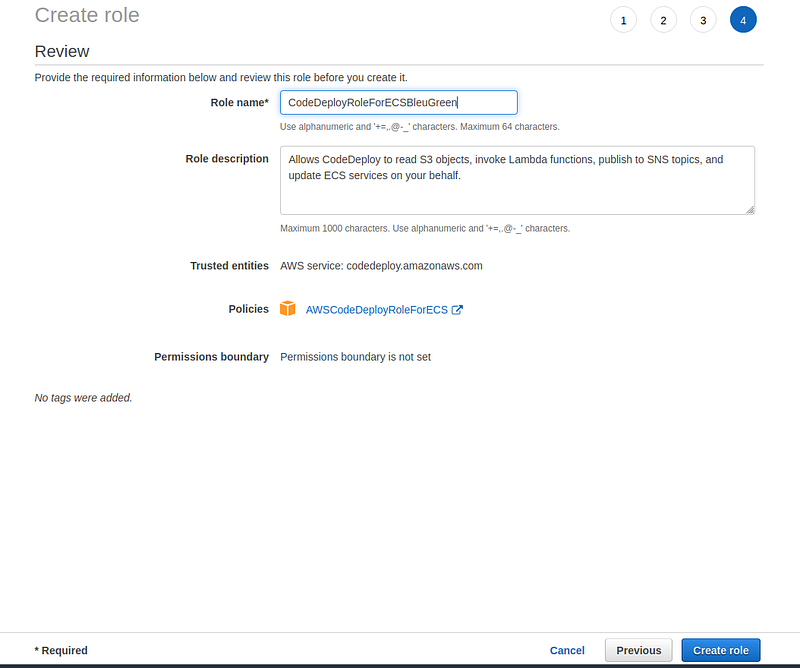
Fill up the Role name and the Role description and press Create role.
3. Create service
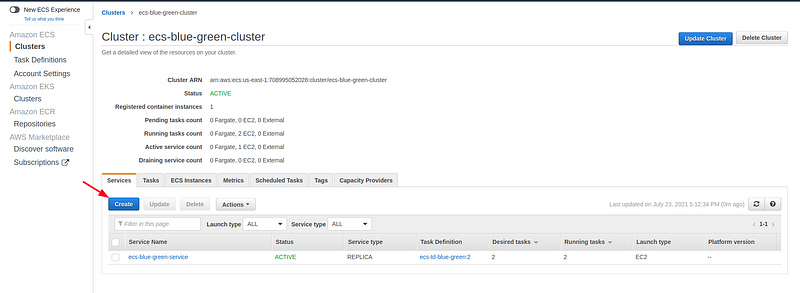
On the cluster level on the Service tab press Create.
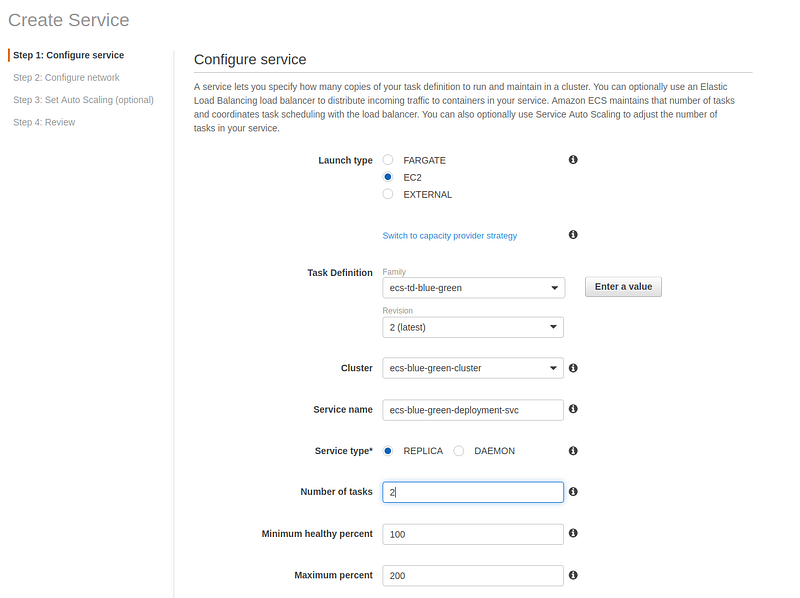
Select Launch type as EC2, select task definition, fill-up a service name, select service type as Replica, a number of tasks put at least 1.
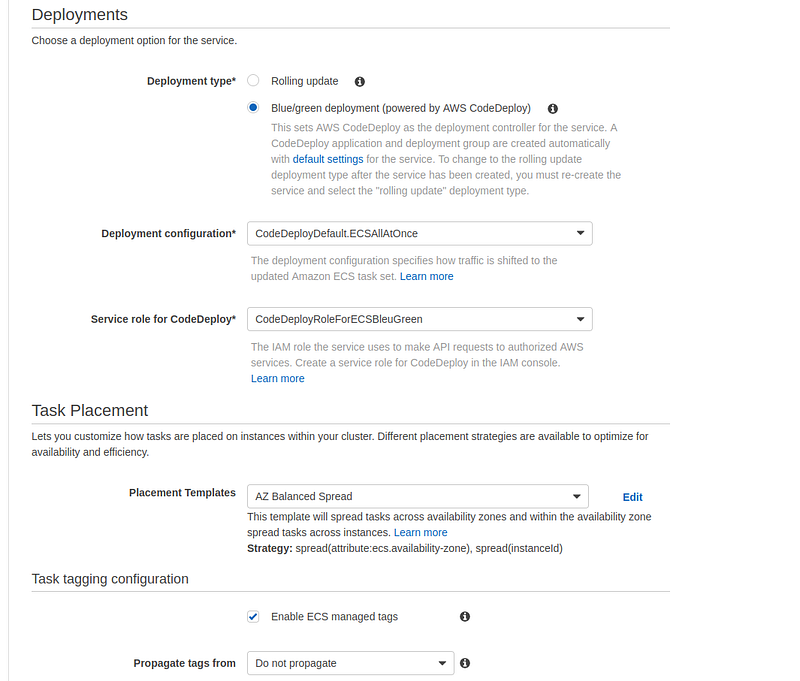
Then select Deployment type as Blue/green deployment, select deployment configuration. More about deployment configurations can be read here. For a service role for CodePipeline select the role created in step 1 of this tutorial. The rest of the configuration leave as is, and press Next.
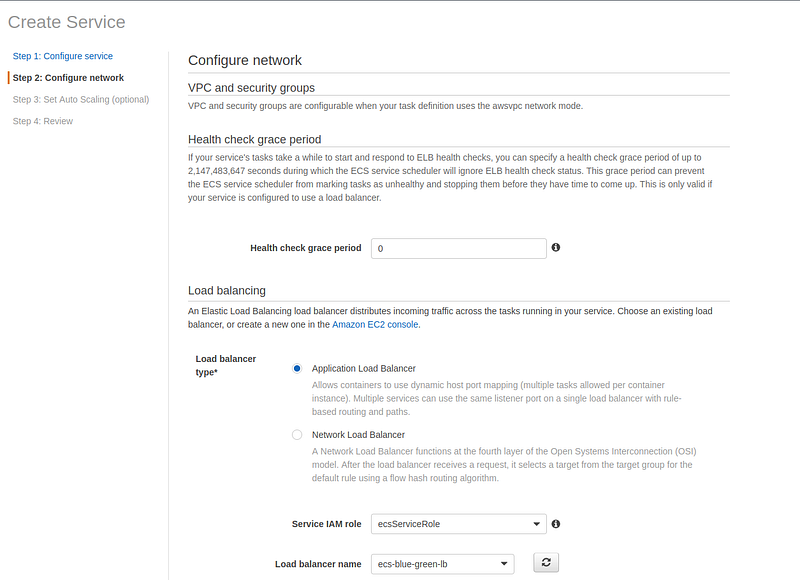
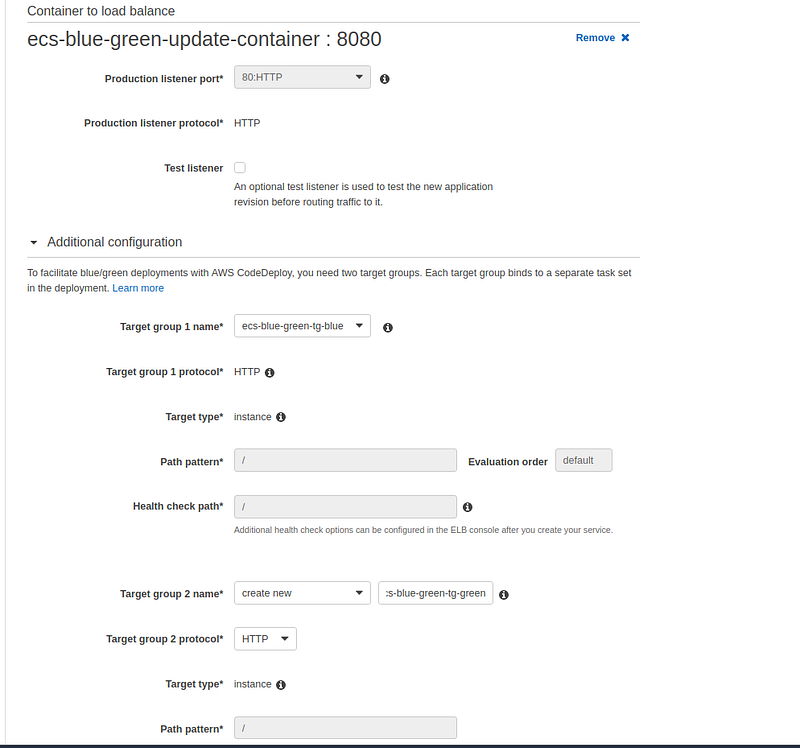
Select Load balancer type as the Application load balancer. Choose Service IAM role as ecsServiceRole and select the name of a load balancer. Just make sure your load balancer is in the same VPC as your cluster and a security group of a cluster instance allows traffic from the load balancer, otherwise, it won't work.
Press Add a container and select the target group of the load balancer. Then select create a new target group and enter the name. The rest of the configuration leave as is. Blue/green deployment needs 2 target groups. Press Next to go to a Review page and press Create service.
After a couple of seconds, your service will be created.
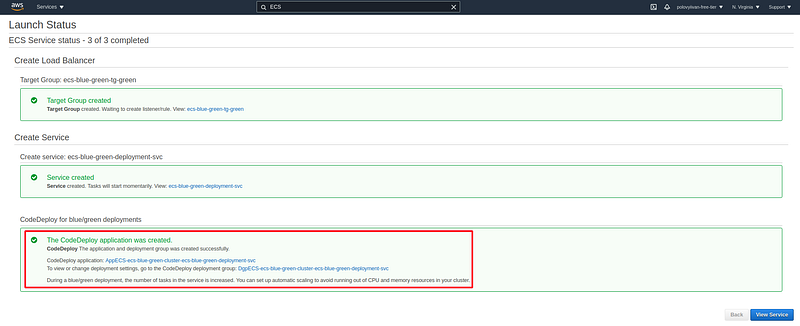
The ECS service creation wizard together with the service creates the CodeDeploy application and deployment group which we will use later on for our CodePipeline.
4. Create CodePipeline
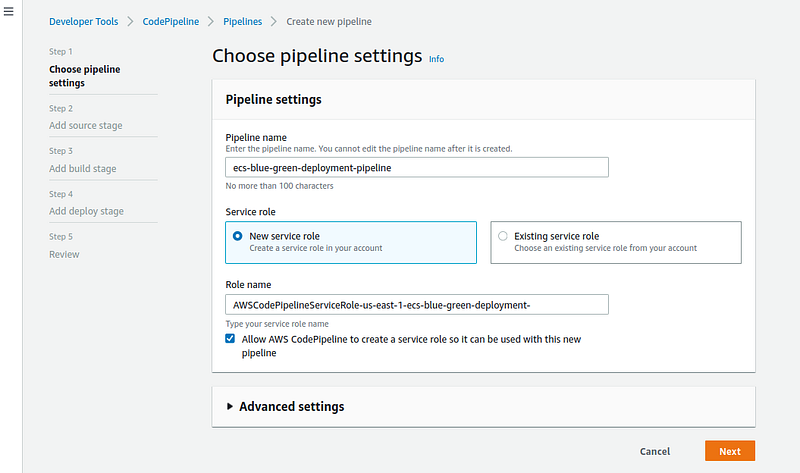
Finally, we will create the CodePipeline. Go to Developer tools -> CodePipeline -> Pipelines and press Create pipeline. Fill up the name, the rest of the configurations leave as is.
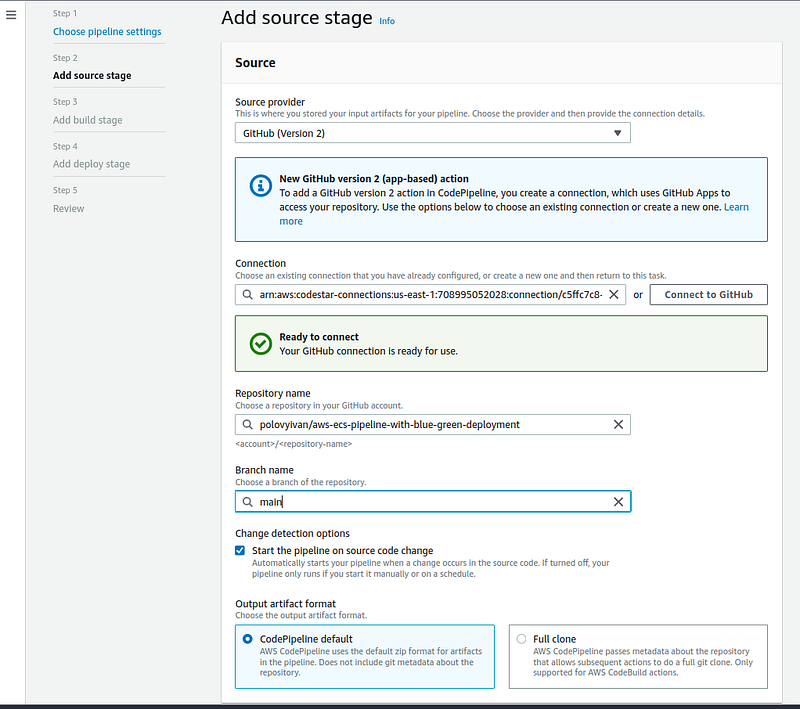
Add the source.
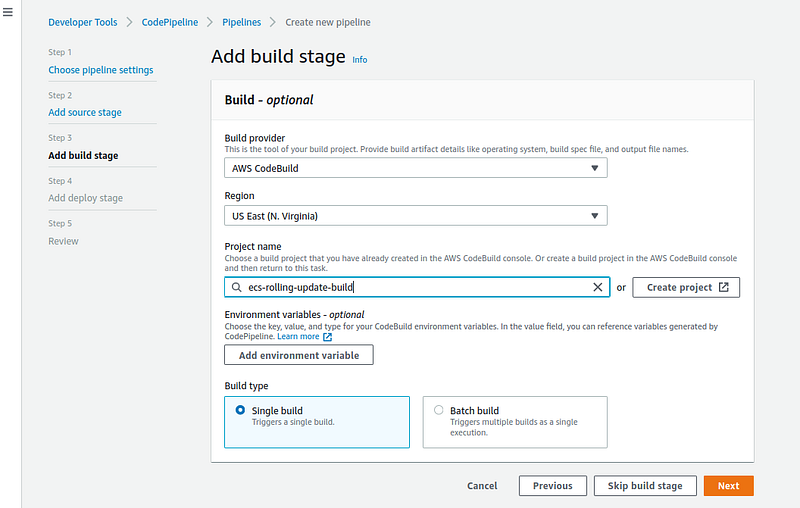
On the Build Stage choose a project name or create a new one, I will reuse a project created in part 1 of this tutorial. Just make sure your CodeBuild project service role has all the necessary permission.
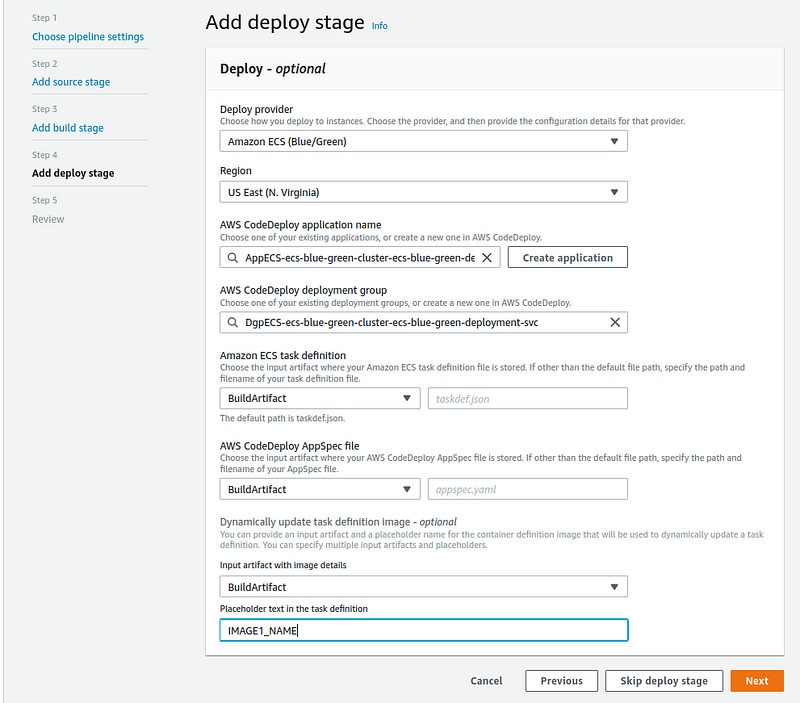
On deploy stage select provider as Amazone ECS (Blue/Green), your region, application, and group select created previously by ECS service creation wizard. For ECS task definition and AppSpec file select BuildArtifact and leave the file name in the blank. If in the root directory of your app those files are named different than taskdef.json and appspec.yaml, then you have to specify their names. For input artifact image details select BuildArtifact and print “<IMAGE1_NAME>”. The one that we defined in our taskdef.json file in step 1 of this tutorial. Press Next.
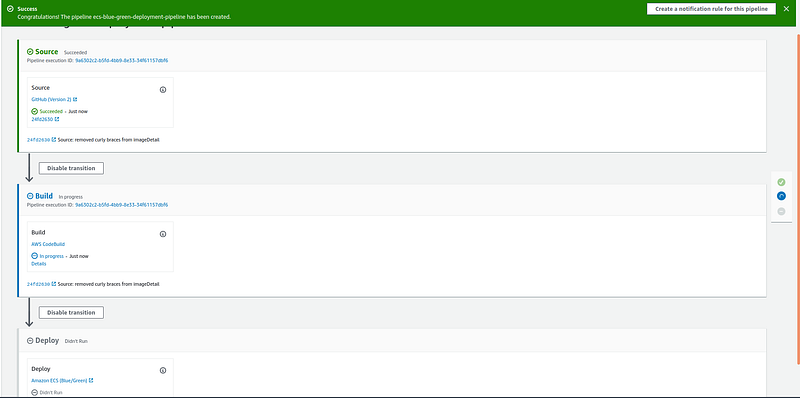
Review all the configurations of a pipeline and press Create pipeline. After a little while, it will start to execute.
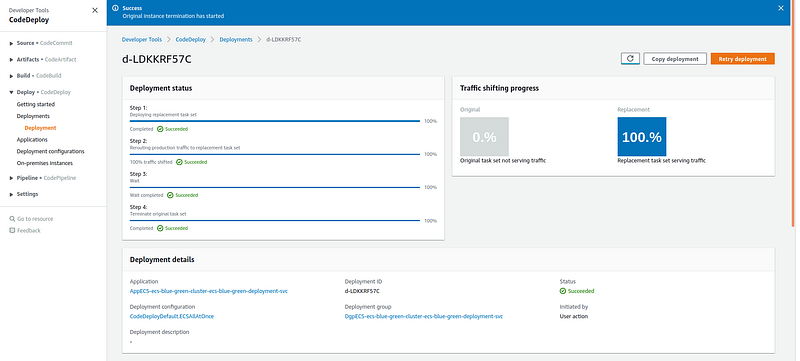
You can follow a deployment process on a deployment page.
Check the quick demo video showing the CodePipeline in action.
Summary:
In this tutorial, I showed you how to create AWS CodePipeline for ECS with a Blue/green deployment strategy. The CodePipeline allows you automatically without manual interaction build, test, and deploy your code every time there is a code change. Personally, I prefer the Blue/green type of deployment over a rolling deployment for production because it enables verification of a new deployment before sending any traffic to it.
Thank you for reading! If you have any questions or suggestions, please feel free to write me on my LinkedIn account.
More content at plainenglish.io


