
Automator on Mac, Downloads folder housekeeping
If you are not a paid Medium reader, you may access this article for free via Friends Link here.
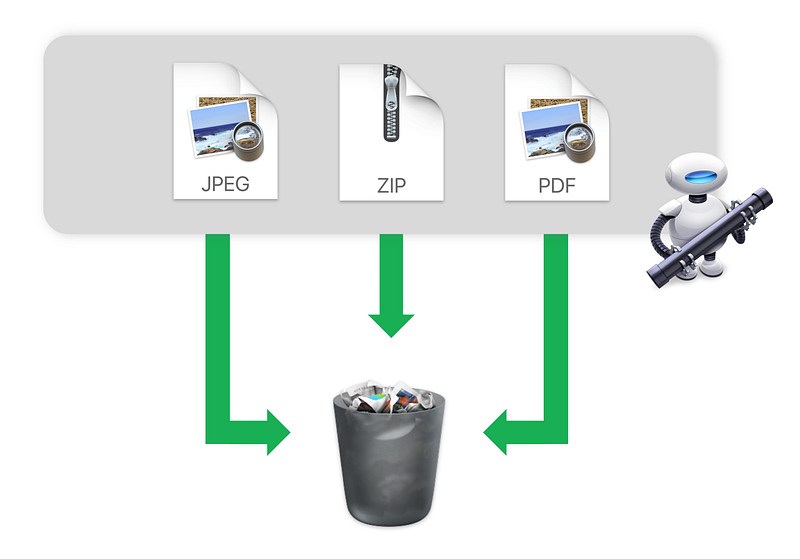
macOS filled with many productive features but they are less known by the public. Starting with my experience, I would like to introduce you a powerful built-in macOS application. I am an online wanderer. I find myself pulling a lot of files from the Internet. Or, I have other mass of files Air-Dropped from other iOS devices. These backlogs keep for a while until I realize they should remove from the Downloads folder. As a minimalist, piles of used stuff irritated me and I need to figure out better file management. “It is any way can I make such housekeeping less difficult and less compromised?
P.S.:The article is published on May 1, which is a public holiday in Hong Kong. Since there’s no human working this day, I need a bot to do it for me. LOL😂
The Chinese version is also available here. 本文另附中文版本。
Solution: Automator
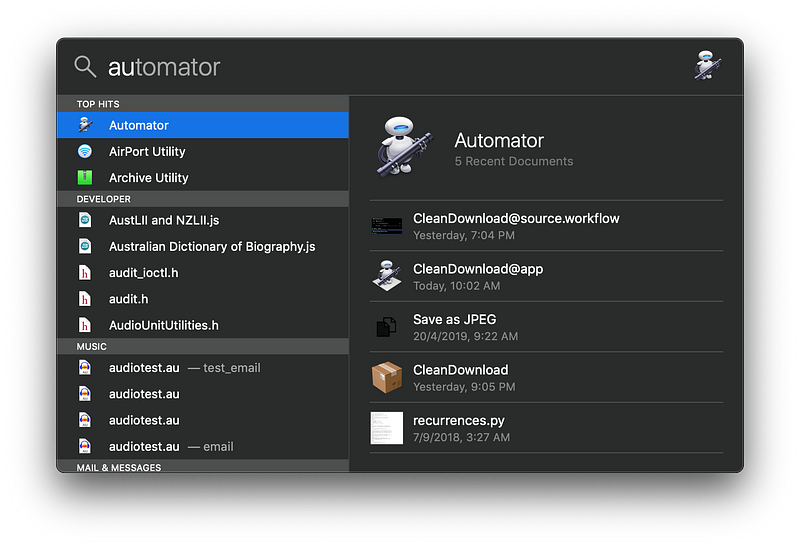
Apple’s Automator (Official manual) can help with such recurrent tasks for us, alike to its sibling on iOS, Siri Shortcuts app (Official User Guide). On macOS, I may call the Automator via Spotlight (can be found from the magnifying glass on the Top right corner/holding ⌘+Space).
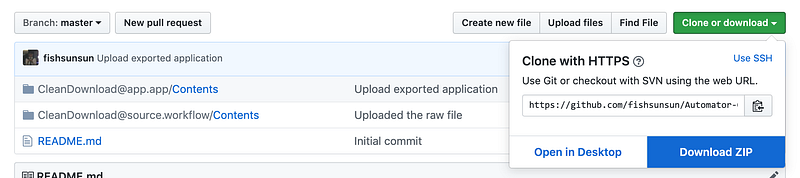
At the end of this article, you may find the GitHub download link to source workflow code and wrapped app.
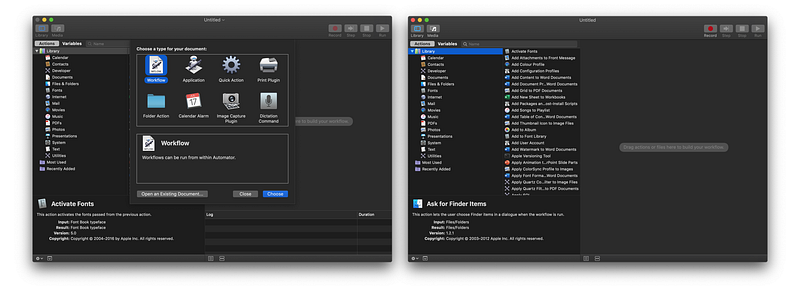
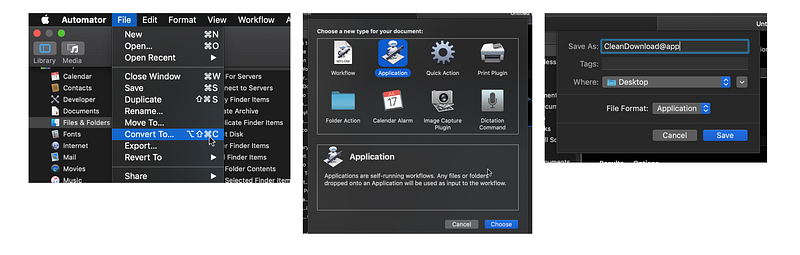
Now, we are confronting at the main interface of Automator. Hit the Workflow and Choose to create a new command for Automator to understand. Then, you may see the two-column spilled. Library on the left lists all the Actions we can pick from (ingredients) while the right column is where we arrange the order of the selected actions (procedures).
Drag and Drop the workflow
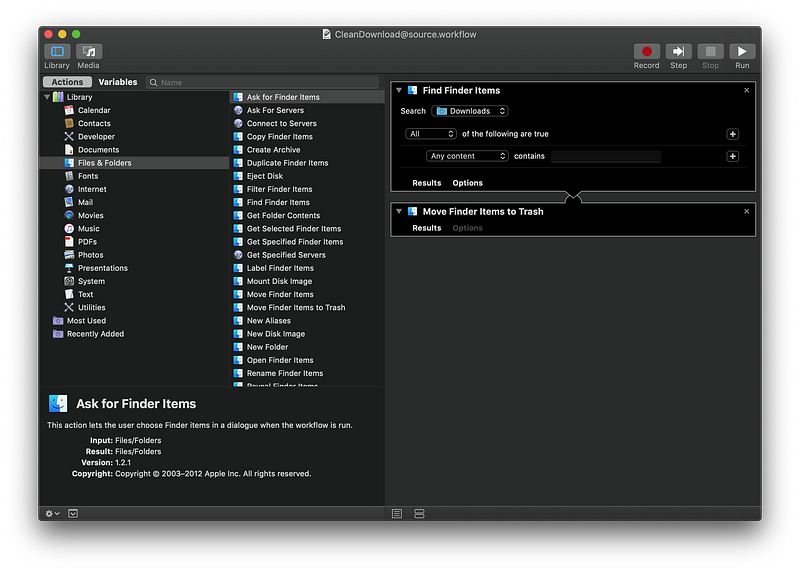
To save our trouble on the virtual housework, we may cite the “Find Finder Items” under “Files & Folders”. This statement dictates our Automator the place to do its job. Once informed, we can supply the “Move Finder Items to Trash” as its name suggested.
Next, we can “Run” (on the top right corner) this set of orders.
However, is it clumsy to open Automator and run this command script? It seems defeating our productive purpose. Well, there’s one more step before completion. We should convert this workflow into an Application. From the menu bar, select File > Convert To…, and opt for “Application”. Then, Command+S to finish the conversion.
Please note that the conversion is irreversible. A recommended approach is to create an archive for this original Workflow file somewhere else for future reuse, amendment or expansion.
Place it on the Dock with a better icon
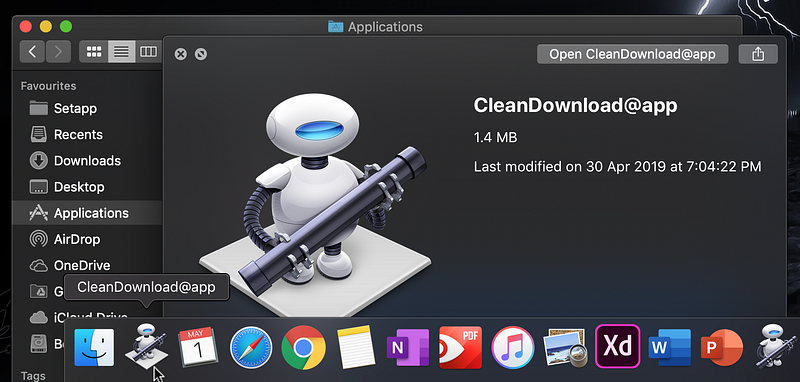
Converted into an app, we can now install our mini-app by simply moving it into the Applications folder and drag it an alias onto the dock. The bot is ready for our service at the moment. Still, some reader may wonder, “Any way can we change the app icon?”
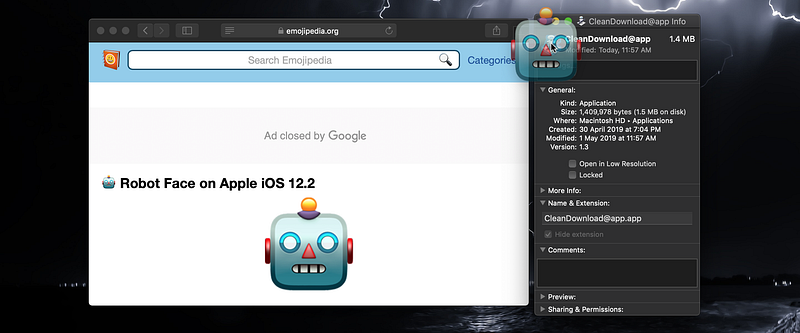
“Get Info” by right-clicking the app icon or pressing Command+I after selected it to view the app information. We may copy and paste new images on the app icon. Or, representing the app by Emoji is what I recommended. Below is showing how I drag an Emoji picture as a new face for the app. Every time we consumed the downloaded files, the Bot can swipe the idle files when we employed it.

Remixing from this recipe
The bot created to correct my hoarding behaviour. Moreover, the above workflow can be modified into a specific kind of files, screenshot for instance (Substitute Any Content as Kind: Picture. I keep all screenshot in the Downloads). It is even possible to request some third-party apps, like Microsoft Office as you can see, to conquer a more complicated task at once.
Readers who own a MacBook Pro with Touchbar may even place their self-defined workflow on the Touchbar instead of Dock. If you are familiar with Macros in Microsoft Office, you may “Record” your recurrent actions for Automator to model. Others who know programming may integrate some JavaScript within the commands.
Exported application and raw workflow are available on Github!
What do you think? Comment below and Clap for me. Don’t forget to share with friends!
This article is created and designed by curtischanct, @blacktc on Wikipedia, or curtischanct on LinkedIn, @curtischanctpsy on Twitter, @fishsunsun on GitHub or curtischanct on Behance. Copyright: CC-BY 4.0


