

Automate your Power BI reports deployment using Azure DevOps
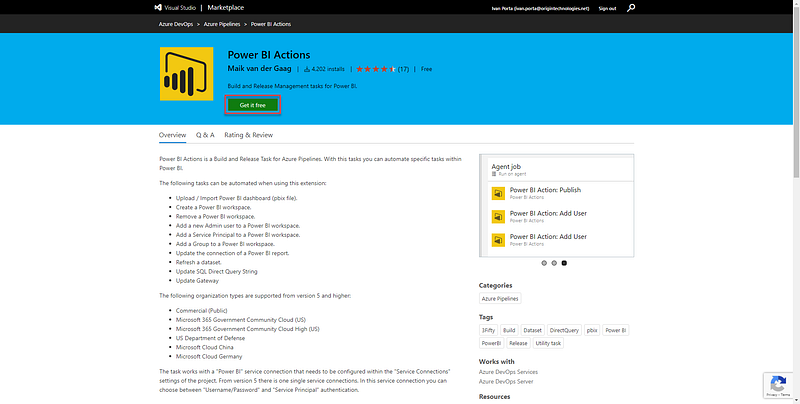
This article will guide you through the implementation of CI/CD pipelines using Azure DevOps. This will enable you to deploy your local report to your Power BI service automatically. To show you how it works, I will use an extension called Power BI Actions, available for free on the Visual Studio marketplace.
Azure Portal
Create a new app registration
To access Power BI service content and APIs, you need to register an application that will authenticate against your Azure Active Directory. To do so, follow these instructions:
- Sign in to the Azure portal.
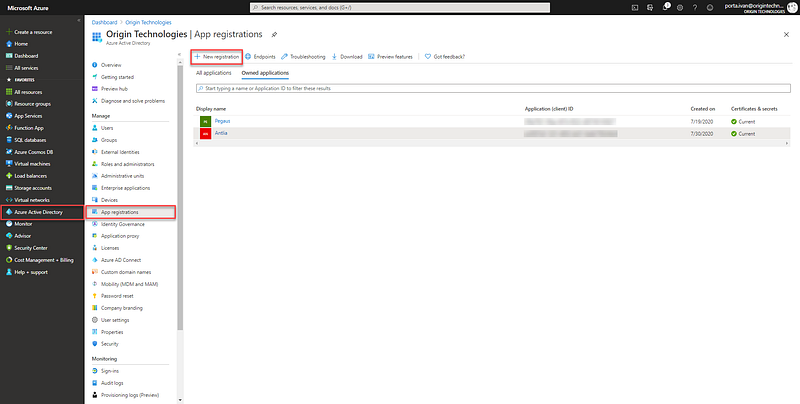
- Select Azure Active Directory and then App Registration.
- Click the New Registration.
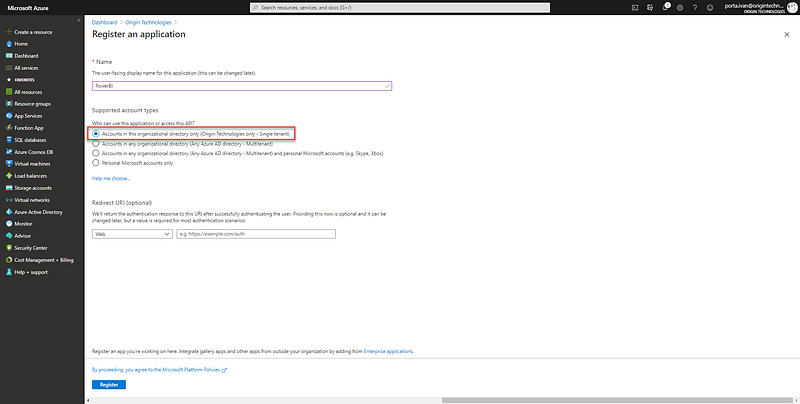
- Provide a Name that describes your application’s purpose, select a supported Account type, and click on Register.
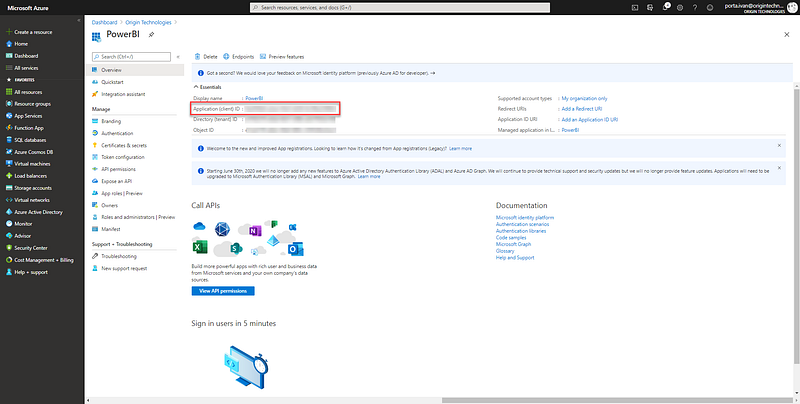
Once the registration is completed, you will be redirected to the app overview page. Copy the application ID’s value as you will need to specify this later in Azure DevOps.
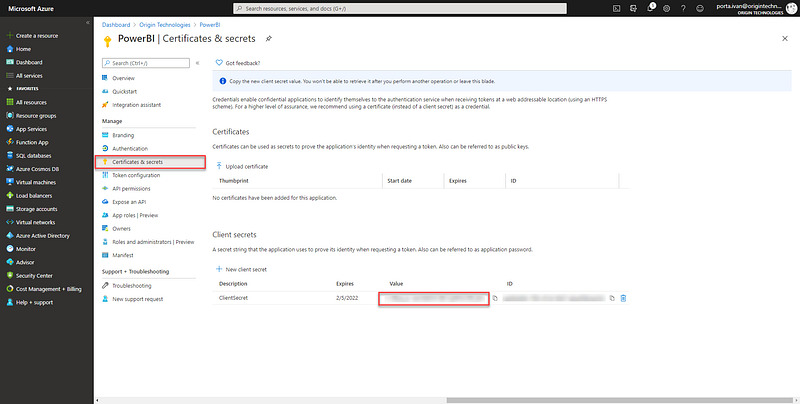
- Select Certificate & Secrets tab, generate a new client secret, and copy its value.
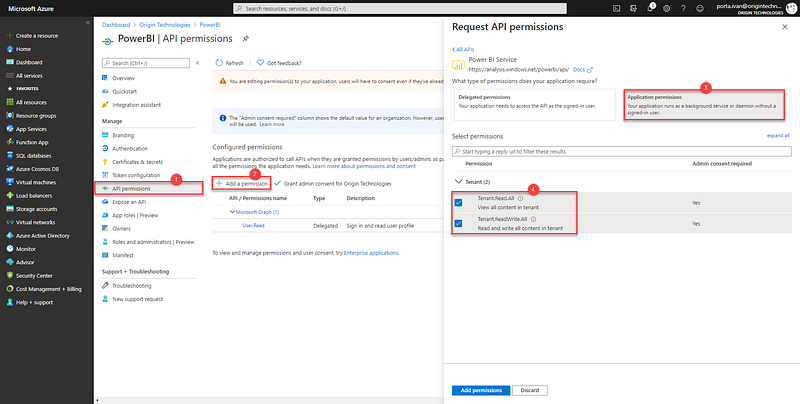
You need to give some permission to your app to conclude the configuration of your application.
- Click on the App permission tab and then Add a permission.
- Select Application permissions.
- Click Power BI services.
- Check the Tenant.ReadAll and Tenant.ReadWriteAll checkbox.
- Click add permission to confirm your updates.
Power BI
Setting up the tenant
The next step is to configure your Power BI;
- Sign in to the Power BI portal.
- Click the gear icon on the top right and select Admin portal.
- Select the Tenant settings tab and allow service principals to use Power BI APIs

Configure a workspace
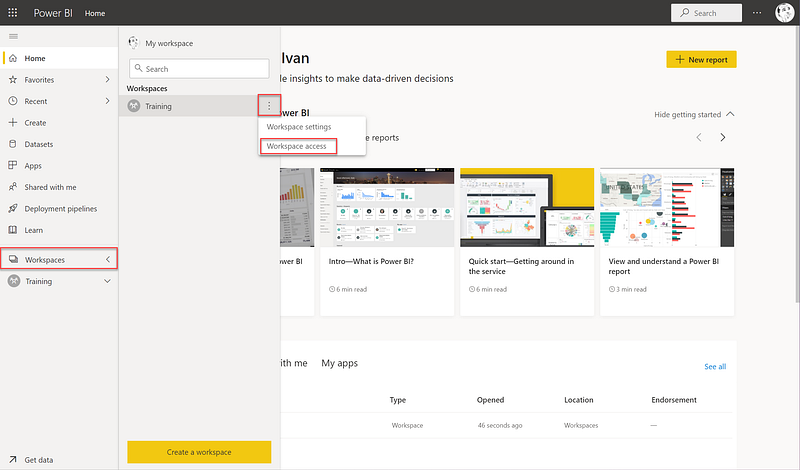
Now create the workspace where your pipeline will publish the reports and grant permission to your Azure AD App to do this:
- Select Workspaces tab.
- Click the three vertical dots on the right of your new workspace.
- Click Workspace access.
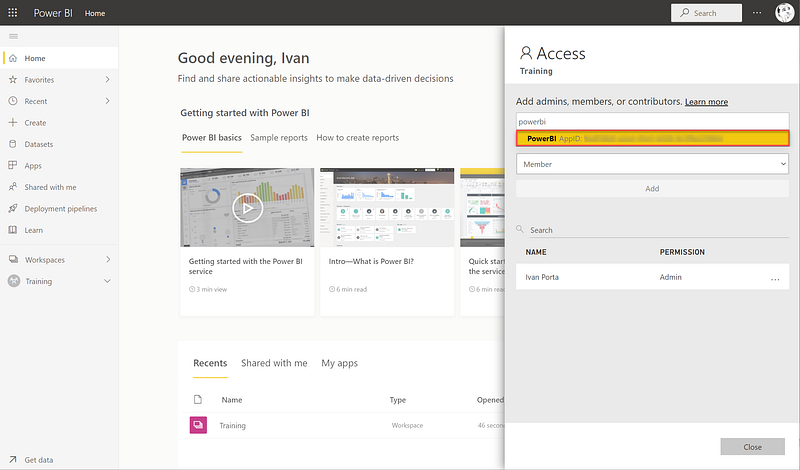
- Search the app that you have previously registered in Azure AD and grant it the permission of Admin.
Azure DevOps
Install the extension
These instructions will show you how to install the Power BI Action extension that we are going to use for this tutorial:
- Sign in to your Azure DevOps organization.
- Go to Organization Settings.
- Select Extensions.
- Click on Browse Marketplace at the top right.
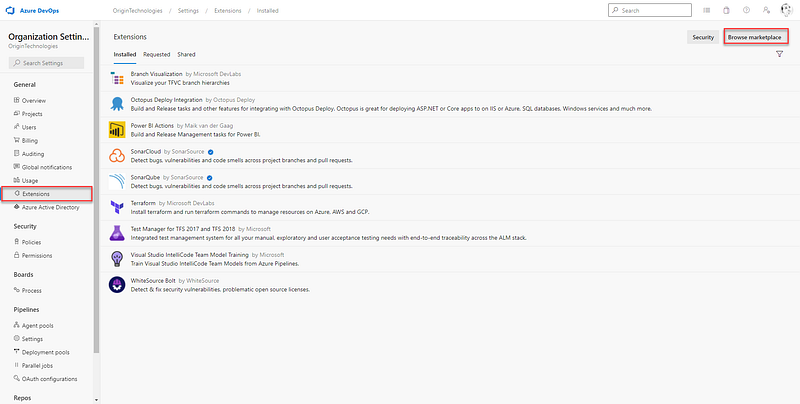
- As the Marketplace opens, search for Power BI Actions and click on the respective result.
- Click on the Get it Free button.
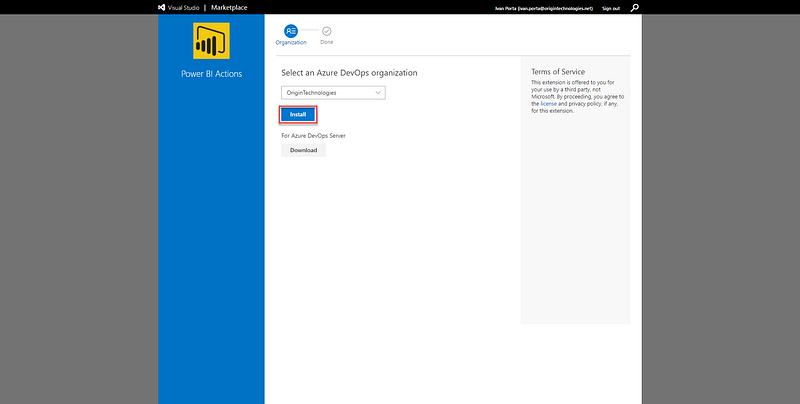
- Select your target organization from the dropdown and click on Install to complete the procedure.
Create a new service connection
- Go to Project Settings.
- Select Service connections.
- Click the New service connection button and select Power BI Service Connection.
- Fill in the parameters for the service connection and allow all pipelines to use this connection option.
- Click OK to create the connection.

Creating the Build Pipeline
It is time to create your build pipeline.
- From the dashboard, select Pipelines.
- Click the New pipeline button.
- Select Azure Git Repos as a source that will trigger our pipeline.
- Azure DevOps will suggest several templates, select the Starter Pipeline, to begin with a bare bone pipeline.
- Add the following YAML snippet to your pipeline.
trigger:
- masterpool:
vmImage: 'windows-latest'steps:
- task: CopyFiles@2
inputs:
SourceFolder: '$(Build.SourcesDirectory)'
Contents: '**.pbix'
TargetFolder: '$(Agent.TempDirectory)/$(Build.BuildId)'
- task: ArchiveFiles@2
inputs:
rootFolderOrFile: '$(Agent.TempDirectory)/$(Build.BuildId)'
includeRootFolder: false
archiveType: 'zip'
archiveFile: '$(Build.ArtifactStagingDirectory)/$(Build.BuildId).zip'
replaceExistingArchive: true
- task: PublishBuildArtifacts@1
inputs:
PathtoPublish: '$(Build.ArtifactStagingDirectory)'
ArtifactName: 'PowerBIArtifact'
publishLocation: 'Container'Create a Release pipeline
To automatically deploy your report on Power BI, create a new release pipeline.
- From the dashboard, select Pipelines and then Releases.
- Click the New pipeline button.
- Select Empty Job.

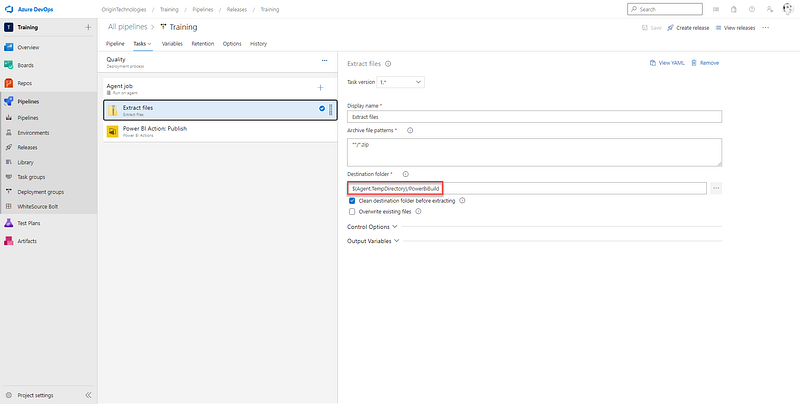
- Add the Extract Files task and configure it as follows.
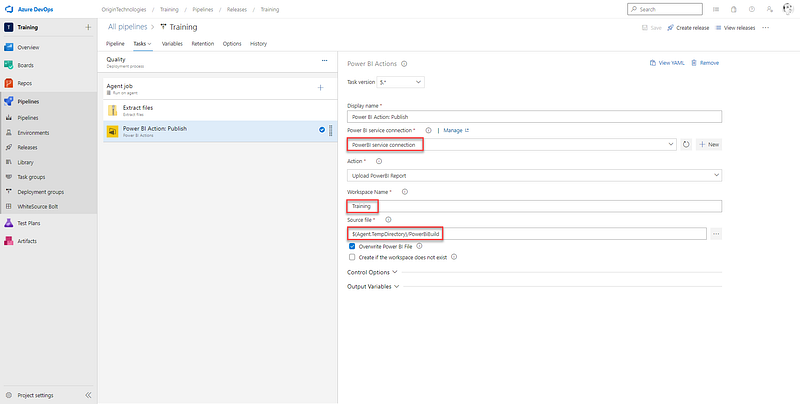
- Finally, add a Power BI Action task, select Upload Power BI Report as Action, enter the target workspace, and add the Source file (path where there will be your report)
You need to specify the deployable component that will be built through the build pipeline and then released by the release pipeline.
- Click Add an Artifact.
- Select Build as Source type.
- In the Source dropdown, select the Training repository.
- Click Add to save.
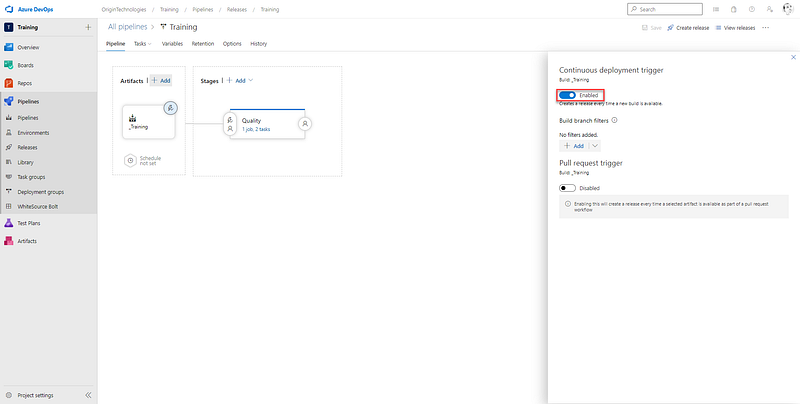
To finalize your release pipeline, instruct the pipeline to automatically create a new release every time a build is available. Apply this feature by enabling the Continuous deployment trigger.
It is now time to push your local code to your repository and start the pipelines.
References
- Power BI Actions extension: https://marketplace.visualstudio.com/items?itemName=maikvandergaag.maikvandergaag-power-bi-actions