
Automate and Configure Your RDS Database With Terraform
Execute post-deployment scripts based on your needs

I’ve been using a lot CloudFormation and enjoying the journey so far. But as you all know, Terraform is trendy so I thought giving a shot at the tool and the different available options to automate a deployment may be worth it.
In this article, I will explain how you can deploy an RDS database, and run post deployment script such as create database, tables… I will assume that you already have your aws credentials configured, and terraform installed as well, and you’re also familiar with configuring an S3 bucket as Terraform backend — so I will mainly focus on the modules sections, and go thru the deployment part briefly at the end.
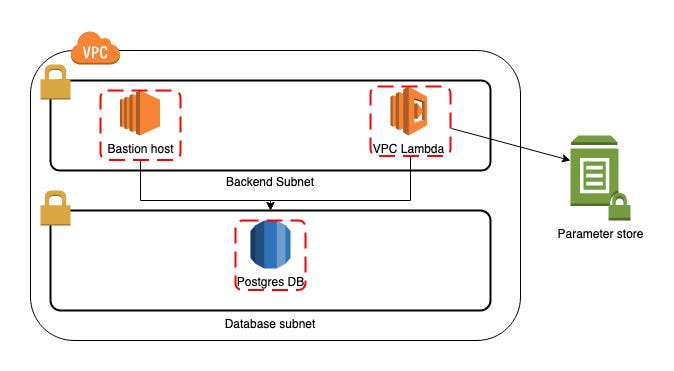
The project will deploy few items
- One bastion host group which will be located in a public subnet, that will allow you to ssh tunnel to your database + the associated security group
- One RDS PostGres database and associated security groups to allow only your VPC subnets to access the db
- One Lambda deployed within your VPC, because you want the lambda to be able to connect to the database in a secure way
- Some SSM parameters such as username / password for your database by the Lambda first and your application in the future
- A Lambda invocation trigger after all the previous items are deployed
Resources creation
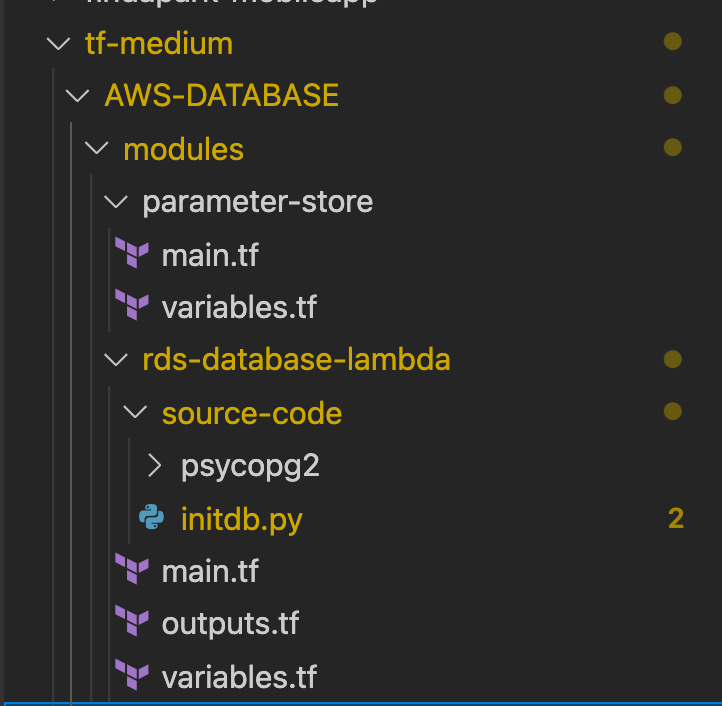
This code block snippet (main.tf — folder module/rds-database-lambda) will create for you some of the items I mentioned previously:
- Your bastion security group. Note that you will need to allow your IP line 17 instead of the dummy one — l5
- The ec2 instance which requires as input a keypair (not automated here as we would like to have it permanent on our AWS account — to be updated line 39, same as the AMI-ID line 37) — l34
- The RDS resource itself (note that t2.micro type (free tier) does not allow the latest postgres versions) — l52
- Your DB security group, which allows your bastion to access the PG DB — l72
- The Lambda security group — l97 and a security group rule to allow the function to access the DB — l115
- The Lambda function itself, which load use very good terraform data which create an archive based on a path (this allows you to include external dependencies to your code, such as psycopg2 in our case) — l124
The parameter store entries are in a different module (i.e subfolder) just to have a better understanding of what’s applied (note that we could also have split our security groups, db, and lambda in different subfolders as well). I will just leave one code snippet below as an example:
resource “aws_ssm_parameter” “db_master_pwd” { name = “/${var.project}/${var.env}/database/master-password” description = “Db master password” type = “SecureString” value = “${var.database_master_password}”}
Now that we have understood which element will be deployed by our TF, it is important to understand how the Lambda function can be triggered when we deploy the infrastructure, but also when times come to save a little bit of money, which means destroy.
Below is the full Lambda code:
While creating such Lambda, it is super important to have some specifications in mind:
- The lambda MUST return something. If not your terraform will wait for output (see for example line 33, where we check if the DB already exists. We use this when we destroy the infra as a return)
- Don’t forget to log. As you may have an SQL syntax error, or whatever, you need to be able to diagnose quickly using cloudwatch log where your Lambda is failing (example line 45 where we trap the exception if we are unable to create the database).
- Split tasks in the different SQL statements to have a clearer code (create/populate / extensions if some…)
- Do not forget about your IAM role (cloudwatch permissions, ssm…) — note that I put two different ways to retrieve credentials as an illustration: using environment variables or using ssm. Always prefer using SSM as you can encrypt your secrets
You are now ready to deploy a new fresh RDS instance and customize it in a way that you will never be afraid of destroying the infra to reduce your cost. This way of working is super convenient when working in a development environment, in which you can create quick POC which doesn’t cost that much!
I’m sharing below the full repository where we can use the code and customise it for your needs — do not forget to set up your AWS account before using it.
Thank you for reading.


