
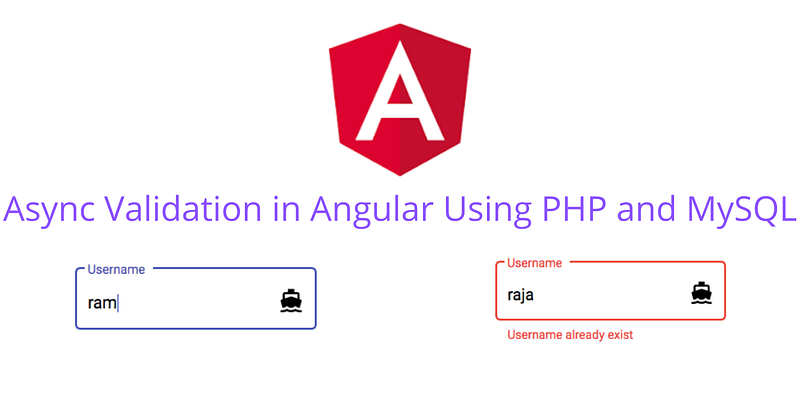
Async Validation in Angular | Step By Step Guide with PHP and MySQL
Validation performs a very important role in application development. Validation helps the user to access/use the application in a better way. Most of the UI frameworks offer built-in validation. We can use some third party plugins for validation also.
Say, for example, if a user wants to verify his/her mobile number using OTP, then he/she must enter a mobile number in the given input field. Sometimes the user may enter more than ten(10) digits( Indian mobile numbers are ten(10) digit length). After entering the wrong mobile number(more digits), the user expects OTP. However, the SMS server will tell us the number is not valid. This consumes a lot of time and the user will not be happy. However, if we show this error while typing the number itself, instead of sending this to the server, it will reduce time. It will be the best practice and gives the user better user experience.
So using the proper validation for needed input fields will help the end-user while using the application. And it reduces application complexity.
Types of validation.
- Client-Side Validation
- Server-Side Validation
- Async Validation
In this tutorial, you will learn how to do Async Validation using the Angular framework.
What is Async Validation and Examples?
Instead of explaining the theory of what is Async validation, we can take realtime use cases where Async validation is needed.
Case 1:
Let’s take a simple example. Assume you are creating a Gmail like application. In that application, the username is always unique. When we try to register, it will ask us to enter the username. When we enter the username in the input field, it will send the username to the server, And it will check whether the username exists or not. If the username exists, then it will show the error message to us. This is called as async validation.
Case 2:
Assume you are creating the e-commerce/ERP application. It is related to products. Now you want to put every product under a category. Then we will create a list of categories. The category is a unique value. So we have check whether the category exists or not. This is also called as async validation.
Like there are many use cases available. In simple terms, if you want to create unique values on your database, then you must need the Async Validation.
The list of things, we are going to see in the tutorial is listed below.
- Create REST API using PHP and MySQL
- Create Services in Angular to Call REST API
- Create Custom Async Validator using Angular
- Create FormGroup and Bind the Async Validation to FormControl
- Show Validation Message
1. Create REST API using PHP and MySQL
You can use any REST API. Here I am using the PHP and MySQL for REST API creation. Feel free to skip this section, if you have REST API already or you know how to create API also.
Scenario:
For this example, we are going to create the user’s list. In the user’s list, the username is unique. So we are going to validate whether the username exists or not using Angular with PHP and MySQL.
I assume you already have PHP and MySQL is installed on your machine. I am using a macOS. So the mac always requires the local IP address(127.0.0.1) instead of the localhost. If you are using Windows, then you can use the localhost instead of the IP address in the following examples.
Step1:
Create a user’s table in MySQL using the below query.
Execute the above code on your MySQL database.
Step2:
To create a REST API in PHP, I am using some different folder structures for best practice.
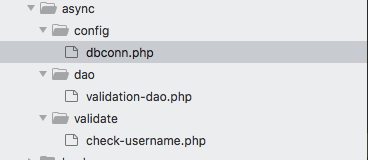
Create a folder named async under your XAMPP htdocs folder. The async is the root folder for this example.
Create a config folder under the async folder. Create a dbconn.php file under the config folder and paste the below code in the file.
Change the username, password, and database name in the above code.
Create a dao folder under the async folder. Then create a validation-dao.php file under the dao folder and paste the below code.
Here we have a check username function, which takes the username as input and will check whether the username exists on the database or not. If the username exists it will return true or it will return false.
Create a validate folder under the async folder. Then Create a check-username.php file under the validate folder and paste the below code.
The above code catches the username from the Angular Application and passes the username to the dao file to check against the database.
Here I am using some standard folder structure. You can put all the three files under one folder if you feel this structure is too complex.
Here is the final REST API URL
http://localhost/async/validate/check-username.php?username=rajaExecute the above URL on your machine. It will return false as the output. Why because there is no username. You can change the username in the above URL, if the username exists, then it will return true as the output.
I have the GET method to catch data. You can use the POST method also in the REST API.
2. Create Services in Angular to Call REST API
The REST API is ready. Now create a new Angular project using the below command, if you have not created it.
ng new async-exampleNow open the project using VS Code editor. Now we need to Angular Material. Angular Material is a UI framework. It is optional only. However, it will give us a good look and feel. So use Angular Material.
Install Angular Material using the below command on your Angular project.
ng add @angular/materialI am using some standard folder structure for Angular. You can skip this folder structure if you want. However, it will be very useful when you develop complex applications.
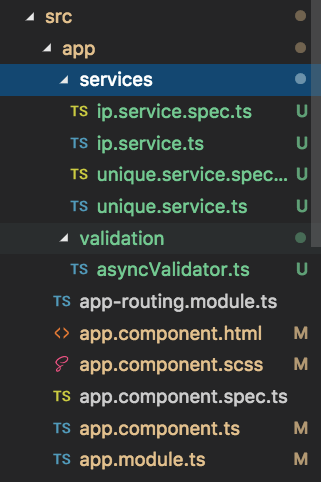
Create an IP services file in Angular using
ng g s services/ipAnd paste the below code in the ip.services.ts file.
This is the only place, where you can easily change the pointing server. This approach is very helpful if you want to switch to a different server.
Create unique services file using
ng g s services/unique
In the unique.services.ts file, paste the below code.
It will pass the user typed input values to the REST API URL and return the output.
3. Create Custom Async Validator using Angular
Now we need to create a custom async validator. And the validator will call the unique service to pass the input values. And this validator will give the validation status to the input field.
Create a validation folder under src/app.
Create an asyncValidator.ts file under the src/app/validation folder and paste the below code.
This code uses the delay concept. It means it won’t send every input value to the server. Instead, it will send the user typed values every 1 second. You can change the timer value as per your need.
The shouldBeUnique is the error property. You need to catch this property on HTML and will show the message based on the condition. You can change this name. But follow the variable naming rules to create a property name like this.
4. Create FormGroup and Bind the Async Validation to FormControl
Everything is ready. Now we need to create a FormGroup with username as FormControl.
Create a constructor with UniqueService as a variable.
Open the app.component.ts file and bind the Async Validator to the username like below.
5. Show Validation Message
Now we need to bind this on the component page. Create a form and bind the username with formControlName property.
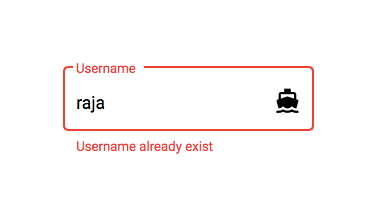
By default, the formControl will show an error styled input field if the username exists. However, if you want to show the proper error message, then you have to use the mat-error tag. And check the shouldBeUnique property is valid or not.
That’s all. It will show error message like below when the username exists.
Hope you enjoy this article!.
Thanks for reading this article!.
Source Code Link.


