
Airflow vs. Prefect vs. Kestra — What is The Best Data Orchestration Platform in 2023?
Three options for modern data orchestration compared in a simple data pipeline task — Which one is best for you?

The world of data orchestration platforms is competitive, especially in 2023. Most companies and individuals use Apache Airflow, but there are other options that do the job just as well, if not even better.
Today we’ll compare Airflow with two alternatives — Prefect and Kestra. The prior has been around for quite some time, while the latter is newer, and offers new and improved ways of writing and managing data pipelines.
The examples you’ll see today are quite basic, so stay tuned to my Medium account for more advanced comparisons. If you need an introductory article to any of these three platforms, start here:
- Apache Airflow — Write Your First DAG
- Prefect — Write and Schedule Your First ETL Pipeline
- Kestra — Is It a Viable Airflow Alternative?
Let’s dive in and get started with the environment differences.
Airflow vs. Prefect vs. Kestra — Environment Differences
All three data orchestration platforms share the same main idea — to provide a single place for creating and managing your data pipelines. Where they differ is the implementation.
For example, Apache Airflow provides a GUI for monitoring tasks and workflows, working with variables, connections, and so on. The tasks or data pipelines are written in Python after installing the prerequisite packages. Each data pipeline is split into multiple tasks, and all tasks are encompassed into a DAG, which can then execute tasks sequentially, in parallel, or however you choose.
A similar idea holds through for Prefect. You don’t need to use the UI here, but you can by running the prefect server start command. Every bit of Python code you write can be executed from the Terminal, and you only need the UI if you want to deploy or schedule your workflows. More on that in a dedicated section.
And finally, there’s Kestra. It takes a different approach since everything is defined in a simple config file. You’re writing YAML instead of Python (but you can execute Python scripts, of course), which means that engineers working on a different stack (not tied to Python) can also contribute. YAML is overall easy to read and understand, even for non-technical users.
These are the basic differences between the three data orchestration platforms. Up next, we’ll compare them hands-on in a simple bash job.
Airflow vs. Prefect vs. Kestra — Writing a Simple Bash Job
The goal of this section is to see what goes into implementing a simple bash job in these three data orchestration platforms. The bash job will simply issue the date command, which is responsible for displaying the current date and time.
Let’s start with Airflow.
Bash Job in Airflow
Assuming you have Airflow installed and configured, implementing a simple bash task won’t take too many lines of code.
You need to declare a DAG which is best done with Python’s context manager syntax. The DAG needs an ID and a start date at a minimum, but we’ve also supplied an optional catchup parameter to instruct Airflow it doesn’t need to catch up for any days between the start date and now.
To issue a bash command in Airflow, you need to use the BashOperator. It needs an ID and a command to run.
Here’s the code for the entire bash job:
from datetime import datetime
from airflow.models import DAG
from airflow.operators.bash import BashOperator


with DAG(
    dag_id="airflow_date_dag",
    start_date=datetime(year=2023, month=7, day=10),
    catchup=False
) as dag:
    task_get_datetime = BashOperator(
      task_id="get_datetime",
      bash_command="date"
    )
You can now save your Python file, open Airflow UI, and click on the DAG. Here’s what you’ll see:
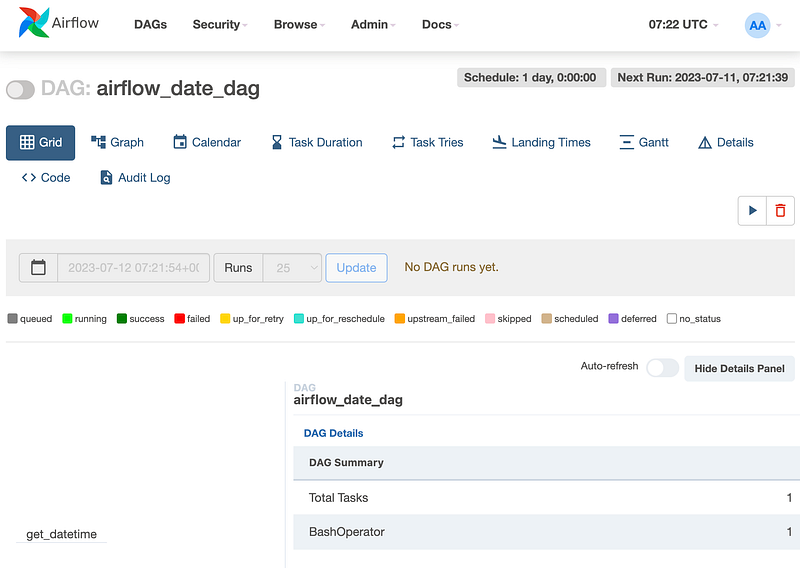
The DAG isn’t started by default, but you can trigger it manually by clicking on the play button on the right side of the screen.
Once executed, here’s what you’ll see:
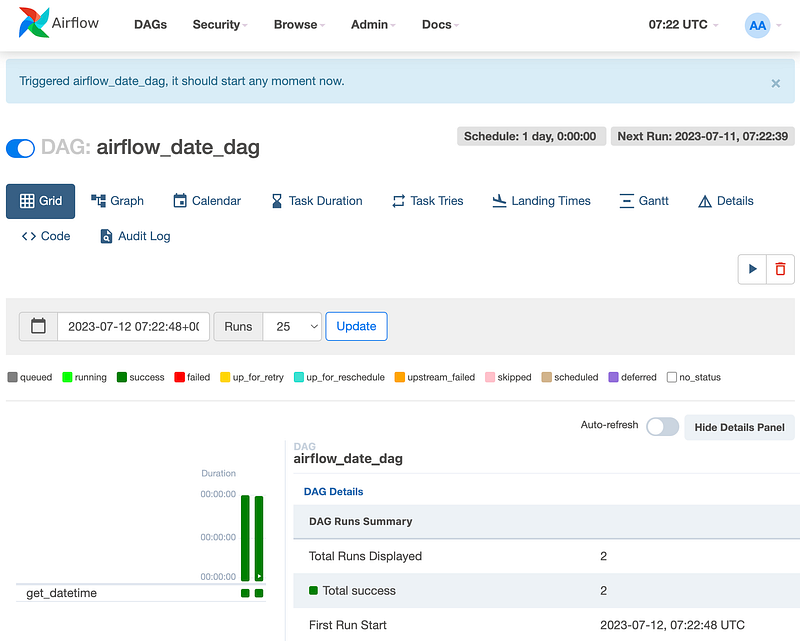
The green bars and boxes indicate our DAG (and its tasks) have been executed successfully.
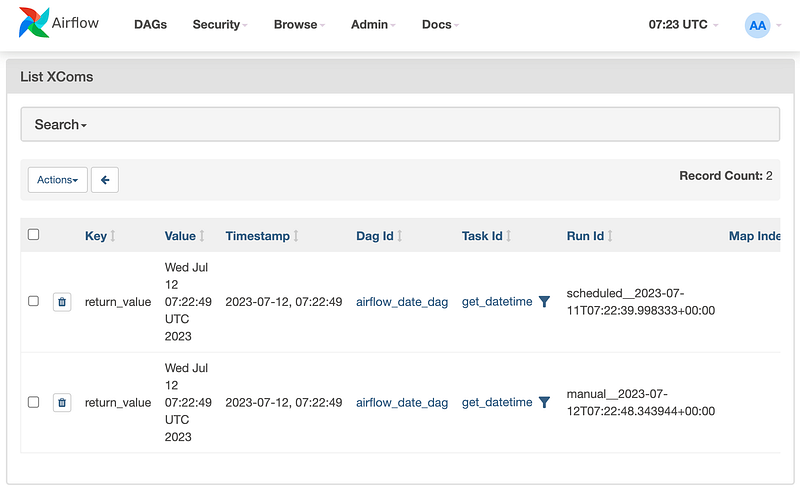
Now the question remains — where can you get the returned values? Airflow handles that with Xcoms, a concept we’ll explore in the following sections. For now, click on Admin and select Xcoms — here’s what you’ll see:
Airflow — done! Let’s implement the same in Prefect.
Bash Job in Prefect
As mentioned in the introduction section, Prefect doesn’t require you to use a UI to manage and run workflows. Everything can be done through simple and easy-to-understand Python code.
Prefect leverages Python decorators for declaring tasks and flows. Put simply, a single flow combines one or multiple tasks to execute a data pipeline.
Below you can see the same pipeline as the one implemented earlier with Airflow:
from datetime import datetime
from prefect import task, flow


@task
def get_datetime():
    return datetime.now()


@flow(name="Date Flow")
def my_flow():
    date = get_datetime()
    print(date)
    return date


if __name__ == "__main__":
    my_flow()
You can run the flow by running the entire Python file through the Terminal:
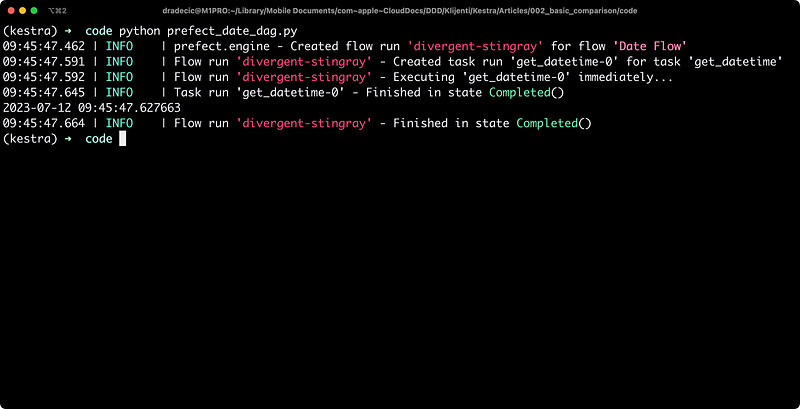
Prefect automatically assigns a name to the flow if you don’t provide one in the code. The execution finishes without any errors, and you can clearly see the datetime printed to the console.
And finally, let’s implement the same workflow in Kestra.
Bash Job in Kestra
Unlike Airflow and Prefect, Kestra leverages YAML for creating and managing data pipelines.
You’re likely to see this screen when you first run Kestra:
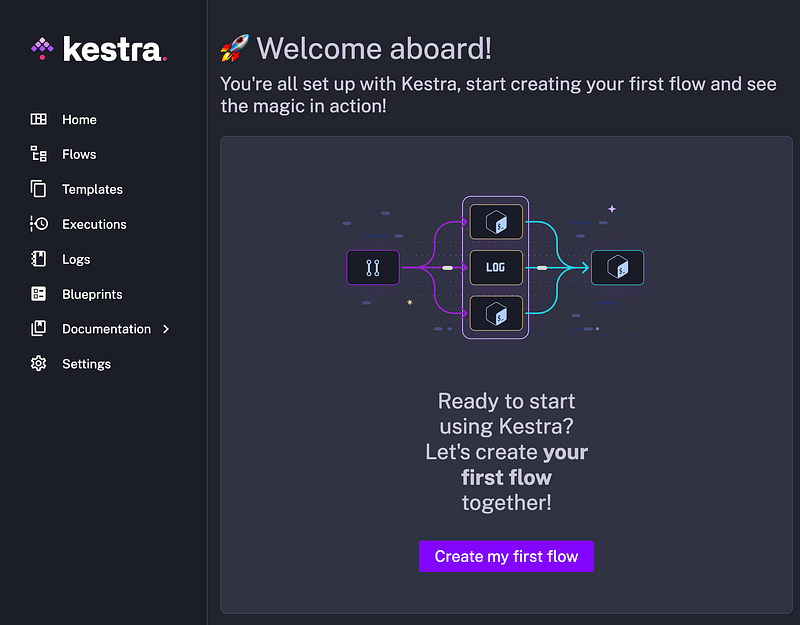
To create a new flow, click on Flows in the left sidebar and then click on the Create button in the bottom right corner.
You’ll be presented with some YAML code, but you can delete it and paste the following:
id: date-task
namespace: dev
tasks:
  - id: get-datetime
    type: io.kestra.core.tasks.scripts.Bash
    commands:
      - 'date'
Here’s what you’ll see on the screen:
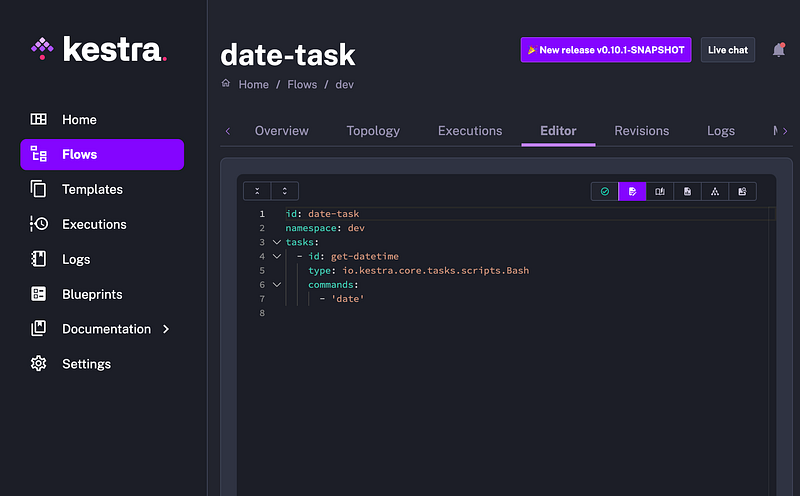
In a nutshell, we’re creating a new flow with the ID of date-task. This flow has only one task — to execute the date bash command. In Kestra, everything is done through plugins. These provide all of the advanced functionality and integration you can imagine, and new types of plugins are constantly being added.
As soon as you save your flow, you can click on the New Execution button. Clicking on it will redirect you to a Gantt view of your flow run:
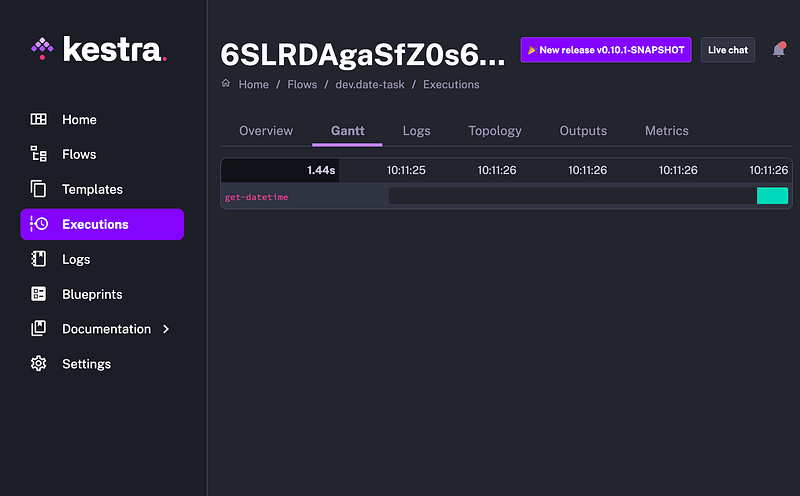
If you see Gantt chart bars painted green, everything is good. The tasks of your flow have executed successfully, and you can see their output by clicking on Logs and expanding the output:
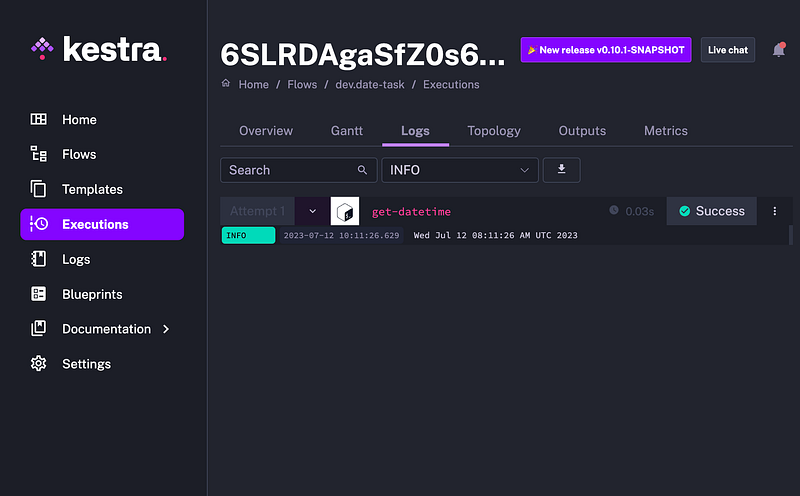
And that’s it for a basic example with Airflow, Prefect, and Kestra. Let’s complicate things slightly by including communication with REST APIs next.
Airflow vs. Prefect vs. Kestra — Writing a Simple Data Pipeline
This portion of the article will show you how to communicate with REST APIs in three data orchestration platforms, and also how to store the results locally in a file. The REST API of choice contains dummy user data.
Data Pipeline in Airflow
First — Airflow. A common practice is to declare a new connection in Admin — Connections. You don’t have to follow this strategy, but it’s recommended by Airflow authors and users.
To add a new connection, click on the blue Plus button:
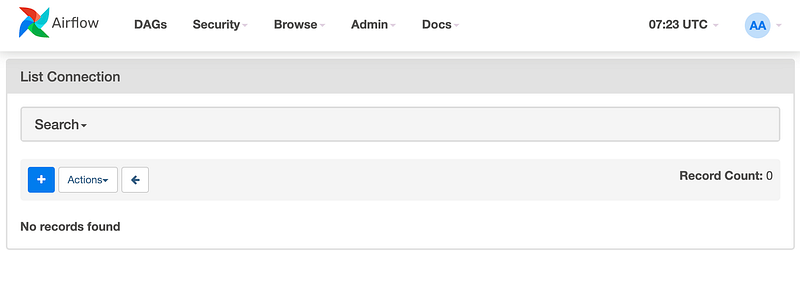
From these, populate the form values as shown below:
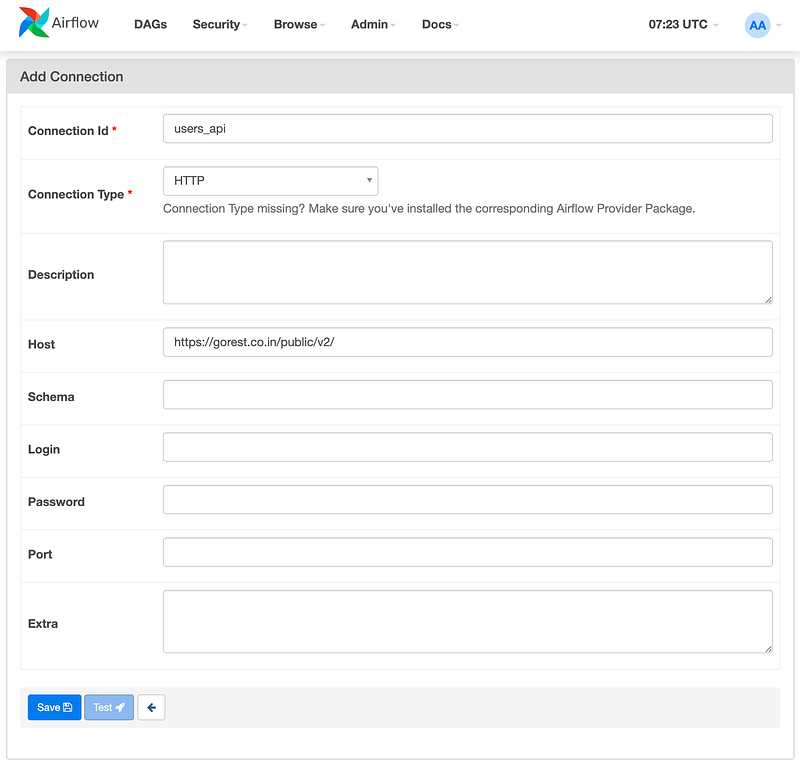
You can see we’re creating a new HTTP connection to the GoRest host but aren’t adding the /users endpoint. That’s something we’ll add in the code.
As before, create a new Python file for the DAG, and paste the following code:
import json
from datetime import datetime
from airflow.models import DAG
from airflow.providers.http.operators.http import SimpleHttpOperator
from airflow.operators.python import PythonOperator


def save_users(ti) -> None:
    users = ti.xcom_pull(task_ids=["get_users"])
    with open("/home/airflow/users.json", "w") as f:
        json.dump(users, f)


with DAG(
    dag_id="airflow_api_dag",
    start_date=datetime(2023, 7, 10),
    catchup=False
) as dag:
    task_get = SimpleHttpOperator(
        task_id="get_users",
        http_conn_id="users_api",
        endpoint="users/",
        method="GET",
        response_filter=lambda response: json.loads(response.text)
    )

    task_save = PythonOperator(
        task_id="save_users",
        python_callable=save_users
    )
Let’s go over it task by task:
task_get— LeveragesSimpleHttpOperatorto establish a connection to the GoRest API and fetch user data. It uses the connection declared earlier in the Airflow UI, and then makes a GET request to the/usersendpoint. Finally, it formats the response as JSON.task_save— Calls the above-writtensave_users()Python function. This function uses Airflow’s Xcoms to pull the data returned by the previous task. It then dumps that data into ausers.jsonfile.
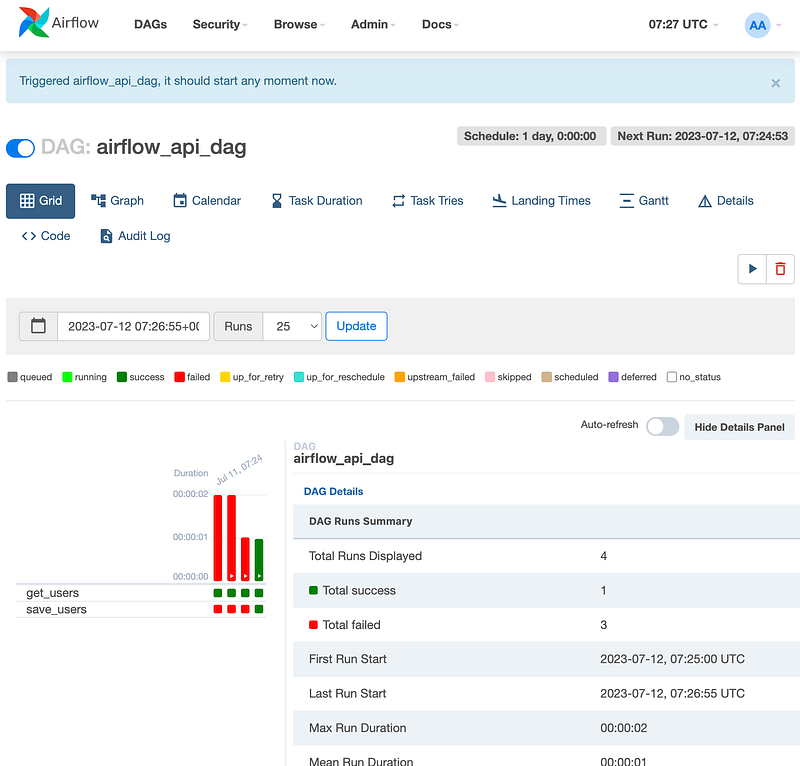
Sounds simple enough, but took us a couple of tries to get the saving part right — as you can see from the red bars in the following image:
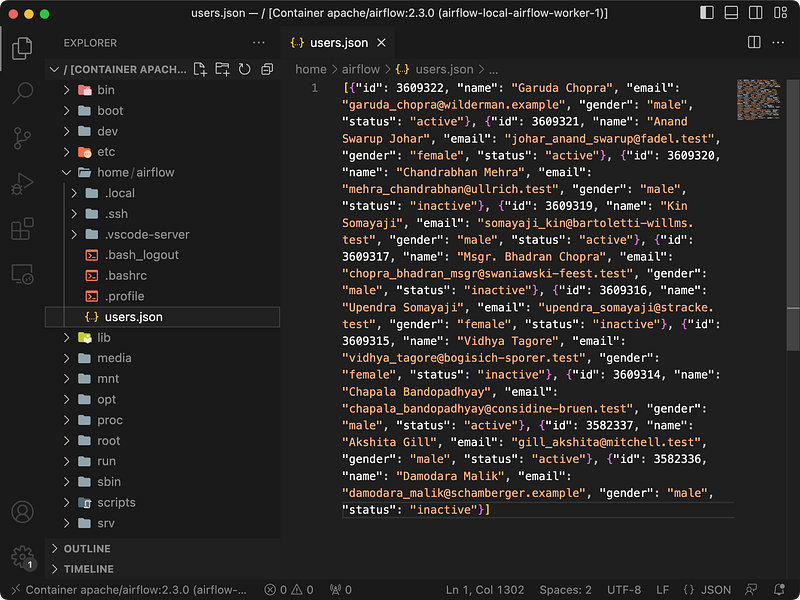
Nevertheless, a successful DAG execution has saved the JSON file into a defined location:
Let’s now implement the same data pipeline in Prefect.
Data Pipeline in Prefect
Just like before, Prefect doesn’t require you to use the UI to manage your data pipelines. You can do everything through the code, but this section will also show you a couple of UI functionalities. Start your Prefect UI by running the prefect server start command.
We have two @task functions inside the Python file — one for making the API request, and the other for saving the results locally into a JSON file.
Both are then combined into a single @flow which simply calls all task functions:
import json
import requests
from prefect import task, flow


@task
def get_users(url: str):
    req = requests.get(url=url)
    res = req.json()
    return res


@task
def save_users(users: dict, path: str):
    with open(path, "w") as f:
        json.dump(users, f)


@flow
def my_flow():
    URL = "https://gorest.co.in/public/v2/users"
    users = get_users(url=URL)
    save_users(users=users, path="users.json")


if __name__ == "__main__":
    my_flow()
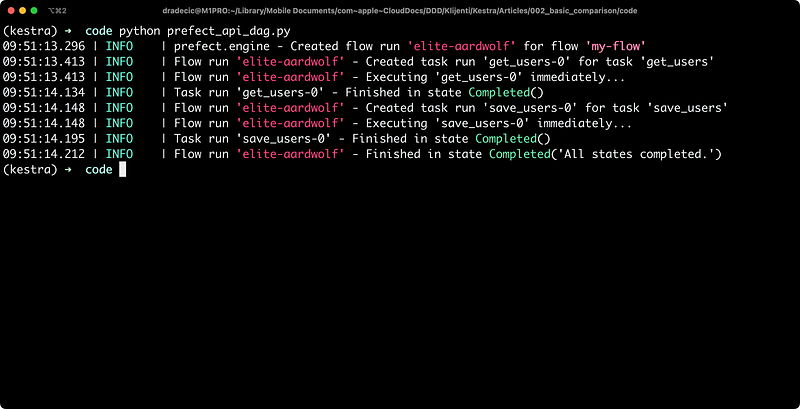
As before, you can run the entire flow through the Terminal:
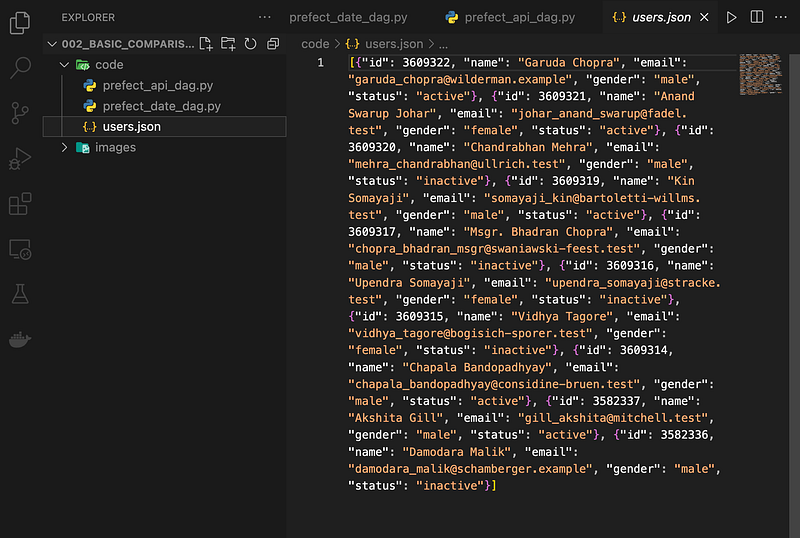
And you’ll see the familiar-looking JSON file after the successful execution:
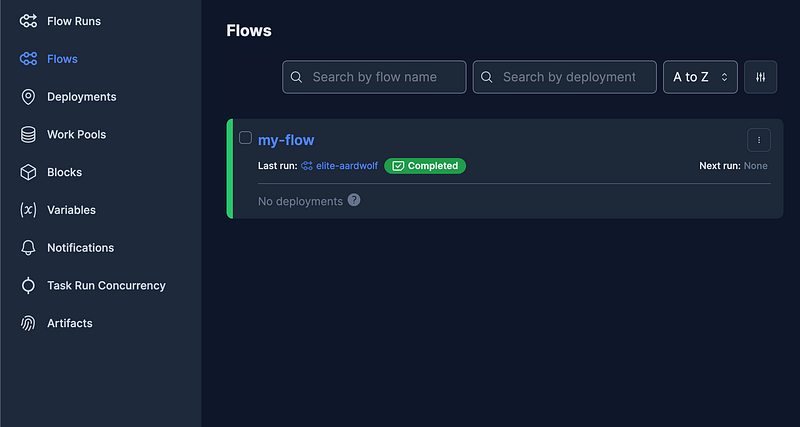
Remember the Prefect UI mentioned earlier? You can open it up on port 4200 to inspect and manage your flows. Here’s what you’ll see:
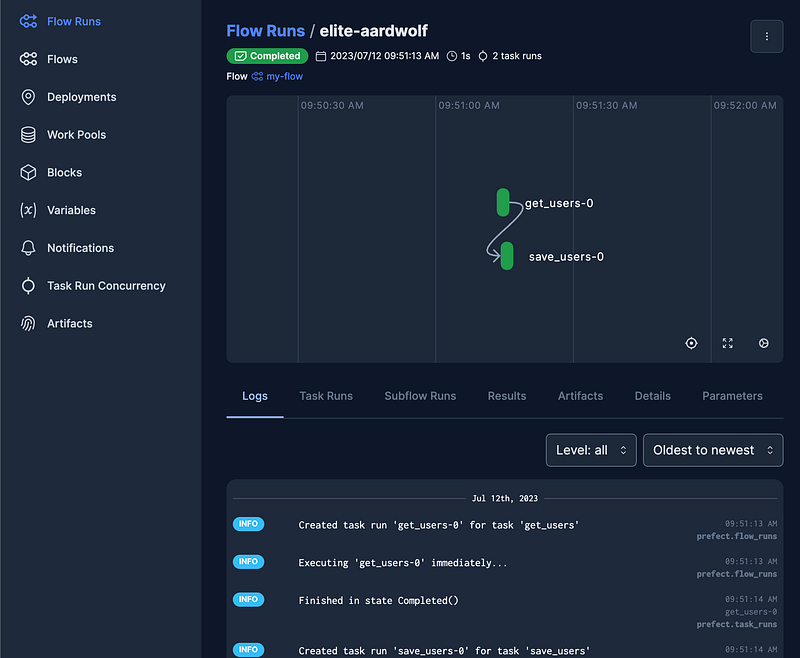
You can also click on Flow Runs to monitor the execution flow graph:
Prefect UI will be essential later for flow deployment and scheduling. But first, let’s recreate the same functionality in Kestra.
Data Pipeline in Kestra
You already know how to create a new Flow in Kestra. Simply click on Flows and hit the purple Create button at the bottom right of the screen.
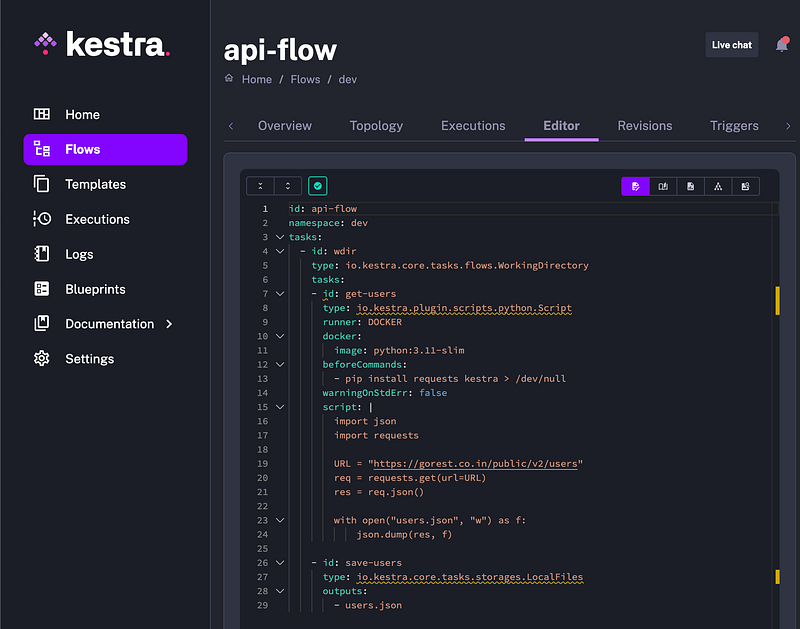
Paste the following YAML code into the editor:
id: api-flow
namespace: dev
tasks:
  - id: wdir
    type: io.kestra.core.tasks.flows.WorkingDirectory
    tasks:
    - id: get-users
      type: io.kestra.plugin.scripts.python.Script
      runner: DOCKER
      docker:
        image: python:3.11-slim
      beforeCommands:
        - pip install requests > /dev/null
      warningOnStdErr: false
      script: |
        import json
        import requests

        URL = "https://gorest.co.in/public/v2/users"
        req = requests.get(url=URL)
        res = req.json()

        with open("users.json", "w") as f:
            json.dump(res, f)

    - id: save-users
      type: io.kestra.core.tasks.storages.LocalFiles
      outputs:
        - users.json
Now let’s discuss what’s going on:
- We have a flow with the ID of
api-flowlocated in thedevnamespace - The flow needs to have a single task of type
WorkingDirectorysince we’ll be storing files on a disk - This task accepts a new list of tasks, the first of which is one for running a Python script. It will pull the Python 3.11 slim Docker image and install Python’s
requestslibrary. Once installed, it will run the Python code written inscript. - The following task inside the
WorkingDirectorytask is responsible for saving the output to ausers.jsonfile.
And that’s it — as simple as can be! Here’s what you should see on the screen:
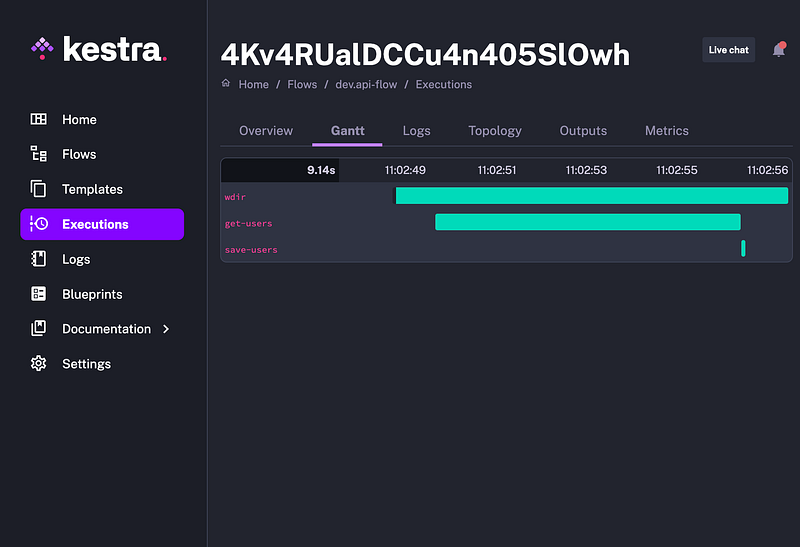
Now save the flow and run it — expect to see a couple of green bars:
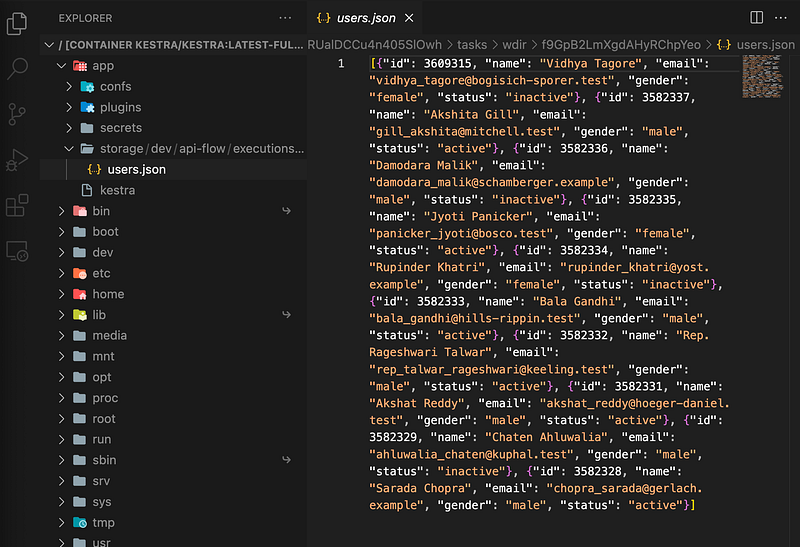
The file was saved to disk under the appropriate flow execution, as you can see from the following image:
And that’s how you can write a simple data pipeline in Airflow, Prefect, and Kestra. The first two platforms use Python for everything, while Kestra considers Python just one of many possible languages for defining business logic for data processing, next to SQL, R, Node.js, Shell, and so on.
And it’s a good thing — YAML is much simpler for business and non-tech users to learn and read, which means you get the added benefit of easier collaboration with domain experts when developing data pipelines.
Airflow vs. Prefect vs. Kestra — Job Scheduling
And finally, let’s cover job scheduling. There’s no point in writing data pipelines if you can’t automate their execution. You almost always need to run them daily or even hourly, so an intuitive and easy-to-use scheduler is non-negotiable.
First, let’s see how Airflow handles job scheduling.
Job Scheduling in Airflow
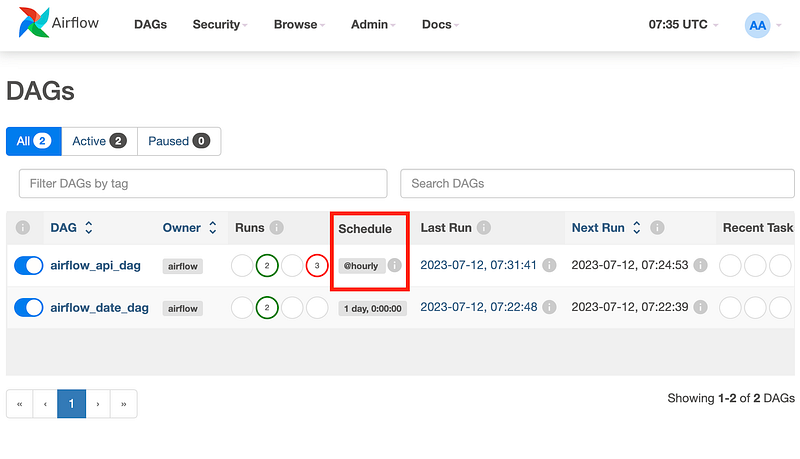
Airflow makes job scheduling as easy as can be. You just have to specify an additional parameter when declaring a DAG — schedule_interval. You can use one of the predefined strings — @once, @hourly, @daily, @weekly, @monthly, or @yearly, or alternatively, specify a cron pattern as a string:
...

with DAG(
    dag_id="airflow_api_dag",
    start_date=datetime(2023, 7, 10),
    schedule_interval="@hourly",
    catchup=False
) as dag:
    ...
As soon as you specify a value for schedule_interval parameter, you’ll see the value populated on the Airflow DAG page:
That’s it! The DAG will now run according to the schedule, provided you keep the Airflow webserver and scheduler running.
Let’s see how Prefect handles job scheduling.
Job Scheduling in Prefect
Prefect makes job scheduling somewhat nonintuitive. You need the Prefect Cloud UI for scheduling Prefect flows because you have to deploy the flow first. That’s done by leveraging the Deployment class and specifying the flow you wish to deploy.
Take a look at the following code and you’ll get the gist:
import json
import requests
from prefect import task, flow
from prefect.deployments import Deployment


@task
def get_users(url: str):
    req = requests.get(url=url)
    res = req.json()
    return res


@task
def save_users(users: dict, path: str):
    with open(path, "w") as f:
        json.dump(users, f)


@flow
def deployed_flow():
    URL = "https://gorest.co.in/public/v2/users"
    users = get_users(url=URL)
    save_users(users=users, path="users.json")


def deploy():
    deployment = Deployment.build_from_flow(
        flow=deployed_flow,
        name="prefect-deployment"
    )
    deployment.apply()


if __name__ == "__main__":
    deploy()
You now need to run the file in order to make it visible on Prefect Cloud. You’ll see it under the Deployments menu:
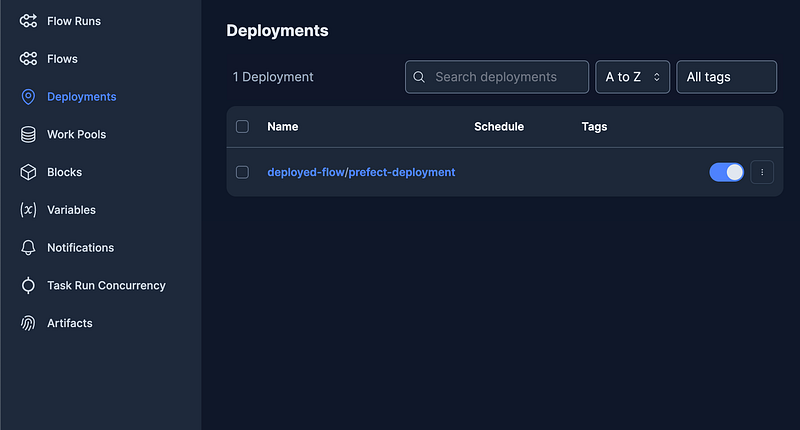
Click on the deployment, and then you’ll see the option to add a custom flow run schedule:
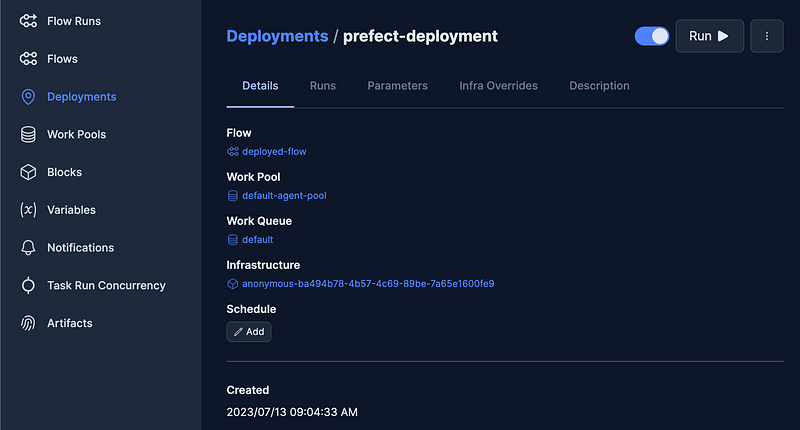
It will open a new modal window that allows you to add a schedule in a couple of ways. The fist one is the most intuitive for majority of users:
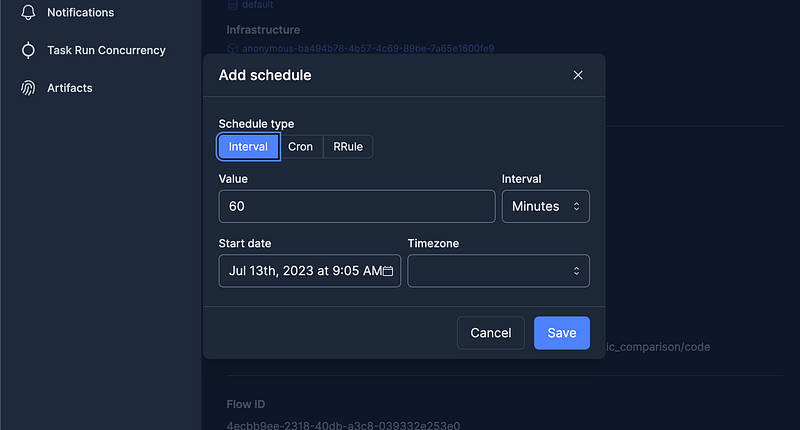
As soon as you click on Save, you’ll see the custom schedule added:
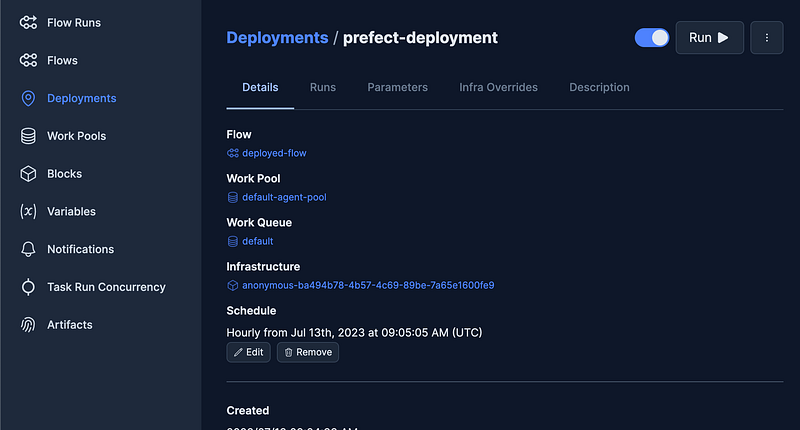
Long story short, Prefect requires the most steps when configuring a job scheduler. Also, scheduled deployments on Prefect won’t work unless you create a work pool and start a worker that polls the scheduled runs.
Job Scheduling in Kestra
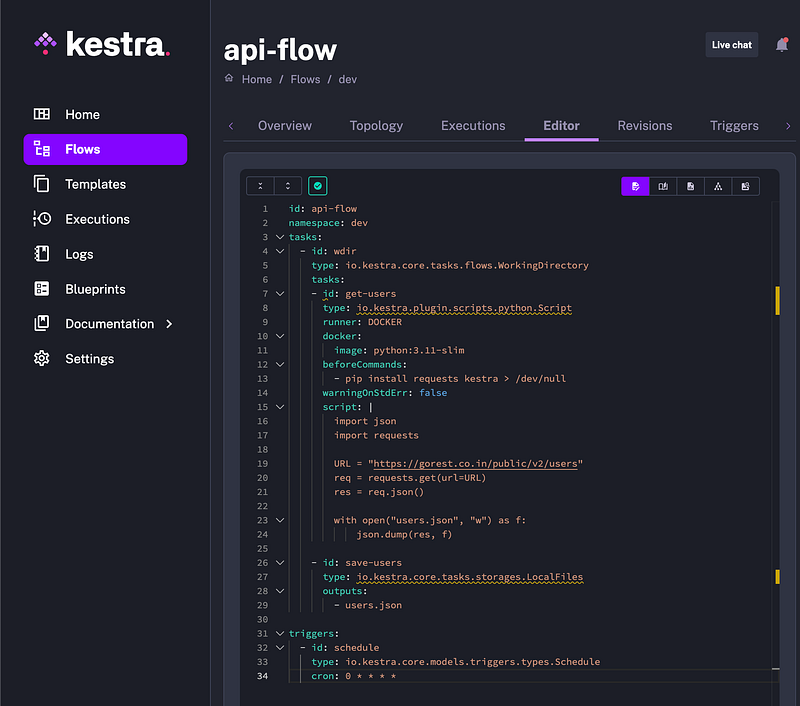
Similarly to Airflow, Kestra makes job scheduling a breeze. All you have to do is to add a new schedule trigger to your YAML file:
id: api-flow
namespace: dev
tasks:
  - id: wdir
    type: io.kestra.core.tasks.flows.WorkingDirectory
    tasks:
    - id: get-users
      type: io.kestra.plugin.scripts.python.Script
      runner: DOCKER
      docker:
        image: python:3.11-slim
      beforeCommands:
        - pip install requests > /dev/null
      warningOnStdErr: false
      script: |
        import json
        import requests

        URL = "https://gorest.co.in/public/v2/users"
        req = requests.get(url=URL)
        res = req.json()

        with open("users.json", "w") as f:
            json.dump(res, f)

    - id: save-users
      type: io.kestra.core.tasks.storages.LocalFiles
      outputs:
        - users.json

triggers:
  - id: schedule
    type: io.kestra.core.models.triggers.types.Schedule
    cron: 0 * * * *
The one you see above will run the flow at minute 0 of every hour. Here’s what it should look like on your screen:
It doesn’t get much easier than that.
The Verdict — Which Data Orchestration Platform is the Best for 2023 and Beyond?
Today’s article covered writing a trivial bash command and a simple data pipeline that communicates with a REST API and saves the file locally. We’ve also looked at scheduling options among all three data orchestration platforms.
These examples aren’t the most interesting ones, but they still give you an idea of how each platform works. Airflow and Prefect implement every aspect of your data pipeline in Python, which might be limiting to some users and some use cases. Prefect doesn’t require a UI for simple pipelines, but you’ll need one if you want to schedule them.
On the other hand, Kestra allows non Python experts to work on data pipelines. YAML is simple to read and understand, which means it will be easier for non-tech users to provide their domain knowledge. Kestra also offers a REST API, making it possible to integrate into platforms you use daily.
The user interface is superb among all three, but only Kestra UI comes with examples, blueprints, and built-in documentation. It’s a nice-to-have feature and will make you open fewer browser tabs.
Stay tuned for more data orchestration comparison articles. The following one will compare these three in a real-world data pipeline.
Loved the article? Become a Medium member to continue learning without limits. I’ll receive a portion of your membership fee if you use the following link, with no extra cost to you.
More content at PlainEnglish.io.
Sign up for our free weekly newsletter. Follow us on Twitter, LinkedIn, YouTube, and Discord.