
Add Real-Time Notifications to your Django Project
Another look at Web Sockets.
Another day another Tech article. In the last article, I went over a basic introduction of WebSockets but in this one, I will be going over a use case of WebSockets which is generating notifications in real-time. So without further waiting, Let’s get started.
1) Set up ASGI for your application
Before Beginning, Install the dependencies listed below which will be needed to set up WebSockets.
Django                             3.0(or greater)
channels                           3.0.4
channels-redis                     3.3.1
Once the above dependencies are installed, We will have to add “channels” to our list of the “INSTALLED_APPS” section in the settings.py file.
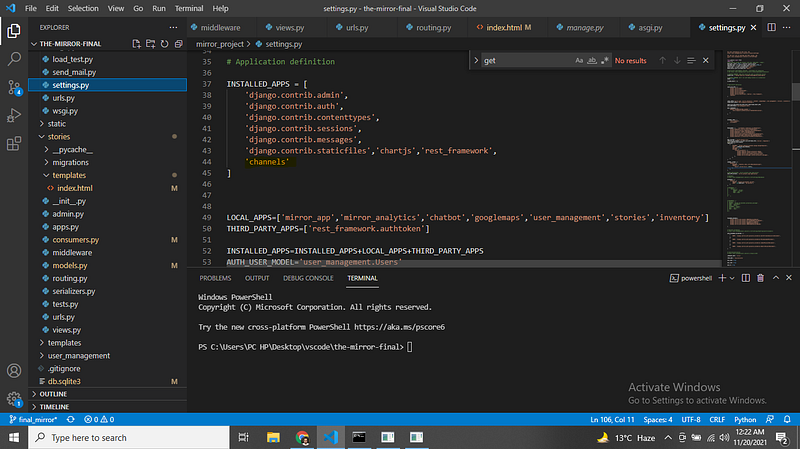
Once the above is done, The last step will be to have our application run on an Asynchronous Server Gateway Interface or ASGI for short. ASGI is used by Python to support asynchronous operations which are needed to get “Django channels” running effectively and efficiently.
By default, Django applications work on WSGI servers and that‘s why we will need to manually set up our application to run on an ASGI server. Go to your settings.py file and add in the following line. NOTE: “your_project” in the code below is the directory name of your root folder which will contain your “settings.py” file
ASGI_APPLICATION = 'your_project.asgi.application'Now for the above piece of code to work, We will have to make sure that an “asgi.py” file is present in our root application directory like:
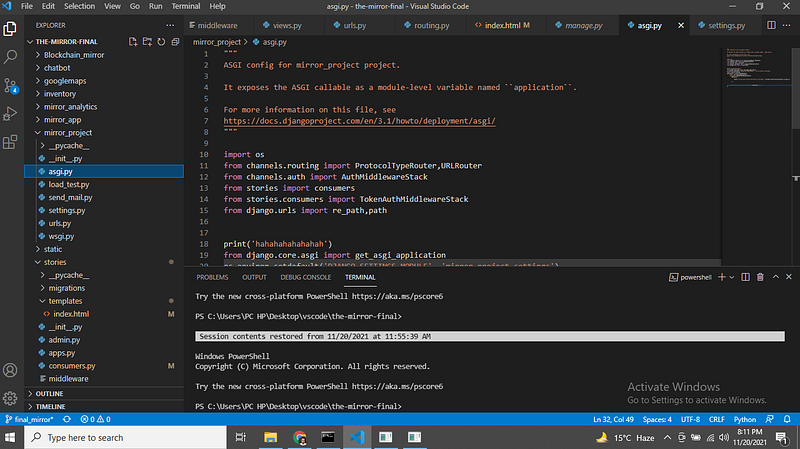
The ASGI file comes by default in newer versions of Django (3.2 or greater) but it can also be created manually and set up accordingly.
Now that our application has been set up to work on ASGI servers, It will have the ability to take care of and handle both “HTTP” and “WebSocket” connections. We will return to the ASGI file to add more details after we have created our notifications model and set up our “consumers.py” file.
2) Creating the Notification model
So how will our Notification system work? Well as you guys know, Notifications are a real-time feature, so they will have to be sent over WebSockets but we must also take into consideration that we need to “store” these notifications in our database.
We need to have access to a record of all notifications ever created because that’s how we will populate our “main notifications page”.
Create the notifications model like
class notifications(models.Model):
user_sender=models.ForeignKey(Users,null=True,blank=True,related_name='user_sender',on_delete=models.CASCADE)
user_revoker=models.ForeignKey(Users,null=True,blank=True,related_name='user_revoker',on_delete=models.CASCADE)
status=models.CharField(max_length=264,null=True,blank=True,default="unread")
type_of_notification=models.CharField(max_length=264,null=True,blank=True)
The model is pretty straightforward and self-explanatory. There are four fields where “user_sender” is the individual who creates or initiates the notification creation action and “user_revoker” is the one who will “receive” the notification or the one who should see that notification.
3) Setup your consumers.py file
consumers are to WebSockets as views are to HTTP. The consumers.py file is the place where all the WebSocket requests get handled and sent back to the front end. There are different types of WebSocket consumers such as “AsynConsumer”, “WebSocketConsumer” and “AsyncWebSocketConsumers” just to name a few.
In our example, We will be going with the “AsyncWebSocketConsumer”. Why? No particularly strong reason but it’s just that asynchronous code is pretty efficient if you know what you’re doing.
Go to an application inside of your project and create a “consumers.py” file.
Import the following dependencies
from channels.generic.websocket import WebsocketConsumer,AsyncWebsocketConsumerfrom channels.db import database_sync_to_asyncfrom asgiref.sync import async_to_sync,sync_to_asyncfrom channels.layers import get_channel_layerEvery “consumer” in Django channels needs to have three defined methods. connect, receive and disconnect.
Connect is used to establish connections between the front end and the backend.
Receive is used to handle requests sent from the front end and deal with them accordingly.
Disconnect is used to deal with what should happen if the WebSocket were to close or shut down.
So how will our WebSockets work? Our WebSocket will first “establish” a connection. Once the connection has been established, The backend will “listen” for any event that the front end might send to it and handle that in the “Receive” method.
Let’s look at a glimpse of that
We will first create a function that will be used to create a Notification object on every event.
@database_sync_to_async
def create_notification(receiver,typeof="task_created",status="unread"):
    notification_to_create=notifications.objects.create(user_revoker=receiver,type_of_notification=typeof)
    print('I am here to help')
    return (notification_to_create.user_revoker.username,notification_to_create.type_of_notification)
The above method will create a notification on every event call.
Next we will look at our main “consumer”. Let’s look at the connect method first.
class NotificationConsumer(AsyncWebsocketConsumer):async def websocket_connect(self,event):
print('connected',event)
print('Am i finallyy here')
print(self.scope['user'].id)
await self.accept()await self.send(json.dumps({
"type":"websocket.send",
"text":"hello world"
}))The connect method on a successful connection will send a message of “Hello World” to the front end to signal that the connection has been established.
4) Enter Redis
Now with the connect method out of the way. We will need to set up “Redis”. Redis is an open-source (BSD licensed), in-memory data structure store, used as a database, cache, and message broker. It is integral to getting our WebSockets running.
Go to your settings.py file and add in the following code to set up Redis.
CHANNEL_LAYERS = {
    "default": {
        "BACKEND": "channels_redis.core.RedisChannelLayer",
        "CONFIG": {
            "hosts": [("127.0.0.1", 6379)],
        },
    },
}
With that done, The last step would be to install Redis. I am working on a windows machine. So to get Redis set up on windows, just download this file and run “redis-server” and “redis-cli” files inside of it.
5) Setting up our URLRouter
With Redis out of the way, The next step would be to create a URL route for our entire set up. “URL Router” is very similar to setting up a “urls.py” file for conventional views, so I am sure you guys will be able to relate.
Go back to the asgi file created in step 1 and paste in this code.
import os
from channels.routing import ProtocolTypeRouter,URLRouter
from channels.auth import AuthMiddlewareStack
from stories import consumers

from django.urls import re_path,path
from django.core.asgi import get_asgi_applicationos.environ.setdefault('DJANGO_SETTINGS_MODULE', 'mirror_project.settings')
import stories.routing
application = ProtocolTypeRouter({
"http": get_asgi_application(),
"websocket":AuthMiddlewareStack(
URLRouter([path('stories/notification_testing/',consumers.NotificationConsumer.as_asgi())]))
})If you look at the “ProtocolTypeRouter” part inside of the code, We have two sections, “HTTP” and “WebSocket”. “HTTP” is for ASGI to take care of conventional view requests whereas “WebSocket” is used to deal with socket requests. Note, I have specified a “path” which contains a “route” and next to it is something similar to a view. A code that links to the “Notification consumer class” .
6)Putting it all together
So far, we have set up Channels, We have set up our consumers.py file and we have configured Redis. With all of that out of the way, The final concept I would like to go over is rooms.
The reason We integrated Redis in the first place is that We need a way to “broadcast” the notification creation event whenever it’s created into a “room”. And then the front end can verify the information and decide to either render it or reject it. Let’s look at our final code for our consumers.py file.
@database_sync_to_async
def get_user(user_id):
    try:
        return Users.objects.get(id=user_id)
    except:
        return AnonymousUser()
@database_sync_to_async
def create_notification(receiver,typeof="task_created",status="unread"):
notification_to_create=notifications.objects.create(user_revoker=receiver,type_of_notification=typeof)
print('I am here to help')
return (notification_to_create.user_revoker.username,notification_to_create.type_of_notification)class NotificationConsumer(AsyncWebsocketConsumer):async def websocket_connect(self,event):
print(self.scope)
await self.accept()await self.send(json.dumps({
"type":"websocket.send",
"text":"hello world"
}))
self.room_name='test_consumer'
self.room_group_name='test_consumer_group'
await self.channel_layer.group_add(self.room_group_name,self.channel_name)
self.send({
"type":"websocket.send",
"text":"room made"
})async def websocket_receive(self,event):
print(event)
data_to_get=json.loads(event['text'])
user_to_get=await get_user(int(data_to_get))
print(user_to_get)
get_of=await create_notification(user_to_get)
self.room_group_name='test_consumer_group'
channel_layer=get_channel_layer()
await (channel_layer.group_send)(
self.room_group_name,
{
"type":"send_notification",
"value":json.dumps(get_of)
})
print('receive',event)async def websocket_disconnect(self,event):
print('disconnect',event)async def send_notification(self,event):
await self.send(json.dumps({
"type":"websocket.send",
"data":event
}))
print('I am here')
print(event)Now the five main things to take from the code above are “channel_layer.group_add” ,“channel_layer.group_send” ,“send_notification” methods and the two functions at the top.
The “group_add” method creates a room group by the name of “test_consumer_group” where all notifications will be sent, and the “group_send” will be used to broadcast these events inside of the “test_consumer_group.
The “get_user” method will take in an id and return if there’s a user against it from the database whereas the “create_notification” will create a notification object for that user.
Now the way they are sent to the front end is where the “send_notificiation” method comes into play.
6) Test your Socket Connections
Go to this site, and paste in the path in your asgi file along with your domain name concatenated together. Like this:
ws://127.0.0.1:8000/stories/notification_testing/and click on “connect”
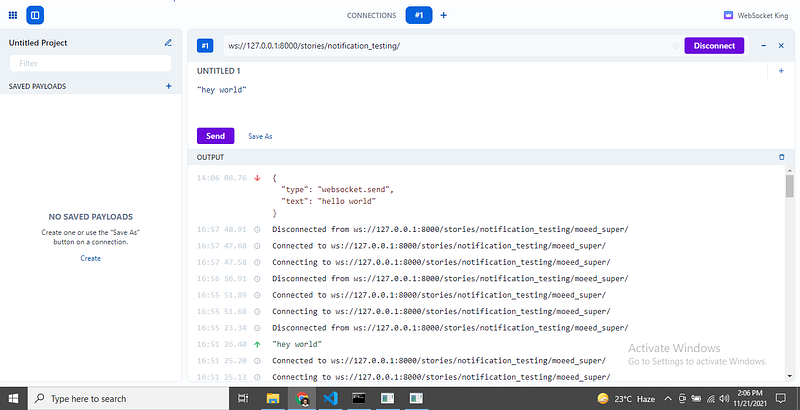
This will initiate the “connect” method and you guys will see a JSON object which is what we put in the “connect method”
Now, with the connect method working, We can send data to our WebSocket which will be used to create notifications that will be “broadcasted” across the group created earlier.
7) Create a Notification by sending a user ID.
Finally, we send a user ID to our WebSocket and what do we get?

There you have it, We have created a Socket connection and have created Notifications as well for a user.
Conclusion
This was a detailed dive into WebSockets, I tried to go over as many details as I could but I believe what I have gone over is more than enough to get a solid start with WebSockets in Django. I hope you guys found this article useful and if you did, please do share this for that helps me out a lot. Thank you


