
How to Build DAG : Apache Airflow Tutorial part II
A Comprehensive Guide to Running Workflows in Docker and Building Directed Acyclic Graphs

In our previous article, we explored the fundamentals of Airflow and how to run it using Docker. We discussed the various components of Airflow and the benefits of using Airflow for workflow management. You can check it out here. In this article, we will take a deeper dive into one of the core features of Airflow — Directed Acyclic Graphs (DAGs). DAGs are a powerful tool for defining, scheduling, and monitoring workflows in Airflow. However, writing effective DAGs can be a daunting task for beginners. That’s why we’ve put together this guide to help you get started with creating and managing DAGs in Airflow. Whether you’re a seasoned Airflow user or just getting started, this article will provide you with practical tips and best practices for writing effective DAGs in Airflow.
Understanding the DAG Code
In this section, we will focus on the code required to create a DAG in Airflow. We will cover the basics of importing libraries and defining the DAG, as well as how to set up dependencies, schedule tasks, and define operators. Understanding this code is essential to building effective DAGs in Airflow, and we will provide practical examples and best practices to help you get started. Whether you’re a seasoned Airflow user or just starting out, this section will provide you with a solid foundation for creating DAGs in Airflow.
1. Import Libraries
Import the necessary modules and packages, including the `DAG` class from Airflow, the `BashOperator` class, and the days_ago and timedelta functions from Airflow’s dates module.
from airflow import DAG
from dpatetime import timedelta
from airflow.utils.dates import days_ago
from airflow.operators.bash_operator import BashOperator
2. Set Up Default Arguments
Default arguments are a key component of defining DAGs in Airflow. These arguments provide a way to specify common settings and behaviors for all tasks in a DAG, such as the start date, email notifications, retries, and other properties. By setting default arguments, you can avoid having to repeat the same settings for each individual task and ensure that all tasks in a DAG are configured consistently.
default_args = {
'owner': 'airflow',
'depends_on_past': False,
'start_date': datetime(2018, 9, 1),
'email_on_failure': False,
'email_on_retry': False,
'schedule_interval': '@daily',
'retries': 1,
'retry_delay': timedelta(seconds=5),
}
In the above snippet:
- owner: Specifies the owner of the DAG. This is typically the name of the person or team responsible for maintaining the DAG.
- depends_on_past: Specifies whether a task instance should depend on the success of the previous task instance.
- start_date: Specifies the date and time when the DAG should start running.
- email_on_failure: Specifies whether to send an email notification when a task fails.
- email_on_retry: Specifies whether to send an email notification when a task is retried.
- schedule_interval: The frequency with which the task should run. In this case, it is set to run once per day.
- retries: Specifies the number of times to retry a failed task.
- retry_delay: Specifies the delay between retries. In this case, we’re using a delay of 5 seconds.
3. Define the DAG
In this step, we will define the dag. And it will include:
- `dag_id`: A unique identifier for the DAG. In this case, it is set to `ETL_DAG`.
- `default_args`: A dictionary containing default values for various configuration options related to the DAG. These options were previously defined in the default_args dictionary that we discussed in the previous section.
- `description`: An optional string that describes the purpose of the DAG. In this case, it is set to `ETL DAG using Bash`.
- `schedule_interval`: The frequency with which the DAG should run. In this case, it is set to run once per day, as indicated by the timedelta(days=1) argument.
dag = DAG(
dag_id='ETL_DAG',
default_args=default_args,
description='ETL DAG using Bash',
schedule_interval=timedelta(days=1),
)
4. Define the Tasks
In this step, we will define the tasks that make up the ETL workflow. Each task will include:
- A task_id string that uniquely identifies the task.
- The Bash command that the task should execute.
- The DAG that the task belongs to, as defined in the previous steps.
#Download the file from the URL located
download=BashOperator(
task_id='download',
bash_command='curl "https://cf-courses-data.s3.us.cloud-object-storage.appdomain.cloud/IBM-DB0250EN-SkillsNetwork/labs/Apache%20Airflow/Build%20a%20DAG%20using%20Airflow/web-server-access-log.txt" > /opt/airflow/dags/web_server_log.txt',
dag=dag,
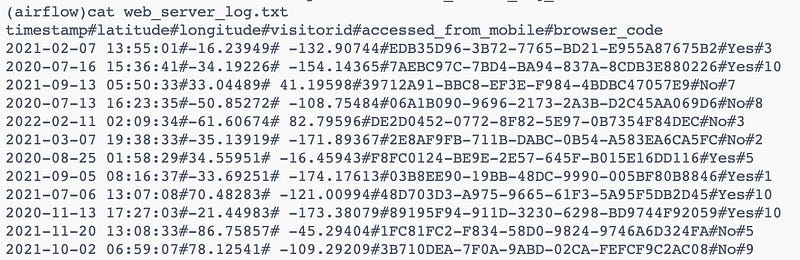
)As you can see below, the `web_server_log.txt` file has been downloaded

And the `web_server_log.txt` file contains many columns like timestamp, latitude, longitude,visitorid, and so on as shown below
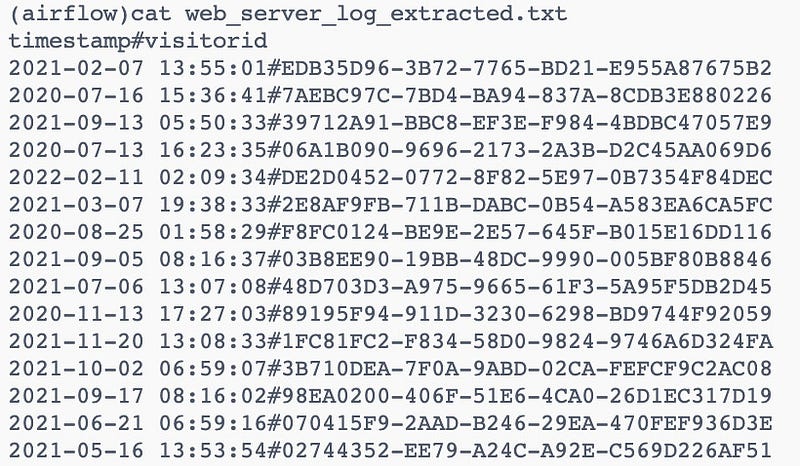
We will extract two columns (timestamp,visitorId) from the file downloaded. So we will use the bash command to extract the two columns and create a new file with the name `web_server_log_extracted.txt`
#Extract two columns from the file downloaded
extract=BashOperator(
task_id='extract',
bash_command='cut -f1,4 -d"#" /opt/airflow/dags/web_server_log.txt > /opt/airflow/dags/web_server_log_extracted.txt',
dag=dag,
)
As you can see below, the `web_server_log_extracted.txt` file has been created with the extracted columns.
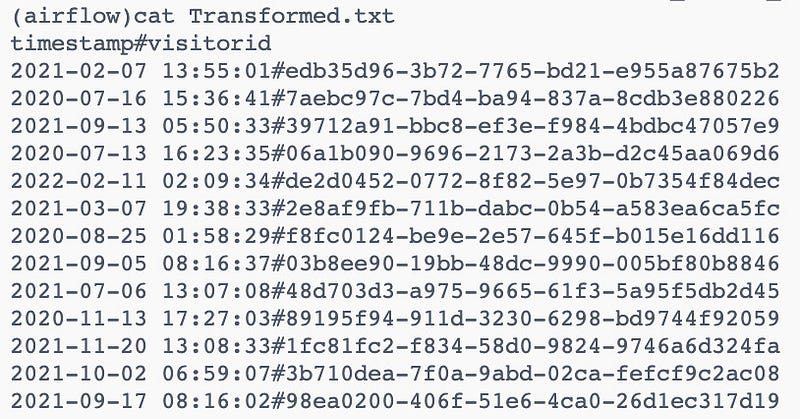
Now we will transform the extracted columns to be all lowercase and create a new file with the transformed data.
#Transform the extracted columns to be all lowercase
transform=BashOperator(
task_id='transform',
bash_command='tr "[A-Z]" "[a-z]" < /opt/airflow/dags/web_server_log_extracted.txt > /opt/airflow/dags/Transformed.txt',
dag=dag,
)
As you can see below, the `Transformed.txt` file has been created with the transformed columns.
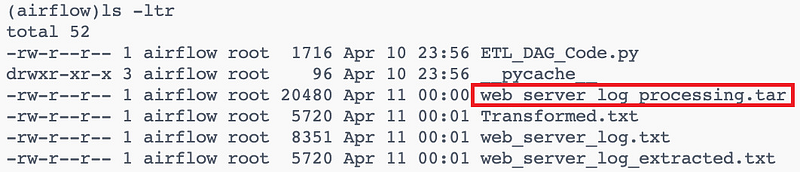
The last step is to compress the transformed and extracted data
#Compress the transformed and extracted data
load=BashOperator(
task_id='load',
bash_command='tar cfv /opt/airflow/dags/web_server_log_processing.tar /opt/airflow/dags/web_server_log_extracted.txt /opt/airflow/dags/Transformed.txt',
dag=dag,
)
As you can see below, the `web_server_log_processing.tar` file has been created.
5. Define the Task Dependencies
This code defines the task dependencies in an Airflow DAG. Tasks in Airflow can depend on other tasks, and this is defined using the >> operator. In this example, The output of `download` is used as the input for `extract`, and the output of `extract` is used as the input for `transform` and so on. In other words, the download, extract and transform tasks are dependencies or upstream tasks for the load, which is a downstream task.
download >> extract >> transform >> loadAnd when the workflow is successful, the output will be like this:

In the previous example, we used sequential execution but sometimes we need another type of execution like
- Parallel execution: In some workflows, you may have multiple tasks that can be executed in parallel, rather than in a strict sequential order. For example, you may have a task that downloads data from multiple sources in parallel, followed by a task that merges the data. In this case, the order of execution may not be strict, and the upstream and downstream tasks would need to be identified based on their dependencies. Here is an example:
with DAG('parallel_execution', start_date=datetime(2023, 3, 29), schedule_interval=None) as dag:
download_task_1 = PythonOperator(
task_id='download_task_1',
python_callable=download_data_from_source,
op_kwargs={'source': 'source_1'}
)
download_task_2 = PythonOperator(
task_id='download_task_2',
python_callable=download_data_from_source,
op_kwargs={'source': 'source_2'}
)
download_task_3 = PythonOperator(
task_id='download_task_3',
python_callable=download_data_from_source,
op_kwargs={'source': 'source_3'}
)
merge_task = PythonOperator(
task_id='merge_task',
python_callable=merge_data,
provide_context=True
)
[download_task_1, download_task_2, download_task_3] >> merge_taskpy
The three download tasks can be executed in parallel since they don’t have any dependencies on each other. The merge_task is downstream of all three download tasks, and can only be executed after they have all been completed successfully.
In this article, we have provided you w an understanding of the code required to build these workflows. By following these guidelines, you can streamline your data processing pipelines, automate your workflows, and improve the efficiency of your data operations. Whether you are a data engineer, data scientist, or just getting started with Airflow, we hope this article has provided you with a solid foundation for building and managing your own workflows using Airflow DAGs.
Become a member and read every story on Medium. Your membership fee directly supports me and other writers you read. You’ll also get full access to every story on Medium.


