
A Step-by-Step Guide on Playwright to Increase Testing Automation
This article aims to guide you step-by-step on setting up and running Playwright for user e2e testing. It is completely capable of replacing any manual testing process for your web app.
Get into the project folder and install dependencies
mkdir playwright-test && cd playwright-test
npm init playwright@latest
Run test in the default setup
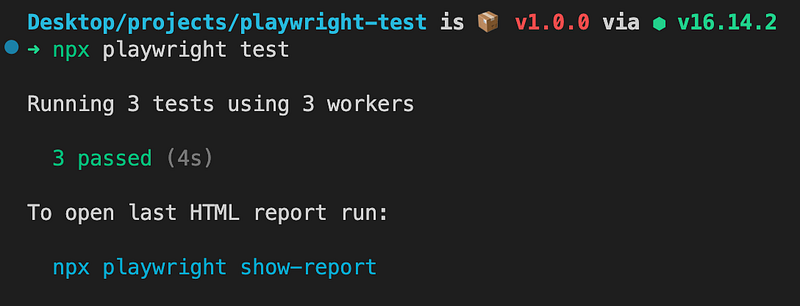
npx playwright testTests will be run on all 3 browsers, chromium, firefox, and webkit using 3 workers. In default headless mode, no browser will open up when running the tests. The results of the tests and test logs will be shown in the terminal.
To see the browser in action, run
npx playwright test --project=chromium --headedTo interact with the test browser
Add await page.pause(); to where you feel like stopping it. Then the Playwright Inspector will pop up and the paused step during the execution.
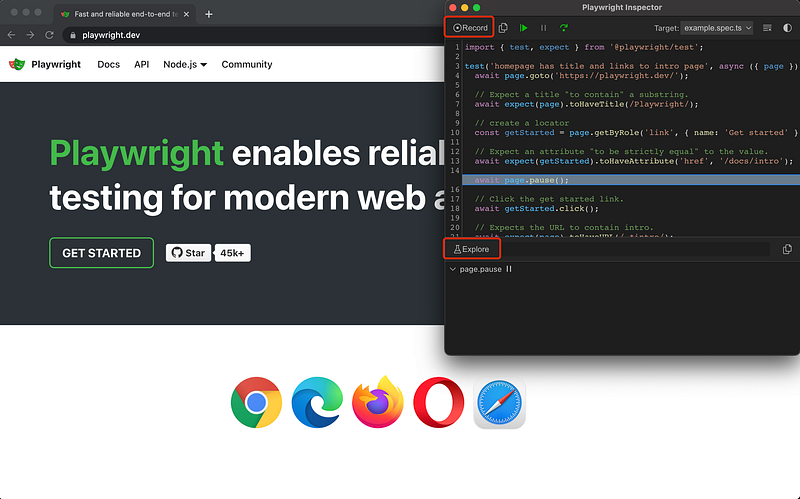
In the inspector
There are two great buttons/features that you really want to know to save yourself from staring at HTML elements and writing boilerplates
- Record (which records your actions and translates into lines of code)
- Explore (which allows you to hover over the page to find elements)
For more info and specific example, feel free to visit the offical doc here
If you find the guide helpful, feel free to clap and follow me. Join medium via this link to access all premium articles from me and all other awesome writers here on medium.