
A Step-by-Step Guide how to create a Desktop Application Using React.js and Electron.js

Electron is a powerful framework that allows developers to build cross-platform desktop applications using web technologies like HTML, CSS, and JavaScript. One of the major advantages of Electron is its ability to run on multiple operating systems, including Windows, macOS, and Linux, without requiring separate codebases. This makes it an ideal choice for developers looking to reach a broad audience.
Pairing Electron with React, a popular JavaScript library for building user interfaces, offers a robust development experience. React’s component-based architecture complements Electron’s capabilities, making it easier to create dynamic and interactive desktop applications. The combination leverages the best of both worlds: the flexibility and ease of web development with the power and capabilities of native desktop applications.
According to the 2021 Stack Overflow Developer Survey, Electron is one of the most popular frameworks among developers, and React holds a similar position in the libraries ecosystem. This speaks volumes about their effectiveness and the community support you can expect.
For more in-depth information, you can refer to the official documentation of Electron and React.
In this article, we’ll explore how to create a desktop application using React and Electron. We’ll focus on the basic configuration to get you started, from initial setup to building executable files for multiple platforms. Let’s dive in!
Prerequisites
- Node.js and npm installed
- Basic knowledge of React and Electron
Setting Up the Project
First, let’s initialize a new React project and install Electron
npx create-react-app my-electron-app
cd my-electron-app
npm install electron electron-is-dev --save-dev
Configuring Electron
Create a new file named electron.js inside the public folder and add the following code:
// Import required modules
const path = require('path');
const { app, BrowserWindow } = require('electron');
const isDev = require('electron-is-dev');

// Initialize mainWindow variable
let mainWindow;

// Function to create the main window
const createWindow = () => {
  // Configure the main window
  mainWindow = new BrowserWindow({
    width: 800,
    height: 600,
    webPreferences: {
      nodeIntegration: true, // Enable Node.js integration
      enableRemoteModule: true, // Enable remote module
      contextIsolation: false, // Disable context isolation
      autoHideMenuBar: true, // Auto-hide menu bar
    },
  });

  // Hide the menu bar
  mainWindow.setMenuBarVisibility(false);

  // Load the appropriate URL based on the environment
  mainWindow.loadURL(
    isDev
      ? 'http://localhost:3000' // Development URL
      : `file://${path.join(__dirname, '../build/index.html')}` // Production URL
  );

  // Open DevTools in development mode
  if (isDev) {
    mainWindow.webContents.openDevTools({ mode: 'detach' });
  }
};

// Create the main window when the app is ready
app.whenReady().then(createWindow);

// Quit the app when all windows are closed (except on macOS)
app.on('window-all-closed', () => {
  if (process.platform !== 'darwin') {
    app.quit();
  }
});

// Create a new window when the app is activated (macOS)
app.on('activate', () => {
  if (BrowserWindow.getAllWindows().length === 0) {
    createWindow();
  }
});
Detailed
Importing Required Modules
First, we import the required modules from Electron and other packages.
// Import required modules
const path = require('path');
const { app, BrowserWindow } = require('electron');
const isDev = require('electron-is-dev');
Initialize mainWindow Variable
Declare a variable mainWindow that will hold the BrowserWindow instance.
// Initialize mainWindow variable
let mainWindow;
Create Window Function
The createWindow function initializes the main Electron window.
// Function to create the main window
const createWindow = () => {
  // ...
};
Window Configuration
Inside createWindow, we configure the window's dimensions, icons, and web preferences.
// Configure the main window
mainWindow = new BrowserWindow({
  width: 800,
  height: 600,
  webPreferences: {
    nodeIntegration: true, // Enable Node.js integration
    enableRemoteModule: true, // Enable remote module
    contextIsolation: false, // Disable context isolation
    autoHideMenuBar: true, // Auto-hide menu bar
  },
});
Set Menu Bar Visibility
We set the menu bar to be hidden by default.
// Hide the menu bar
mainWindow.setMenuBarVisibility(false);
Load URL
Depending on whether we are in development or production, we load the appropriate URL into the window.
// Load the appropriate URL based on the environment
mainWindow.loadURL(
  isDev
    ? 'http://localhost:3000' // Development URL
    : `file://${path.join(__dirname, '../build/index.html')}` // Production URL
);
Open DevTools
If we are in development mode, we open Chrome DevTools.
// Open DevTools in development mode
if (isDev) {
  mainWindow.webContents.openDevTools({ mode: 'detach' });
}
App Lifecycle Events
We define what happens when the app is ready, and when all windows are closed.
// Create the main window when the app is ready
app.whenReady().then(createWindow);

// Quit the app when all windows are closed (except on macOS)
app.on('window-all-closed', () => {
  if (process.platform !== 'darwin') {
    app.quit();
  }
});

// Create a new window when the app is activated (macOS)
app.on('activate', () => {
  if (BrowserWindow.getAllWindows().length === 0) {
    createWindow();
  }
});
That’s a detailed breakdown of the Electron configuration with comments. Each part plays a crucial role in setting up your Electron app with React.
Modifying package.json
Update the main field in your package.json to point to the electron.js file:
"homepage": "./",
"main": "public/electron.js",
Add a new script to start Electron:
"scripts": {
  "start-electron": "electron .",
  // ...
},
Running the App
To run the app, execute the following commands in two separate terminals:
npm start
npm run start-electron
Results:
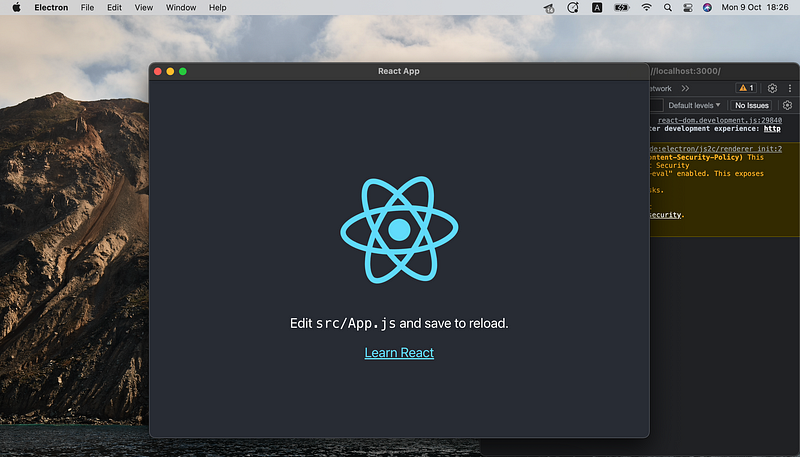
At this point, you should have a working Electron application integrated with React. The beauty of this setup is that you can now develop your application just like you would with a standard React app. You can use all the React features, libraries, and components you’re familiar with.
In the next part of this series, we’ll dive deeper into the unique features that Electron offers, such as native menus, file system access, and more.
Building the Electron App
Building an Electron app for different platforms involves a few steps. Here’s a step-by-step guide to building your Electron app for macOS, Windows, and Linux.
Building for macOS
- Install electron-packager: First, you’ll need to install
electron-packager.
npm install electron-packager --save-dev
Add Build Script: Add a build script to your package.json.
"scripts": {
  "package-mac": "npm run build  && electron-packager . --overwrite --platform=darwin --arch=x64 --icon=assets/icons/mac/icon.icns --prune=true --out=release-builds"
}
Run Build Script: Execute the build script.
npm run package-mac
Building for Windows
Add Build script for Windows
"scripts": {
  "package-win": "npm run build  && electron-packager . MyApp --overwrite --platform=win32 --arch=ia32 --icon=assets/icons/win/icon.ico --prune=true --out=release-builds"
}
Building for Linux
Add Build script for Linux
"scripts": {
  "package-linux": "npm run build  && electron-packager . MyApp --overwrite --platform=linux --arch=x64 --icon=assets/icons/png/1024x1024.png --prune=true --out=release-builds"
}
That’s it! You should now have executable files for macOS, Windows, and Linux in your release-builds directory.
The results of macOS build:

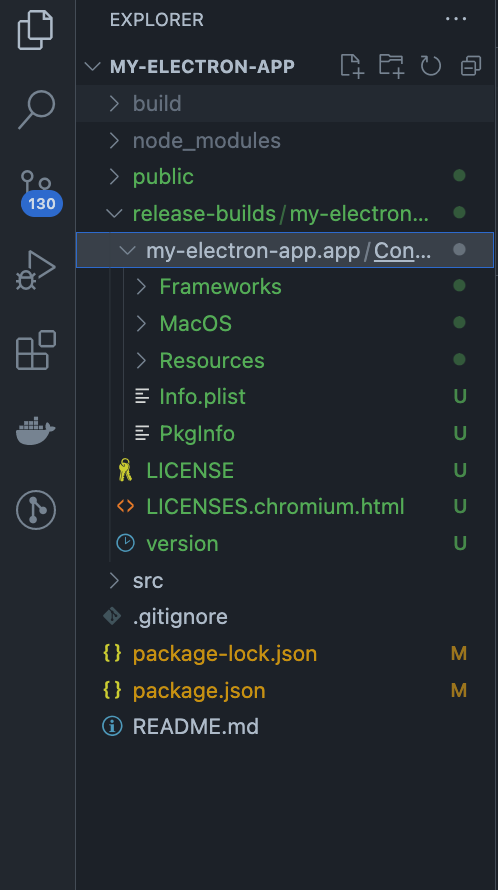

Now that you’ve successfully built your Electron application, you have an executable file that can be easily shared and installed on other computers. You can distribute this file through various channels, including direct downloads from your website, or even submit it to platform-specific stores like the Mac App Store or Microsoft Store. This opens up a wide range of possibilities for reaching a broader audience and delivering a seamless user experience across different operating systems. The sky’s the limit from here!
Conclusion
Congratulations, you’ve successfully built a cross-platform desktop application using Electron and React! You’ve learned how to set up your development environment, integrate React with Electron, and package your application for macOS, Windows, and Linux.
This setup allows you to leverage the full power of web technologies and native desktop capabilities, offering a seamless user experience across different platforms. While we’ve covered the basics, the possibilities are endless. You can extend your application with advanced Electron features, which we’ll explore in the next part of this series.
Thank you for following along, and happy coding!


