
A Shell Script Starter for Small to Large Projects
Do you think creating a large Shell Script project is hard? Use Shellscript Starter!

Introduction
In the last article, I wrote about how to modularize Bash script code. This time, I created a Shell Script starter plus more based on the article. It works for bash, zsh, sh, ksh. By using this starter you can create a project like GitHub CLI that has many subcommands. (You can use the starter without any subcommands if you wish.)
In this article, you will find how to use this starter for your next Shell/Bash/Zsh/Ksh Script projects.
I tested it with the following Shells.
/bin/bash 3.2.57(1)-release (arm64-apple-darwin21)
/bin/ksh sh (AT&T Research) 93u+ 2012-08-01
/bin/sh GNU bash, version 3.2.57(1)-release (arm64-apple-darwin21)
/bin/zsh zsh 5.8 (x86_64-apple-darwin21.0)
/usr/bin/env bash 5.1.12(1)-release (aarch64-apple-darwin21.1.0)
Please download or clone the GitHub repo.
Shebang
Use one of the following shebang for the main script, shellscript_starter.
#!/usr/bin/env bash
#!/usr/bin/env zsh
#!/usr/bin/env ksh
#!/usr/bin/env bash
#!/bin/sh
You don’t need to add shebang to other files. But your text editor may need it for formatting.
Changing the main script name
The main script name is shellscript_starter. You need to change it to a unique name.
# change the directory name
$ mv shellscript_starter my_script
$ cd my_script
# change the main script name
$ mv shellscript_starter my_script
Test some commands:
$ ./my_script -h
$ ./my_script cmd1 -a -b
$ ./my_script --version
$ ./my_script text_example
I use shellscript_starter for the rest of this article to indicate the main script file name.
Don’t add the .sh extension to the main script name. But use the .sh extension for all other script files.
If you need to make the file executable:
$ chmod +x my_scriptSetting variables
In the main script, shellscript_starter file, find the variable section, and set your variables:
Importing files
In the import files section, you will find example codes. You need to import /lib/getoptions.sh and /lib/main_definition.sh for it to work properly.
If you are going to use subcommands, create new definition files in the lib directory and import those files here. More about definition files later.
You don’t need to import your subcommand files here. We will do it in the case statement later.
The repo includes the utils , shell_helpers , and bash_helpers files.
utils.sh
You can use the utils file for all Shells. It has check_cmd, check_bash, text colors and text attribute functions.
shell_helpers.sh and bash_helpers.sh
Use one of those helper files for your project. If your target is Bash, then import bash_helpers.sh, otherwise, import shell_helpers.sh.
cmd1_definition.sh, cmd2_definition.sh
These are sample codes. Please use them as references when you create yours.
Creating subcommand definition files
Create your parser definition files in the /lib directory. See the /lib/cmd1_definition.sh and /lib/cmd2_definition.sh as examples. In your definition files, set command flags, parameters, options, descriptions, and examples.
The following example is from ko1nksm/getoptions.
Checking user environment
OS
You will find the following code in the shellscript_starter file. If you need to check the OS, you can use it to set OS-dependent variables or commands. Otherwise, you can remove it.
check commands
The /lib/utils.sh file has check_cmd() function. Once you imported this file in the import section, you can check if the user has certain commands:
check_cmd jq
check_cmd you_dont_have_it
If a user doesn’t have the command in the system, it gives a warning and exits the script.
check bash
If your target is Bash, then it is a good idea to check the bash version.
The utils file has the check_bash() command. Check if a user has at least Bash version of 5:
check_bash 5Adding a subcommand
Let’s create a new subcommand called create.
Step 1
Add your command in the /lib/main_definition.sh file.
# example
cmd create -- "Create this and that."
Step 2
Create the lib/create_definition.sh file and import it in the above import section.
# in the import section
. "${script_dir}/lib/create_definition.sh"Step 3
Create /src/create.sh and write your script.
Step 4
At the end of the main script, shellscript_starter file, you will find examples.
We are adding the following:
Your new subcommand is: create
Your parser definition file is: lib/create_definition
The lib/cmd3_definition file has: parser_definition_create() function
The src/cmd3.sh file has: a function fn_create()
Add the following:
Step 5 Test your script
$ ./shellscript_starter create -a -d ~/Downloads
Example commands
The starter repo includes three subcommands.
Text example
This subcommand prints different text colors and types.
$ ./shellscript_starter text_example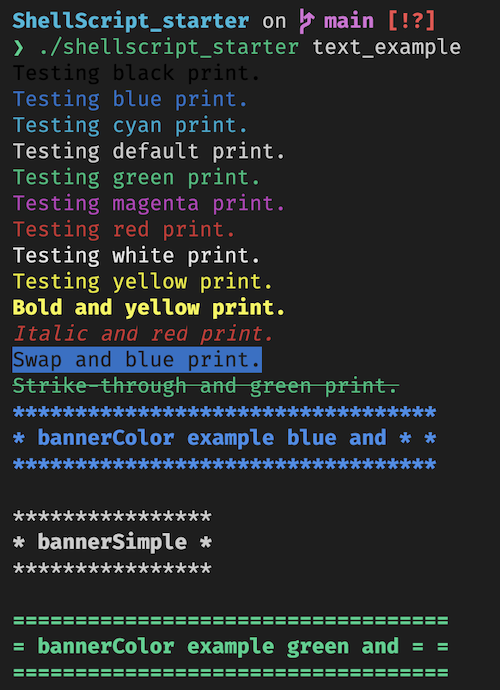
The /src/text_example.sh file uses functions from the /lib/utils.sh that you can use for your project.
cmd1
This subcommand uses the ko1nksm/getoptions basic example.
$ ./shellscript_starter cmd1 -a -b +f --with-flag -vvv -p foo -n 5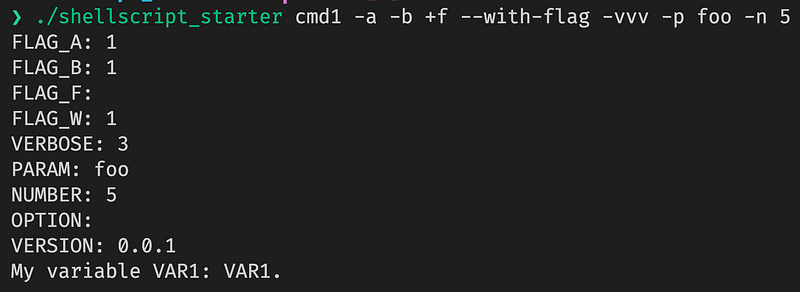
cmd2
This subcommand uses the ko1nksm/getoptions advanced example.
$ ./shellscript_starter cmd2 -a +b -c -vv -p bar --number 5 --range 50 --pattern foo --blood-type ab --array a,b,c,d --array-posix e,f,g arg1
Helper files
The starter repo includes two helper files. Import only one of the helper files.
# shellcheck disable=SC1091
{
    # other files ...
    . "${script_dir}/lib/shell_helpers.sh"
}
Shell helpers
All the functions are taken from dylanaraps/pure-sh-bible.
Bash helpers
All the functions are from dylanaraps/pure-bash-bible.
Debian APT
If you are creating a Debian package, you need to remove the readlinkf() function and define the script directory as in the following:
script_dir="/usr/share/my_script"Please find more details in this article.
Unit testing
The starter uses Shellspec unit testing.
When you run a unit test for bash_helpers_spec.sh, specify the path to bash using the -s parameter.
$ shellspec spec/bash_helpers_spec.sh -s "/usr/bin/env bash"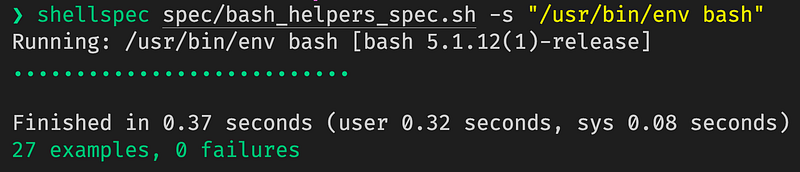
Run a unit test for shell_helpers_spec.sh:
$ shellspec spec/shell_helpers_spec.sh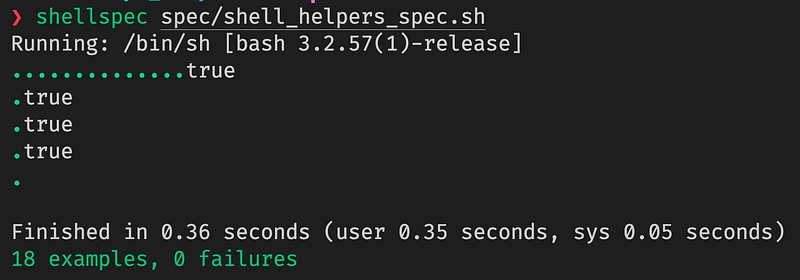
Run the Shellspec tests from the root directory and use the -s parameter to specify the path to the shell you want to use.
You can create your unit test files in the spec directory.
Conclusion
The Shell script starter template is great for multiple subcommand projects. You can use it for a simple Shell/Bash/Zsh/Lsh script project as well.
You can create a new unit testing file in the spec directory. You can use snippets from one of the helper files and add new commands easily.
If you have any questions, please use the comment section.
Happy coding!
Get full access to every story on Medium by becoming a member.


