
The Easiest Way to Record a Presentation
3 steps to recording your presentation for online delivery

COVID-19 restrictions came in when I was half way through delivering a biology course to around 700 students. Within days face-to-face teaching was no longer possible and classes needed to move online. I wanted to use the easiest way to record my lectures, leaving more time to address challenges such as how to have students isolate DNA at home.
I chose Microsoft Powerpoint as it is an application I, and most people, are familiar with.
I didn’t add my face as a ‘talking head’ as I felt it would not add much value throughout the lecture when I couldn’t see the audience I was engaging with. And as the lecture recordings at my institution generally only capture the screen this format is what my students were familiar with.
If you do think featuring yourself would make the presentation more personal, one option I tried was recording two pieces to camera and using imovie to add these at the start and end of the lecture — these provided context and a conclusion. I find imovie quite easy to use as you can even film and edit a presentation on your iphone!
The recording feature of Powerpoint is particularly efficient as you record each slide separately. This makes it easy to repeat a portion if you make a mistake or are interrupted. It also means you can update content easily if you want to update the slides or your narrative in the next iteration of the course.
So let’s get you started…
Step 1:
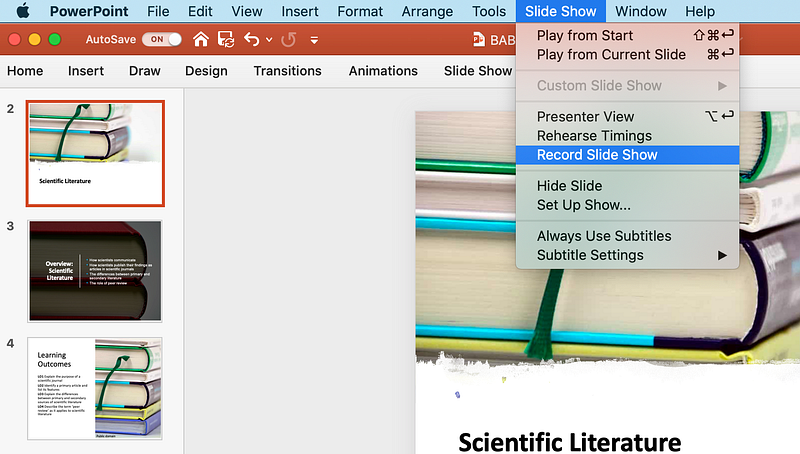
In Powerpoint, select ‘Slide Show’ from the menu and then ‘Record Slide Show’.
Step 2:
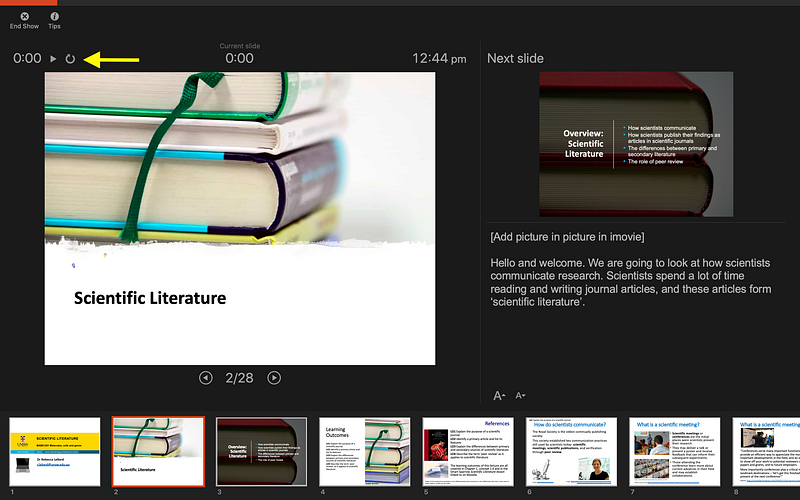
The recording will start immediately, but I prefer to press the pause icon and restart once I am ready. Each slide is recorded separately, so there is no editing required, if something goes wrong you just restart. This also means you can easily respond to any feedback from students by adding slides or updating the lecture for the next iteration of a course.
Step 3:
Once the recording is completed (and saved as a .pptx), select ‘File’ from the dropdown menu and ‘Export’. Choose ‘MOV’ from the formats displayed.
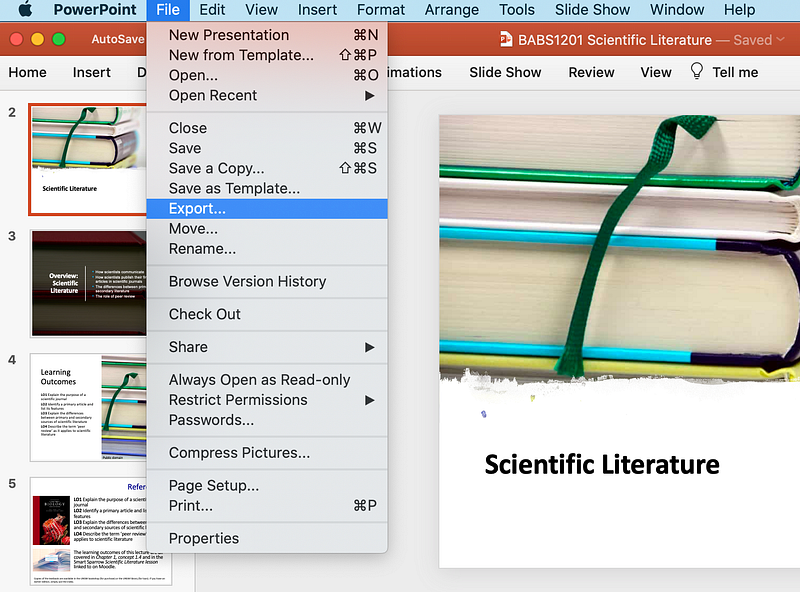
Step 3 is one that students have told me they really appreciate. Students can listen to the recording in Powerpoint, and changing the format to a movie makes the file substantially larger. Yet it allows students to vary the speed that they listen to the lecture, and to skip ahead to a section easier. Yes, many students prefer to listen to lecture recordings at 1.5 or 2 times the normal speed!
Most of my lectures have writing in the notes section, which I have added in case anyone else needs to deliver my lectures. I found this really helpful when recording! While I do not use these when giving lectures in a theatre, it was quite different making a recording and I needed these prompts.
I uploaded the files directly into the platform my institution uses for lecture recordings. If you don’t have that option then YouTube is probably the easiest place to upload, and you have the option to publish as unlisted (where only those with the link can find your video) if you prefer.


