
A Powerful Way to Master New Data Science Libraries Without Wasting Weeks
Learn new packages effectively on your own

Motivation
Online courses and videos often have hidden agendas. They want to make the new data science libraries you are learning as easy as possible to give you instant gratification and a sense of accomplishment. But when it comes to solving real-world problems with them, you usually receive a backhand slap in the face.
So, let this article be a numbing agent on your face — a guide on how to learn new libraries effectively inside and out on your own. It is designed to make your fingers dirty from the get-go and etch the knowledge about the library into your brain with hard practice.
Let’s dive in.
Step 0: Be on the clouds
Different packages have different requirements in terms of dependencies or computation expenses. As you would repeat this learning process for many packages (I hope), saturating your local environment with new Conda environments is not an option.
Besides, most data science packages like SHAP and UMAP want big CPUs and GPUs, so cloud environments should be your first choice. The best options are Google Colab or Kaggle Kernels. Both offer generous benefits in terms of coding environment and hardware.
Besides, they all run on Linux under the hood, and some libraries you will encounter are way easier to install if you have a Linux machine. People who tried to install Tensorflow GPU on Windows know what I am talking about😉.
And just in case:
Step 1: Start with Quickstart
The first page you visit from the documentation of your new package is the Quickstart. If there is none, there will probably be an installation page, or just the home page will do. You want to form the initial impressions of whether learning the package is worth it and, if so, learn how to install it.
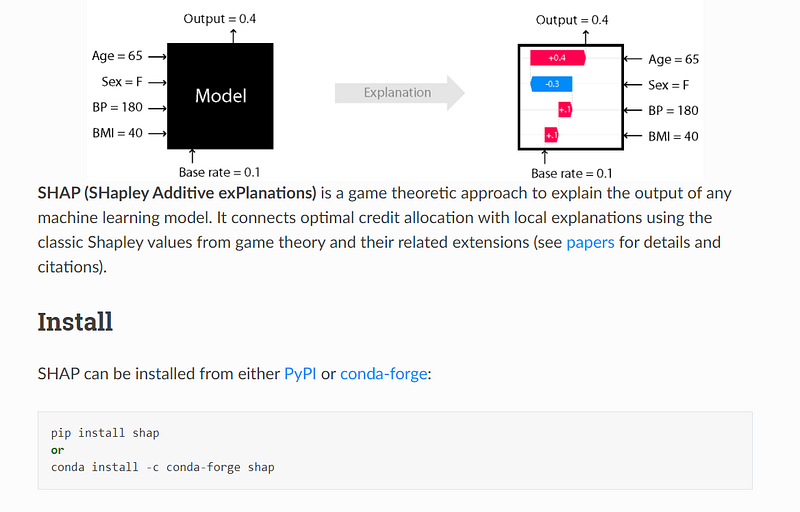
Unless the package requires third-party software, simple pip or conda installs will be all you need. For example, here is the quickstart for SHAP — an excellent framework to explain black-box models and deep neural nets.
Step 2: The N-tab Rule
After the installation, you leave the documentation and search Google for “your_package_name tutorial.”
You open a few links to articles in separate tabs and start reading them cursorily. You don’t want YouTube videos where half the video is spent watching the guy type the code and waste your time with filler sentences.
By reading a few articles on your package, you gain some insight into the context of the problem it solves and how it solves it. You will also get some exposure to its basic API.
Besides, a good tutorial explains most of the related terms and concepts to your package, so you won’t get lost when they are mentioned in the documentation out of the blue.
Finally, you choose one or two articles that explain the package the best and leave their tabs open if you need them during the next steps.
Step 3: Move on to the tutorials section or the user guide
Now, it is time to open the tutorials page of the documentation. Your package documentation may not have a separate section for tutorials. In that case, you search for the “Examples” page or just put the word “examples” in the search bar of the docs. Searching for a “User guide” works as well.
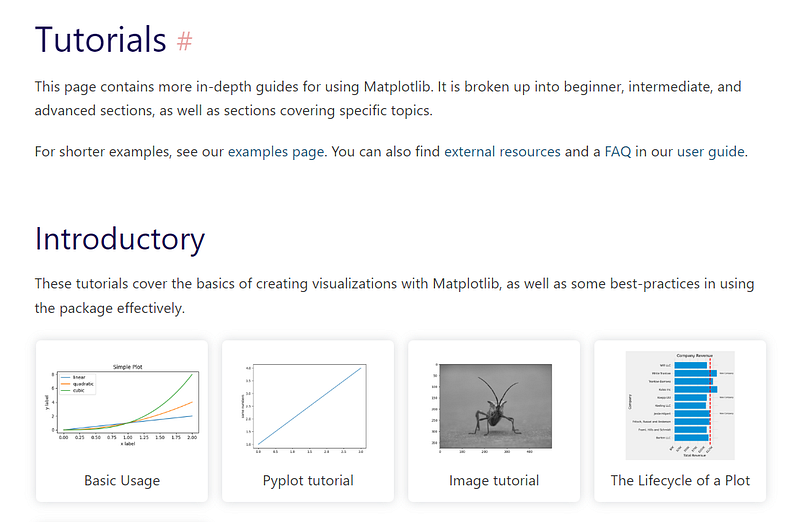
If you are lucky and your package is widespread, there is a good chance it will have a comprehensive tutorials page. For example, Matplotlib divides its tutorials into three levels of difficulty. All its code examples are written by package creators and run fast, allowing you to experiment with the code quickly:
The core part of your learning happens in this stage. You should open each tutorial one by one, read the explanations carefully and copy each code chunk into your environment.
I recommend spending at least 2–5 minutes on each chunk. First, run it line by line, commenting and uncommenting them. Then, change the values of different parameters and see what effect they have on the output. I use “Shift + Tab” on Jupyter Lab, which shows the class or function docstring in a pop-up for possible ideas.
Even though the first few tutorials will take a couple of hours, you will spend less time as you move to subsequent pages because the functions and classes will start to repeat.
Step 4: The API reference
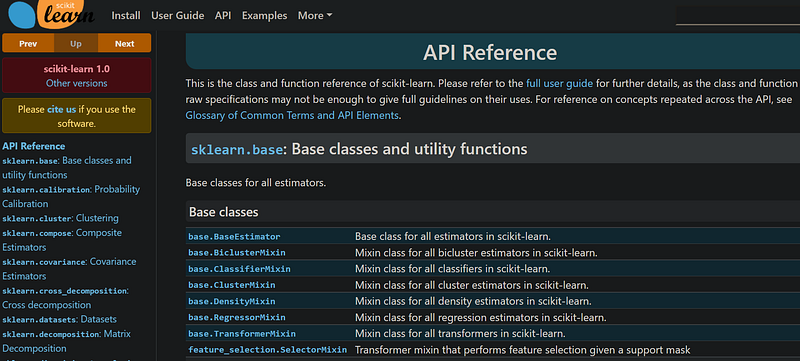
Now, we put the finishing touches. The API reference page is usually at the end of the documentation, and it shows a list of every module, class, and function inside the package.
There will be hundreds of references, so you only need to explore the functionalities that you need. You already know what you want because you have spent quite a while learning about the package, noting its advantages and weaknesses, and have a good idea of how you will use it.
After finding functions you may use in the future, open their documentation and try out the examples a few times. I also suggest reading the other function and class names at least once. Quite often, you will face edge cases that might be solved elegantly by one of the functions that are buried in the corners of the API reference.
Step 5: What about the CLI?
What if your package has a CLI tool as well?
Usually, CLI is for people who are experienced on the command line and already know the core package API (and are hackers :). That’s why you need to learn it in the last stage.
If your package has a CLI tool, it will have a separate CLI reference page as well. You should open it on a separate tab and read it just like you did in the API reference section.
I also heavily use the --help or -h flags extensively. For example, using -h after conda shows all subcommands of the Anaconda CLI:
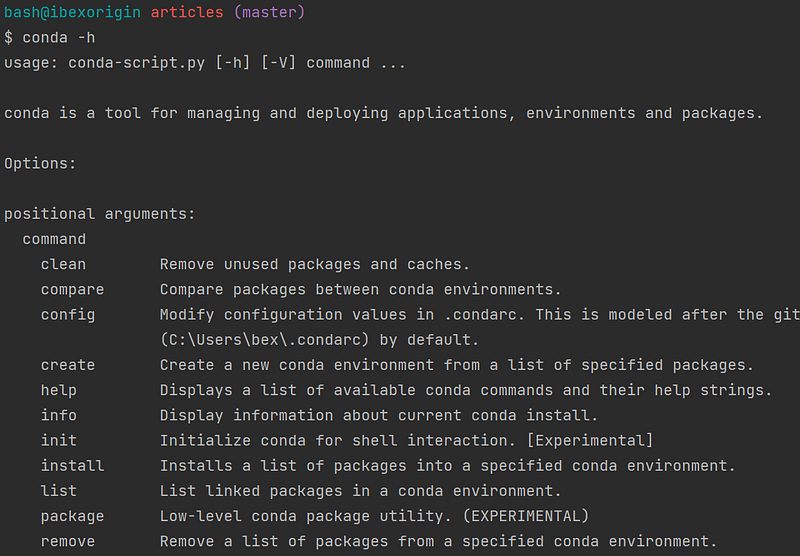
I am mostly interested in the create, install and remove subcommands because those are the only ones I need to manage environments. After combining each one with conda keyword, I add the -h flag again and get another set of subcommands. I try out the ones I need and continue adding -h flags until I am comfortable with the whole process.
That’s how you will become a command-line ninja!
Wrap
The data science stack is overwhelming. There are so many things you need to learn and practice. To make the most out of your time, you need to learn smart and make every learning session as productive as possible. The main idea is to comprehensively learn every package, library, and framework so that you don’t ever have to waste your precious time relearning.
Besides, knowing the required packages and tools inside out enables you to do deep, uninterrupted work, vastly increasing your output capacity.
Thank you for reading!