
A Beginner’s Guide to Configuring Android ⚙️Build Variants

Android build variants are configurations that allow developers to build different versions of their Android app from the same source code. Configuring build variants is essential for managing different flavors of an app, such as debug, release, or custom versions for different environments. This guide will walk you through the process of configuring Android build variants with examples for better understanding.
⚙️Step 1: Understanding Build Variants
Build variants represent different versions of your app, each with its own set of configurations, resources, and behaviors. Common build variants include debug for development and testing and release for production. Android Studio automatically creates a default set of build variants, but you can customize them based on your requirements.
⚙️Step 2: Open Your Android Project
Launch Android Studio and open your Android project.
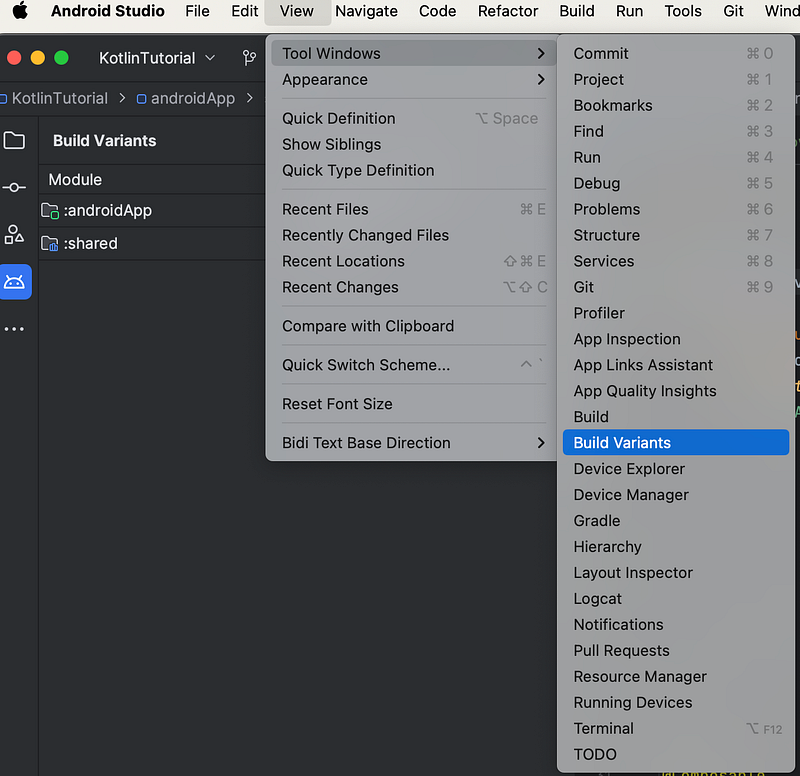
⚙️Step 3: Locate the “Build Variants” Tab
Navigate to the Build Variants tab located on the left side of the Android Studio window. If you can’t find it, you can open it by clicking on View in the top menu and selecting Tool Windows then choosing Build Variants

⚙️Step 4: Understand Default Build Variants
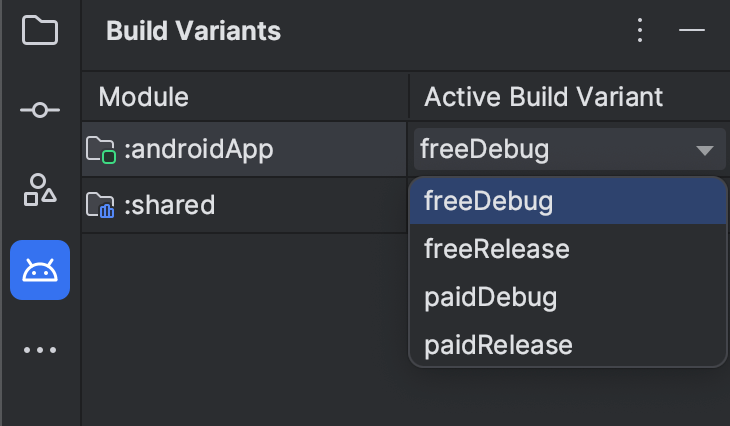
By default, Android Studio creates two build variants: debug and release The debug variant is used for development, while the release variant is intended for production. You can see these variants listed in the Build Variants tab.
⚙️Step 5: Create Custom Build Variants
The following code sample creates a flavor dimension named version and adds paid and full product flavors. These flavors provide their own applicationIdSuffix andversionNameSuffix :
android {
    // Specifies one flavor dimension.
    flavorDimensions += "version"
    productFlavors {
        create("paid") {
            // Assigns this product flavor to the "version" flavor dimension.
            // If you are using only one dimension, this property is optional,
            // and the plugin automatically assigns all the module's flavors to
            // that dimension.
            dimension = "version"
            applicationIdSuffix = ".paid"
            versionNameSuffix = "-paid"
        }
        create("free") {
            dimension = "version"
            applicationIdSuffix = ".free"
            versionNameSuffix = "-free"
        }
    }
}
⚙️Step 6: Configure Build Types
You can create and configure build types inside the android block of the module-level build.gradle.kts file. When you create a new module, Android Studio automatically creates the debug and release build types. Although the debug build type doesn't appear in the build configuration file, Android Studio configures it with debuggable true. This lets you debug the app on secure Android devices and configures app signing with a generic debug keystore.
You can add the debug build type to your configuration if you want to add or change certain settings. The following sample specifies an applicationIdSuffix for the debug build type and configures a "staging" build type that is initialized using settings from the debug build type:
android {
    defaultConfig {
        manifestPlaceholders["hostName"] = "www.example.com"
        ...
    }
    buildTypes {
        getByName("release") {
            isMinifyEnabled = true
            proguardFiles(getDefaultProguardFile("proguard-android.txt"), "proguard-rules.pro")
        }

        getByName("debug") {
            applicationIdSuffix = ".debug"
            isDebuggable = true
        }

        /**
         * The `initWith` property lets you copy configurations from other build types,
         * then configure only the settings you want to change. This one copies the debug build
         * type, and then changes the manifest placeholder and application ID.
         */
        create("staging") {
            initWith(getByName("debug"))
            manifestPlaceholders["hostName"] = "internal.example.com"
            applicationIdSuffix = ".debugStaging"
        }
    }
}
⚙️Step 7: Build and Run Your Custom Variants
Once you’ve configured your custom build variants, you can build and run them from the Build Variants tab. Select the desired variant, then click the Runbutton to deploy the app with the specified configurations.
⚙️Conclusion:
Configuring Android build variants is crucial for managing different versions of your app efficiently. By understanding and customizing build variants, you can streamline your development process and ensure that your app meets the requirements of various environments. Experiment with different configurations to find the setup that best suits your needs.⚙️⚙️⚙️⚙️⚙️


