
A Step-by-Step Guide on React Router 6
Comprehensive examples for React Router

For a web application, routing is the mechanism to render the whole or partial page based on the provided URL, params, or user actions on a button, link, icon, etc.
React itself does not include routing. react-router is compatible with the latest versions of React, and it is the most popular routing choice for React applications. React Router enables the navigation among views of various components. It reads and controls the browser URL, and keeps the UI synchronized with the URL.
React Router 6 was release on November 3, 2021. Let’s go over the details on how to use it.
Navigation Terminologies
First, we review some terminologies that are used frequently in browser navigation.
URL
URL (Uniform Resource Locator) is the address of a given unique resource on the web. A browser has an address bar for users to type in a specific URL, or to be filled programmatically.
The URL interface is used to parse, construct, normalize, and encode URLs. It has a number of properties which can be read and modified.
Create a URL:
const url = new URL('https://john:password@www.mycompany.com:8080/users/?id=5#profile');Here is the generated object:
url.searchParams.get('id') returns 5.
Location
Location is an object that represents the URL location. It is based on the browser’s window.location object.
Type URL, www.google.com, in a browser’s address bar, and window.location is set to the following value:
Here is the Path and Location definitions in React Router:
History
There are two history APIs that track and manipulate browser history:
historyAPI: It tracks the main frame URLs that a user has visited in any tab for the lifetime of a profile.Historyinterface: It manages the browser session history. i.e. it tracks the navigation in each tab.
Since the History interface is more meaningful in modern browsers, window.history includes an entry for History. Here is an example of window.history:
Here is the History definition in React Router:
Set Up Working Environment
React Router is published with 3 packages:
react-routercontains most of the core functionality of React Router, including the route matching algorithm and most of the core components and hooks.react-router-domincludes everything fromreact-routerand adds a few DOM-specific APIs, including<BrowserRouter>,<HashRouter>, and<Link>.react-router-nativeincludes everything fromreact-routerand adds a few APIs that are specific to React Native, including<NativeRouter>and a native version of<Link>.
For web applications, all we need is react-router-dom.
As always, we build the Create React App environment:
npx create-react-app react-router
cd react-router
Set up react-router-dom:
npm i react-router-domIn addition, lorem-ipsum is installed to generate lorem ipsum placeholder text for the pages. Lorem ipsum text is commonly used as placeholder text in publishing, graphic design, and web development.
npm i lorem-ipsumreact-router-dom and lorem-ipsum become part of dependencies in package.json.
Set Up Routes
Router is a stateful, top-level component that makes all the other navigation components and hooks work. React Router has BrowserRouter, HashRouter, StaticRouter, NativeRouter, and MemoryRouter. For web applications, BrowserRouter is commonly used. An application should have one <BrowserRouter>, which wraps one or more <Routes>.
<Routes> checks all its children <Route> elements to find the best match, and renders that part of the UI.
<Route> is defined as an object or a Route element. If it is an object, the object has a shape of { path, element }. If it is a Route element, the component has a shape of <Route path element>. When the path pattern matches the current URL, the element prop is rendered.
We prepare a few pages to be managed in src/Pages.js:
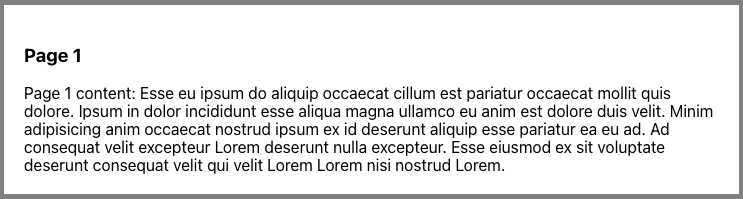
Lines 3–10 defines the function, getPage. It generates a titled page, where the page content is generated by loremIpsum() with 5 random sentences (line 7).
The getPage function is used to generate PageOne (line 12) and PageTwo (line 13). Here is how PageOne looks, and PageTwo looks similar.
In src/App.js, two routes are created:
<BrowserRouter> and <Routes> are used to defined the router (lines 6–11).
There are two <Route>s in the app. When the URL matches the path, "one", the app shows PageOne (line 8). When URL matches the path, "two", app shows PageTwo (line 9).
Execute the app by running the command, npm start.
http://localhost:3000/one shows PageOne.

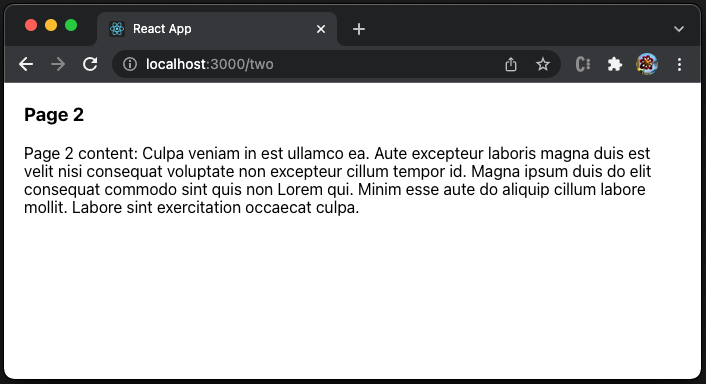
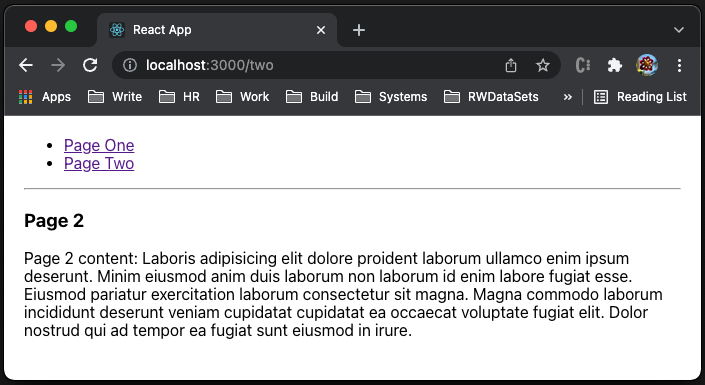
http://localhost:3000/two shows PageTwo.
The app works for the paths, "one" and "two". However, http://localhost:3000 does not show anything, same as any invalid URLs, such as http://localhost:3000/anything.
This problem can be resolved with a wildcard path (line 8):
http://localhost:3000/two shows PageTwo. Otherwise, it shows PageOne.
Since React Router 6 is smart enough to pick the most specific match, the route order does not matter.
Set Up Nested Routes
The two routes in the above example work as expected. However, it is not convenient to type a URL in the browser address bar. We would like to have the navigation capability by clicking on a link, which is <Link>.
<Link> renders an accessible <a> element with a real href that points to the resource it is linking to. Clicking the link sets the URL and keeps track of browsing history.
src/MainPage.js is created with <Link>s:
Lines 4–13 define the <nav> element with a set of navigation links.
Line 7 is a link that points to the path, "/one". The link text is "Page One".
Line 10 is a link that points to the path, "/two". The link text is "Page Two".
<Link to> values can be relative to the path of the route that renders them. i.e. the path is specified without the leading /. Alternatively, line 7 can point to "one", and Line 10 can point to "two".
Use MainPage in src/App.js:
Line 9 is an index route, which is a child route without a path. When the URL matches "/", the app shows MainPage. Here is the index page:
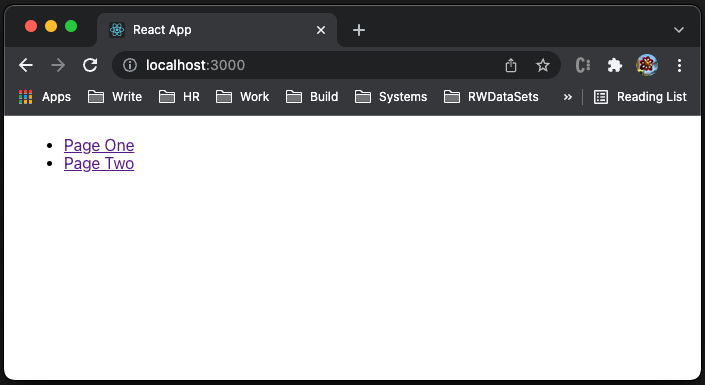
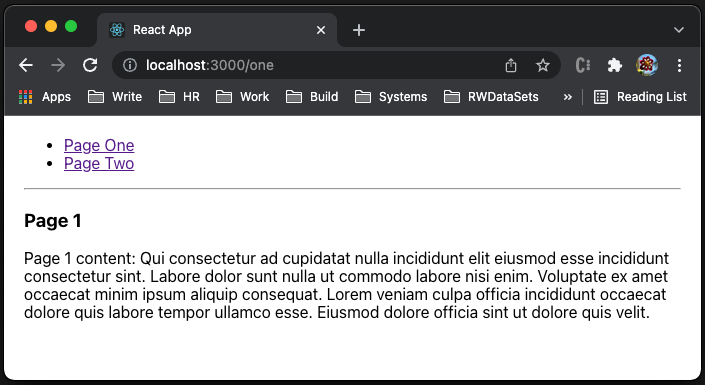
Clicking the Page One link, it goes to PageOne. Clicking the Page Two link, it goes to PageTwo.
However, inside PageOne or PageTwo, we are not able to use links to navigate. To resolve this issue, we create the <Outlet> component in MainPage. The outlet component renders the next match ("one" for PageTwo and "two" for PageTwo) in the path.
This is src/MainPage.js with an outlet:
Line 15 is the <hr> element that is a horizontal rule to separate content.
Line 16 is the <Outlet> component to render the active child route.
<Outlet> brings up nested routes, where each route can have child routes to occupy a portion of the URL. Nested routes typically use relative links (line 8 and line 11).
Here is the modified src/App.js:
At line 9, the top-level route is "/", and it renders the MainPage component. There are three child routes under it:
- The index route (line 10): It shows the text,
No page is selected.

- The wildcard route (line 11): It shows the component,
PageOne.
- The
"two"route (line 12): It shows the component,PageTwo.
useRoutes Hook
Instead of <Routes>, we can also use the hook, useRoutes, to accomplish the same thing.
The nested routes in src/App.js can be rewritten with useRoutes:
At lines 6–16, we use the hook, useRoutes, to generate the routes object from a data structure.
We have to create AppWrapper to wrap routes inside <browserRouter> (lines 20–26). Otherwise, we will encounter the following error:
Error: useRoutes() may be used only in the context of a component.useLocation
Location is an object that represents the URL location. It is based on the browser’s window.location object.
The hook, useLocation, returns the current location object.
At line 7, location is generated by the hook, useLocation.
Lines 8–10 define useEffect, which logs the location value if it changes.
- When URL is
http://localhost:3000/, the console logs:
Current location is {pathname: '/', search: '', hash: '', state: null, key: 'default'}- When URL is
http://localhost:3000/one, the console logs:
Current location is {pathname: '/one', search: '', hash: '', state: null, key: 'f2114bru'}- When URL is
http://localhost:3000/two, the console logs:
Current location is {pathname: '/two', search: '', hash: '', state: null, key: 'if9ngy0q'}- When URL is
http://localhost:3000/anything, the console logs:
Current location is {pathname: '/anything', search: '', hash: '', state: null, key: 'default'}useParams Hook
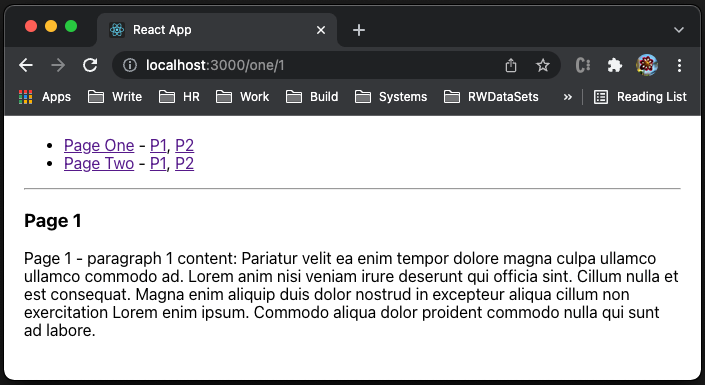
To make the example more interesting, we nest more routes. On MainPage, besides the links for "Page One" and "Page Two", there are more detailed links to "P1" (paragraph 1) and "P2" (paragraph 2).
Here is the modified src/App.js:
Under path "one" (line 23), there is another child route, with the dynamic parameter, ":id" (line 25).
Under path "two" (line 28), there is another child route, with the dynamic parameter, ":id" (line 30).
Here is the modified src/MainPage.js:
Next to the link, "Page One", links P1 (path "one/1") and P2 (path "one/2") are added (lines 9–10).
Next to the link "Page Two", links P1 (path "two/1") and P2 (path "two/2") are added (lines 13–14).
The useParams hook returns an object of key/value pairs of the dynamic params from the current URL. Here is the modified src/Pages.js, using the useParams hook:
Since a hook must be used in a React component, lines 4–14 change the getPage function to the BuildPage component.
Line 5 uses the hook, useParams, to retrieve the dynamic path, id. The id value is displayed at the beginning of the content (line 10).
Line 14 generates PageOne via BuildPage.
Line 15 generates PageTwo via BuildPage.
When URL is http://localhost:3000/one/1, the console logs:
Current location is {pathname: '/one/1', search: '', hash: '', state: null, key: 'qpdrrtyg'}useNavigate
The useNavigate hook returns a function that can be used to navigate programmatically. Replace two <Link>s with <button>s in src/MainPage.js:
Line 4 returns the useNavigate hook.
Lines 10–12 define the button, "Page One", where the onClick handler navigates to the relative path, "one".
Lines 16–18 define the button, "Page Two", where the onClick handler navigates to the relative path, "two".
Run the app. The buttons act similar to links.

The navigate function has two signatures:
- Pass a
Tovalue (same type as<Link to>) with an optional second argument,{ replace, state }. - Pass the delta number to go in the history stack. For example,
navigate(-1)is equivalent to hitting the back button.
Other Hooks
We have showed how to use useLocation, useNavigate, useParams, and useRoutes.
There are other React Router hooks:
useHref: It returns a URL that may be used to link to the giventolocation, even outside of React Router.useLinkClickHandler: It returns a click event handler for navigation when building a custom link.useInRouterContext: It returnstrueif the component is being rendered in the context of a<Router>,falseotherwise.useNavigationType: It returns how the user came to the current page, either viaAction.Pop,Action.Push, orAction.Replaceon the history stack.useMatch: It returns match data about a route at the given path relative to the current location.useOutlet: It returns the element for the child route at this level of the route hierarchy.useResolvedPath: It resolves thepathnameof the location in the giventovalue against the pathname of the current location.useSearchParams: It is used to read and modify the query string in the URL for the current location.
Conclusion
React Router 6 is feature-rich and easy to use. It is compatible with the latest versions of React. Since it introduces a few breaking changes from version 5, it is recommended to wait for a backwards compatibility package to be released before upgrading apps.
Thanks for reading. I hope this was helpful. If you are interested, check out my other Medium articles.
Note: Thanks, Urian Chang and Josh Brown, for evaluating React Router 6 with me.


