GPT-Engineer: Generate an Entire Codebase with 1 Prompt!
Think of a project. Type a prompt. Get all the files generated in seconds!

We’ve seen how ChatGPT can generate code for us. Then we’ve seen how Auto-GPT could make GPT-4 fully autonomous. And now we can build entire apps with one prompt with GPT-Engineer.
How does it work? Simple, you only have to describe your project and GPT-Engineer will build it for you.
No need to copy/paste code. No need to create the files on your own. No need to set up the project environment yourself.
Here’s how to install and use GPT-Engineer. I’ll address all the errors you might encounter during the installation and, in case there are some changes in the GitHub repo, I’ll try to update this guide.
If you don’t feel like reading, you can watch my video below.
Step 1: Clone the Repo
First, we have to clone this GitHub repo. To do so, open up a terminal and run the code below.
git clone https://github.com/AntonOsika/gpt-engineer.gitStep 2: Set up GPT-Engineer
A new folder named gpt-engineer will be created. Change directory using cd.
cd gpt-engineer
make install
source venv/bin/activate
Note: If you get the error “No module named venv”, you need to set up a virtual environment that runs Python 3 (with pip or conda), then activate it, and finally repeat the steps above.
# pip
python3 -m venv name-of-env
source name-of-env/bin/activate
cd gpt-engineer
(same steps above)

# conda
conda create --name name-of-env python=3.11.3
conda activate name-of-env
cd gpt-engineer
(same steps above)
Then we have to set our API key as shown below. To get your OpenAI API Key, click here.
# macOS/linux
export OPENAI_API_KEY=[your api key]

# windows
set OPENAI_API_KEY=[your api key]
Step 3: Run GPT-Engineer
The way we interact with GPT-Engineer is through the main_prompt file, which is inside the projects folder. By default, we have the “example” folder as shown below.

If you want to start a new project, just create a new folder using the command below.
cp -r projects/example/ projects/my-new-projectNow it’s time to edit the main_prompt file. If you open it up with a text editor, you’ll see the text below.
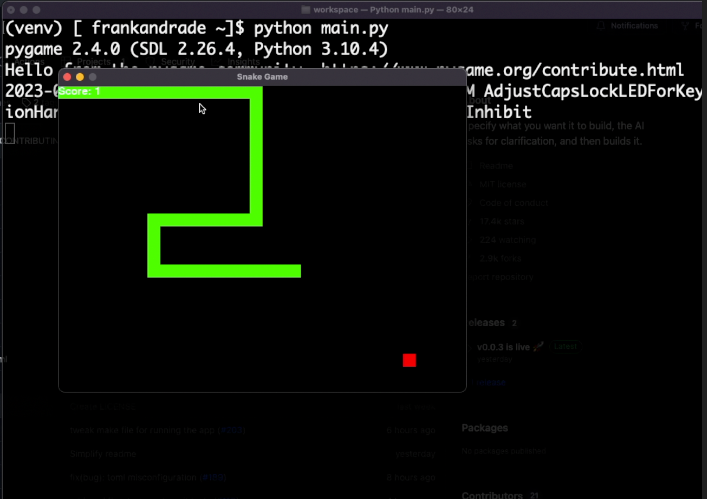
We are writing snake in python. MVC components split in separate files. Keyboard control.
Those are the instructions to create a snake game in Python. You can test it out as is, but for this demo, I’ll change the prompt to scrape my website.
Note: In case you leave the prompt as is, you should get this snake game after following the steps in the next section.
Test #1: Web Scraping
Scrape the article titles from this website https://thepycoach.com/. The article titles are inside an h2 tag. Export the data into a CSV file
Finally, to run gpt-engineer we have to use the command below.
gpt-engineer projects/my-new-project
Since my folder was named “web-scraping” the command will be gpt-engineer projects/web-scraping for me.
Check out the files generated!
All the generated files will be in projects/my-new-project/workspace.
Here are the files I got.
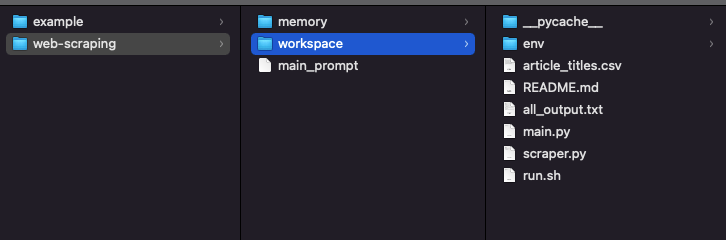
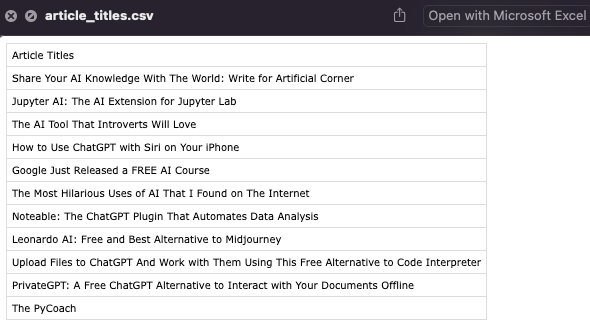
As you can see I got the .py files that do the scraping part for me and also I got the data I wanted in a CSV file.
All the data was successfully scraped!
Remember that you might still encounter some errors while following every step in this guide. This GitHub project is good but has some issues. Here are some I found.
Note 1: The requirements.txt file might not be generated. If that’s the case, duplicate the all_output.txt file (that should’ve been generated, and locate the requirements.txt section. Delete everything but the libraries specified in that section.
Note 2: If you get the error openai.error.ServiceUnavailableError: The server is overloaded or not ready yet just try again later and it should be fine.
Test #2: Create a Web App
As we do with ChatGPT, when you edit the main_prompt file you can be very specific with your prompt or not.
In this case, I’ll just type “Create a website about dogs” to see what it can deliver without much prompting.
Here are all the files I got.
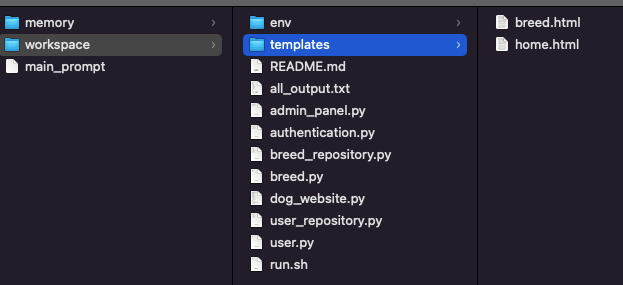
Unfortunately, I’d still have to do some tweaks to get the web app running, but GPT-Engineer still simplified the whole process.
That’s it! Now it’s your time to build apps with GPT-Engineer. Let me know in the comment section whether GPT-Engineer got your request in one shot or if you still had to do some tweaks to get the code working.
For more info about GPT-Engineer, check the official repo.
Join my newsletter with 30K+ people to get my free ChatGPT cheat sheet.
If you enjoy reading stories like these and want to support me as a writer, you can do it through Paypal or by getting a Medium subscription (it’s $5 a month, giving you unlimited access to articles like this one … if you use my link, I’ll earn a small commission with no extra cost to you).