
Medium Has An API?
A primer on how to post articles through Mediums API
Did you know that Medium has an API? I sure didn’t and I’m glad to have found out about it. For those of you who missed it, in my previous article, we journeyed through the process I undertook to build a simple, easy-to-use, and highly customizable markdown editor. So far, this new editor has made it much easier for me to write my blog articles. However, one major piece is missing and that is the ability to publish articles on sites like Medium. Fortunately, Mediums API, which I just recently discovered, will help solve that problem. So, without wasting another valuable moment, let’s take a look a look at how to integrate the markdown editor with Mediums API!
How to Get An Integration Token
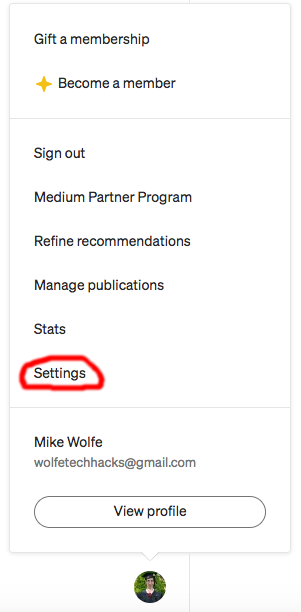
Before we can dive into some coding, we need to get an integration token that will grant us access to Medium’s API. To do this, you will need to have a Medium account, but once you have that, click on your profile picture at the bottom of the navigation bar and click the Settings option in the drop-up menu.
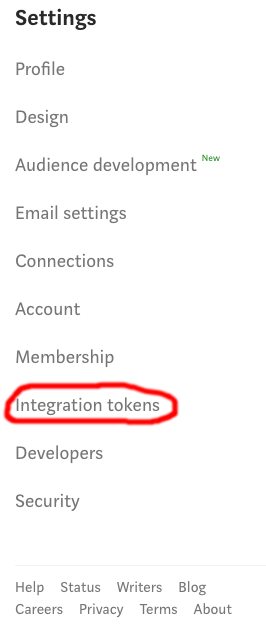
After that, click the Integration tokens option in the left side menu (or scroll down to the Integration tokens section).
All you have to do next is enter a description for the token and click the Get integration token button.
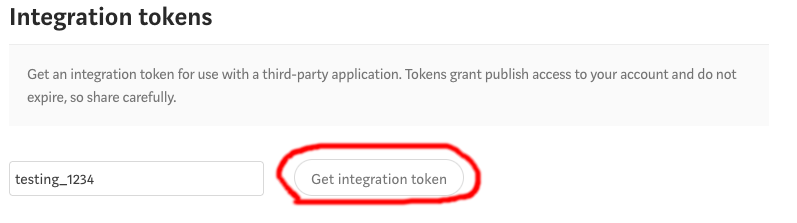
If everything worked, you should see a token with your description.
Writing Some Code
New Front-End Features
Now that we have a token, we can begin the fun part of writing some code. We will be building off of what I did in my previous article, so if you need a refresher, go ahead and take a look at that. To recap what happened in that article, we created a Flask web application that uses an EasyMDE markdown editor. This is where all the magic of writing blog articles happens and it is within this editor that the articles can be saved to a MongoDB database by using a couple of Flask endpoints on the back-end. So now that we have refreshed ourselves on what this project is all about, we need to add a couple of things to the editor on the index.html page. The first new piece that needs to be added is an input textbox that will hold a list of tags for the article. Remember, tags are used to help identify and categorize articles on Medium. Also, within the form, a paragraph tag has been added. This tag will list the sites where the article has been published. Here is the modified HTML form containing the new input textbox:
The next addition to the front end is a new toolbar icon that contains a dropdown menu with an option to publish the article to Medium.
Looking at the code, the function to publish the article to Medium does a post request using fetch to a new endpoint on the back-end (we will go over that endpoint here in a minute). This request sends a JSON body containing the title of the article, the tags we set for it, the MongoDB article id, which publisher we will publish with, and of course the blog article content.
Now that those additions have been added in, that wraps up everything for the front end. Below is what the full code for the index.html page looks like.
Back-End Additions
With the front end squared away, let’s dive into some back-end code. We’ll start by creating a new file called publishers.py. This file will hold all the specific functions needed to post articles to blogging sites. Next, we need to import a couple of modules.
import markdown
import requests
import storageIf you don’t have the markdown module installed, that can be accomplished with this command.
pip3 install Markdown
As for the requests and storage modules, requests are installed by default and storage is the name of the file containing our MongoDB database-related functions. Once the imports are in, we need to add a function that will call Medium’s API and publish a draft article. Publishing it as a draft gives us a chance to review it first before making it live.
Taking a closer look at this function, it first sends a get request to Medium’s me endpoint using the integration token we got earlier. A successful response will give us the user id for your account. The id will then be used in a post request sent to the posts endpoint. In the body of this request is where we convert the article contents from markdown to HTML, set our tags string as a list, and set the publish status to draft. Also, if you happen to have your own website, in the body you can set a canonical link to that site to ensure that search engines know the originating source of the article. The last bit of code in this function calls another function to update the publisher's field in the articles document if the post request was successful.
While we’re on the topic of the function to update the publisher's field, open up the storage.py file and add this code to the end of it.
In a nutshell, this function simply connects to the database and updates the publisher's field based on the passed article id. The last major code change for the back-end is in the main.py. We’ll first need to add a new import to the publisher's file and then add the following endpoint.
Essentially, this is the endpoint that gets called by the toolbar icon on the front end. It grabs the JSON body sent by the request and then determines which publisher to use. In our case, the only one we have is Medium.
One Small Adjustment
Before we can wrap this up and test all of the new changes, there are two small fixes that we need to make. For the first fix, in the storage.py file, there is a get_articles function. This function queries the database and gets a list of all blog articles. After that, a for loop is used to loop through the articles and append certain fields to a dictionary. What we need to do, is two new dictionary elements for the publishers and tags. However, we do have a couple of options. You could simply just add the elements to the for loop, or go with the better option and utilize Python’s map function. Take a peak at how this would look below:
The very last fix (I promise) we need to make is on the save_blog function in the storage.py file. When saving or updating a blog article, we need to make sure an empty publishers list is getting created as well as ensuring the article tags are getting added. Here is what the updated save_blog function should look like.
Testing All the Changes
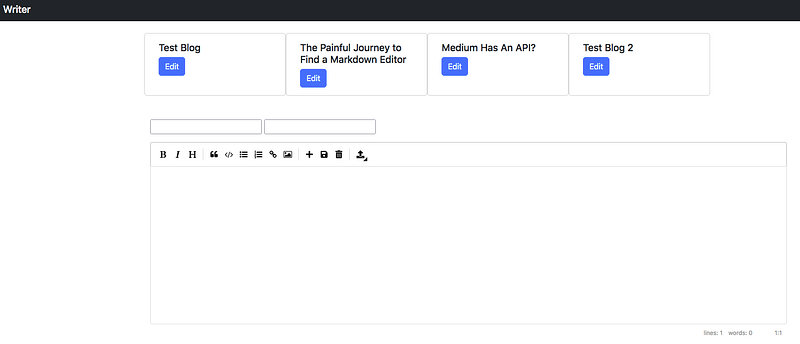
We finally finished coding! Now it's time to test it all out. Go ahead and run python3 main.py to get the Flask app running. Then navigate to your localhost using port 5000 in a web browser of your choice. You should see an editor that looks a little something like this:
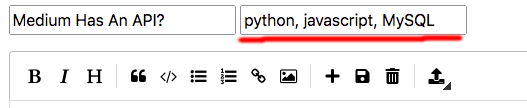
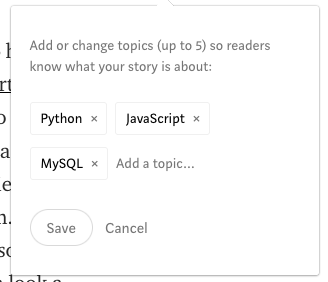
The second textbox is where we can list the tags (topics) for the article.
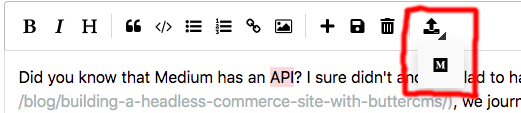
Clicking on the new toolbar icon should show Mediums Font Awesome logo.
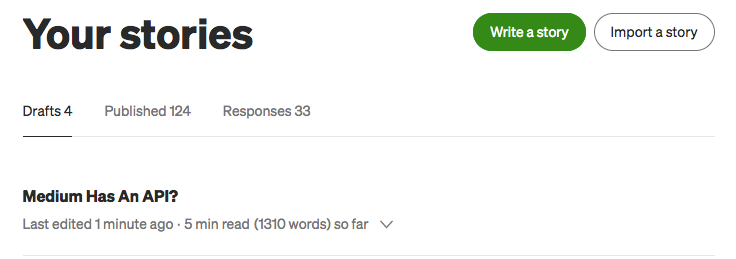
This last part of testing could use some improvement. If you click the Medium logo, you will just have to keep an eye on your debugger to see if any errors show. In the future, it would be helpful to add some front-end error displays to show if anything went wrong when posting. For right now though, head on over to your Medium account and check the draft stories. If you see your new article, then posting worked!
Another way would be to reload the editor page and see if there is any text beneath the text boxes. Not an ideal solution and definitely not very pretty looking, but something to address in the future.

Conclusions
Looking back on what we just did, only a tiny portion of Medium’s API was utilized. There is still much more to explore, however, now that you have your feet wet, I’ll leave that part up to you. As for the blog editor project, it's coming along rather nicely. The point was to help reduce the use of multiple editors and utilize APIs and databases to help make publishing (and writing) easier. With that being said, it is by no means perfect, because there are plenty of improvements it could use. Things like displaying errors from the back-end, showing where articles have been published and of course, adding more sites to publish to, would greatly help increase functionality. In the meantime, feel free to tinker around with the code and let me know if there are any cool features you would like to see. Until next time, cheers!
Read all my articles for free with my weekly newsletter, thanks!
Want to read all articles on Medium? Become a Medium member today!
Check out some of my recent articles:
More content at PlainEnglish.io. Sign up for our free weekly newsletter. Follow us on Twitter, LinkedIn, YouTube, and Discord.


