
Working With Astro — The Super Fast Web Framework
Ship minimal JavaScript

Astro is an all-in-one web framework for building fast, content-focused websites. Astro was designed for building content-rich websites. This includes most marketing, publishing, and documentation sites, blogs, portfolios, and some e-commerce sites.
Meanwhile, Astro might not be the right choice for some complex applications, such as admin dashboards, inboxes, social networks, to-do lists, etc.
Astro leverages server-side rendering over client-side rendering, and it is a Multi-Page Application (MPA) framework. An MPA website consists of multiple HTML pages written with HTML, CSS, and JavaScript (or TypeScript). MPA differs from Single-Page Application (SPA), which uses client-side rendering, and renders each route dynamically and directly in the browser.
Astro is superior to SPA for fast initial loading and short Time to Interactive (TTI), where TTI measures how long a page takes to become fully interactive.
Astro is UI-agnostic. Astro officially supports react, Preact, Solid, Svelte, Vue, and Lit. Code written by different frameworks can be mixed on the same page.
Does it sound like an amazing web framework?
Without further ado, let’s see how Astro works.
Install and Run Astro
Astro requires Node.js version “^14.18.0 || >=16.12.0”. Run the following command to install Astro:
% yarn create astro
yarn create v1.22.10
[1/4] 🔍  Resolving packages...
[2/4] 🚚  Fetching packages...
[3/4] 🔗  Linking dependencies...
[4/4] 🔨  Building fresh packages...
success Installed "[email protected]" with binaries:
      - create-astro
[##################################################################################################################] 114/114
Welcome to Astro! (create-astro v1.1.0)
Lets walk through setting up your new Astro project.
✔ Where would you like to create your new project? … ./my-astro-site
✔ Which template would you like to use?
❯ Just the basics (recommended)
Blog
Portfolio
Documentation Site
Empty project
✔ Template copied!
✔ Would you like to install yarn dependencies? (recommended) … yes
✔ Packages installed!
✔ Would you like to initialize a new git repository? (optional) … no
ℹ Sounds good! You can come back and run git init later.
✔ How would you like to setup TypeScript?
Relaxed
❯ Strict (recommended)
Strictest
I prefer not to use TypeScript
✔ TypeScript settings applied!
✔ Setup complete.
✔ Ready for liftoff!Next stepsYou can now cd into the my-astro-site project directory.
Run yarn dev to start the Astro dev server. CTRL-C to close.
Add frameworks like react and tailwind to your project using astro addStuck? Come join us at https://astro.build/chat
Good luck out there, astronaut.✨ Done in 88.00s.The project is created in the folder, my-astro-site, and package.json is located in the root directory.
There are two types of dependencies in a package.json: dependencies and devDependencies. These two dependencies work mostly the same in Astro since both are needed at build time. It is recommended to put all dependencies in dependencies to start and only use devDependencies for special needs.
With the Just the basics choice during installation, there is only one dependency, astro (line 14 in code above).
Execute yarn astro, and we see all Astro commands:
% yarn astro
yarn run v1.22.17
$ astro
astro v1.5.2 Build faster websites.astro [command] [...flags]Commands
add Add an integration.
build Build your project and write it to disk.
check Check your project for errors.
dev Start the development server.
docs Open documentation in your web browser.
preview Preview your build locally.
telemetry Configure telemetry settings.Global Flags
--config <path> Specify your config file.
--root <path> Specify your project root folder.
--verbose Enable verbose logging.
--silent Disable all logging.
--version Show the version number and exit.
--help Show this help message.✨ Done in 1.21s.Start Astro in dev mode:
% yarn dev
yarn run v1.22.17
$ astro dev
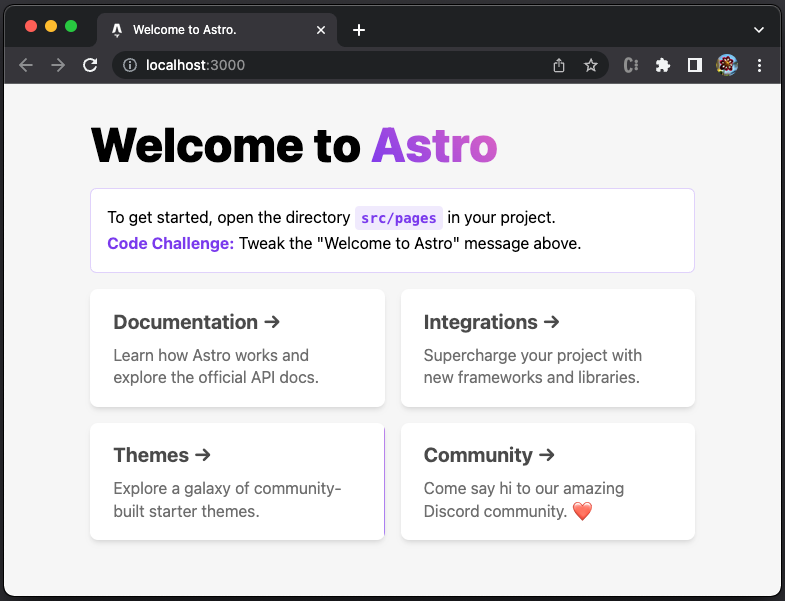
🚀 astro v1.5.0 started in 52ms
┃ Local http://127.0.0.1:3000/
┃ Network use --host to exposeThe default website is available at http://localhost:3000/.
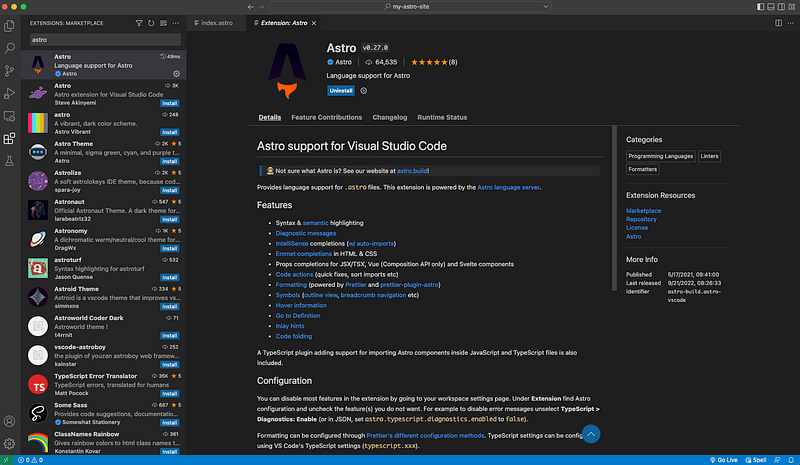
There are Astro plugins for major IDEs. The following is VS Code extension for .astro files that support syntax and semantic highlighting, diagnostic messages, quick fixes, sort imports, code formatting, etc.
Astro Source Folder
After the installation, the folder, my-astro-site, looks like this:
my-astro-site
├── README.md
├── public
│   └── favicon.svg
├── src
│   ├── components
│   ├── layouts
│   ├── pages
│   └── env.d.ts
├── astro.config.mjs
├── package.json
├── tsconfig.json
└── .gitignoremy-astro-site: It is the directory that contains the Astro web framework.README.md: It describes the project structure and scripts.public: It is the directory for static assets, includingfavicon.svg.src/components: It is the recommended directory for Astro components.src/layouts: It is the recommended directory for creating reusable page templates.src/pages: It provides directory-based routing for Astro pages. Each file in thesrc/pagesdirectory becomes an endpoint of the website.src/env.d.ts: It references TypeScript type declarations that are specific to the Astro project.astro.config.mjs: It is the Astro configuration file.tsconfig.json: It is the TypeScript configuration file.
Astro Components
Components are the basic building blocks of an Astro project. They are HTML-only templating components with no client-side runtime.
Astro component syntax is a superset of HTML similar to JSX. Each Astro component has a file extension, .astro, and they are rendered to HTML during the build. Astro component comprises two main parts: the component script and the component template.
The component script is similar to React, written in JavaScript or TypeScript. It can import other Astro components, framework components, and JSON data, fetch content from an API or database, and create variables to be referenced in the component template.
Astro uses a code fence (---) to bind the beginning and the end of a component script.
The component template is below the component script. It decides the HTML output of the component. It supports JavaScript expressions, importing components, and special Astro directives. Data and values defined in the component script can be used in the template to produce dynamically-created HTML.
Out of the box, the folder, src/components, comes with one component, Card.astro.
components
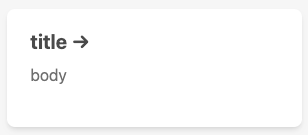
└── Card.astroCard is a component with props — href, title, and body. When the title component is clicked, the page is redirected to href.
Here is src/components/Card.astro:
Bounded by code fences at line 1 and line 9, it defines the component script.
- At lines 2–6, the interface,
Props, is defined. - At line 8, three const variables,
href,title, andbody, are destructured from props.
From lines 11 to 63, it defines the component template.
- At lines 11–21, the JSX template is defined with interpolated values of
href,title, andbody. - At lines 22–63, the template style is defined.
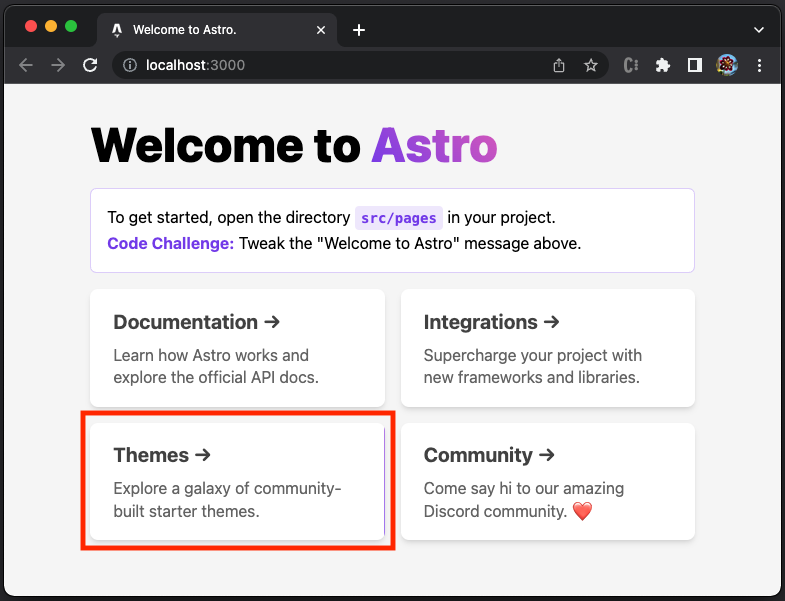
- At line 28, the card’s
background-imageis defined as a gradient color using a CSS variable. It shows up as an accent of every third of the four cards if the browser window is wide enough (see the red box in the image below).
You may wonder what is the red heart on the fourth card. It is simply an emoji, ❤️.
Astro Layouts
Layouts are a special Astro component useful for creating reusable page templates with common settings, such as header and footer. These common parts are implemented as a layout component that pages can reuse. A layout component is typically named with an extension .astro or .md.
Out of the box, the folder, src/layouts, comes with one component, Layout.astro.
layouts
└── Layout.astro
Layout is a component that provides both a page shell (<html>, <head> and <body> elements) and a <slot />. <slot /> is used to specify where a child component should be injected in the layout page.
Here is src/layouts/Layout.astro:
Bounded by code fences at line 1 and line 7, it defines the component script.
- At lines 2–4, the interface,
Props, is defined. - At line 6, the const variable,
title, is destructured from props.
From lines 9 to 40, it defines the component template.
- At lines 11–17, the document
<head>element is defined. The title is set to the interpolated value oftitle(line 16). - At line 19, a
<slot />is used to place a child component. - At lines 20–38, the template style is defined.
- At line 20,
is:globalis an Astro directive that sets the style scope to be global.
There is no visible component in the layout above, except <slot />. The common layout parts are the head element and the global style.
For the default website, View Page Source the browser shows the converted head content, where the title is set to Welcome to Astro. (line 6 in code below), along with the global style (lines 7–19 in code below).
Astro Pages
Pages are files that are placed in the src/pages directory. They are responsible for handling routing, data loading, and overall page layout for every page on the website. The routing is based on the index file or the index file's directory name. The supported file types are:
.astro.md.mdx(with the MDX Integration installed).html- [
.js/.ts] (as endpoints)
Out of the box, the folder, src/pages, comes with one component, index.astro.
pages
└── index.astro
The index.astro defines the UI to be displayed when the URL is /. Here is src/pages/index.astro:
Bounded by code fences at line 1 and line 4, it defines the component script.
- At line 2,
Layoutis imported. - At line 3,
Cardis imported.
From lines 6 to 82, it defines the component template.
- At line 6,
Layoutis invoked with a specified title, and its child (lines 7–36) will be placed into<slot />inLayout. - At line 8, the
h1heading,Welcome to Astro, is defined. - At lines 9–13, the instruction paragraph is defined.
- At lines 16–19,
Cardwith the title,Documentation, is created. - At lines 20–24,
Cardwith the title,Integrations, is created. - At lines 25–29,
Cardwith the title,Themes, is created. - At lines 30–34,
Cardwith the title,Community, is created, where the body text includes the emoji, ❤️ (line 33). - At lines 39–82, the template style is defined.
Astro Template Directives
Template directives are a special kind of HTML attribute available inside of an Astro component template (.astro files), and some can also be used in .mdx files. They are used to control an element or component’s behavior, but they are never included directly in the final HTML output.
A template directive includes a colon (:) in its name, using the form X:Y, and it must be visible to the compiler, i.e., it is not hidden in the format, <X {...attr}>.
Most template directives take no value, such as <X client:load />. But some template directives take a custom value, such as <X class:list={['some-css-class']} />.
Common Directives
Common directives are used in Astro components:
class:list={...}: It takes an array of class values and converts them into a class string. The list is composed of strings, all truthy keys of objects, flattened arrays, and flattened sets. Duplicate values are removed automatically.
set:html={string}: It injects an HTML string into an element, similar to settingel.innerHTML. Astro does NOT automatically escape the value.
set:text={string}: It injects a text string into an element. Unlikeset:html, thestringvalue is automatically escaped by Astro.
Client Directives
Client directives control how components are hydrated on the page. By default, components are not hydrated in the client. If no client:* directive is provided, its HTML is rendered onto the page without JavaScript.
client:load: It loads and hydrates the component JavaScript immediately on page load.
<BuyButton client:load />client:idle: It loads and hydrates the component JavaScript once the page is done with its initial load and therequestIdleCallbackevent has fired.
<ShowHideButton client:idle />client:visible: It loads and hydrates the component JavaScript once the component has entered the user’s viewport. This uses anIntersectionObserverinternally to keep track of visibility.
<HeavyImageCarousel client:visible />client:media={string}: It loads and hydrates the component JavaScript once a certain CSS media query is met.
<SidebarToggle client:media="(max-width: 50em)" />client:only={string}: It skips HTML server-side rendering and renders only on the client. It acts similarly toclient:loadin that it loads, renders, and hydrates the component immediately on page load.
<SomeReactComponent client:only="react" />Script and Style Directives
Script and style directives can only be used on HTML <script> and <style> tags to control how the client-side JavaScript and CSS are handled on the page.
is:global: It makes the contents of a<style>tag apply globally on the page when the component is included. This disables Astro’s CSS scoping system that scopes<style>CSS rules to the component.
is:inline: It tells Astro to leave the<script>or<style>tag as-is in the final output HTML. Otherwise, Astro will process, optimize, and bundle any<script>and<style>tags that it sees on the page.is:inlinelimits some Astro features, like importing an npm package or using a compile-to-CSS language, such as SASS.
define:vars={...}: It can pass server-side variables from the component front matter into the client<script>or<style>tags. Any JSON-serializable front matter variable is supported, includingpropspassed throughAstro.props. Values are serialized withJSON.stringify().
It shows the following text:

Advanced Directives
is:raw is an advanced directive. It instructs the Astro compiler to treat any children of that element as text.
Astro Islands
The islands architecture was first coined by Etsy’s frontend architect Katie Sylor-Miller in 2019, and it was further expanded by Preact creator Jason Miller in 2020. Astro adopts the islands architecture, which encourages small, focused chunks of interactivity within server-rendered web pages. It ships pure HTML to the client by default and injects placeholders for the interactive widgets. Each page has little islands of interactivity in a sea of otherwise static content. It reduces the page load times to a minimum and minimizes the work performed on the client. It also gracefully degrades when errors occur.
Astro generates every website with zero client-side JavaScript by default. It uses a frontend UI component built with React, Preact, Svelte, Vue, SolidJS, AlpineJS, Lit, and Astro. These components are automatically rendered HTML ahead of time and strip out all JavaScript. By removing all unused JavaScript from the page, keeps every site fast by default.
Conclusion
Astro is an all-in-one web framework for building fast, content-focused websites. Astro was designed for building content-rich websites. This includes most marketing sites, publishing sites, documentation sites, blogs, portfolios, and some e-commerce sites.
Astro leverages server-side rendering over client-side rendering, an MPA framework. Astro provides fast initial loading and a short time to interactivity.
In a way, Astro is similar to Qwik, which we introduced in a previous article. Since Astro is focused on content-based websites, it is simpler than Qwik from the directory structure to package.json.
Astro uses island architecture, which is also adopted by Fresh.
Websites started with server-side rendering, and then SPA, the client-side rendering, was popular for a while. Now, it is time to revisit MPA. Isn’t it interesting?
Thanks for reading.
Want to Connect?If you are interested, check out my directory of web development articles.


