
AI is Changing Photoshop Forever. Here Are Some Amazing Features You Can’t Miss
You no longer need to have design skills to work with Photoshop
We’re all familiar with Photoshop, the go-to image-processing application. It’s packed with features and is primarily aimed at professional photographers who want to perfect their images.
But here’s the exciting news! Thanks to AI now not only professionals can use Photoshop’s nice capabilities, but also anyone who wants to unleash their inner artist.
Photoshop sets itself apart from other image generators like Midjourney or Leonardo in a few ways.
- Firefly is trained using the extensive Adobe Stock database and public photo stocks. In other words, the AI has learned from licensed images, ensuring that the content it creates respects copyright laws.
- Images edited using neural networks will be subtly marked with an invisible digital signature. This helps differentiate Firefly’s creations from those made by human hands.
Note that Photoshop’s new AI feature is currently available only in the beta version of the application.
How to get this beta version?
First, you have to download Creative Cloud. Once you’re done with the download and installation, you need to register. Don’t worry, the registration process is easy-peasy, but make sure to put your age as 18 or above. Otherwise, they won’t let you use the new feature.
After all that, just open Creative Cloud and head over to the “Beta applications” section.
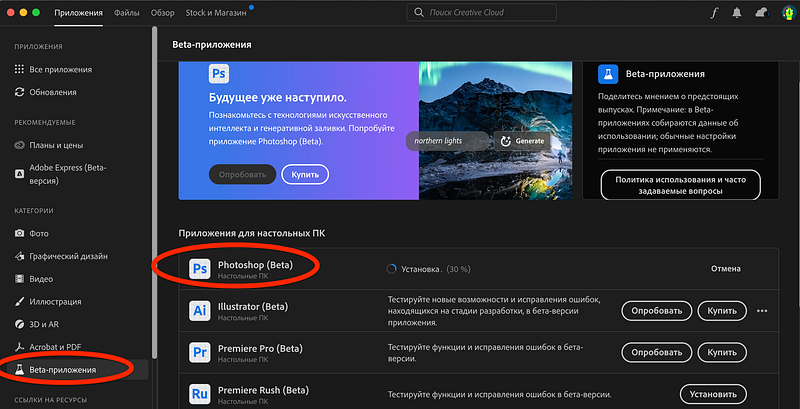
Click “test” and wait for Photoshop to load. Then press “Open.”
Note: After the end of the 7-day trial period, you can subscribe — for 23.99 € / month (price may vary in different countries) or you can create a new account each time and use the trial period ;)
Let’s see some of Photoshop’s new AI features.
1. Add anything to your picture
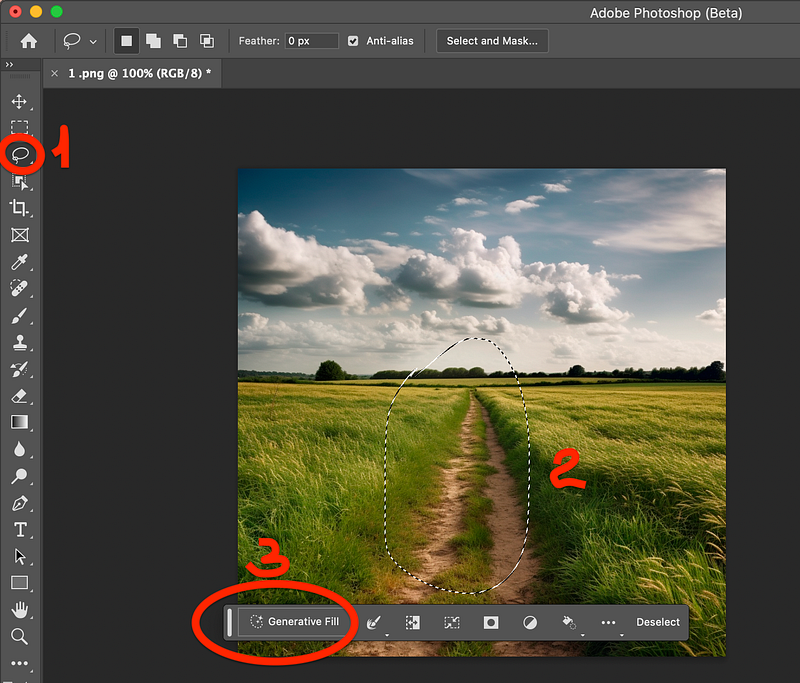
This cool new feature is called Generative Fill and it lets you easily change the background, add objects to your photos, and give your frames a polished look with just a few clicks.
It’s super easy to make small tweaks to your images or enlarge them without killing quality. With this tool, Photoshop works like magic, effortlessly enhancing your images and adding that extra pop of color or missing element.
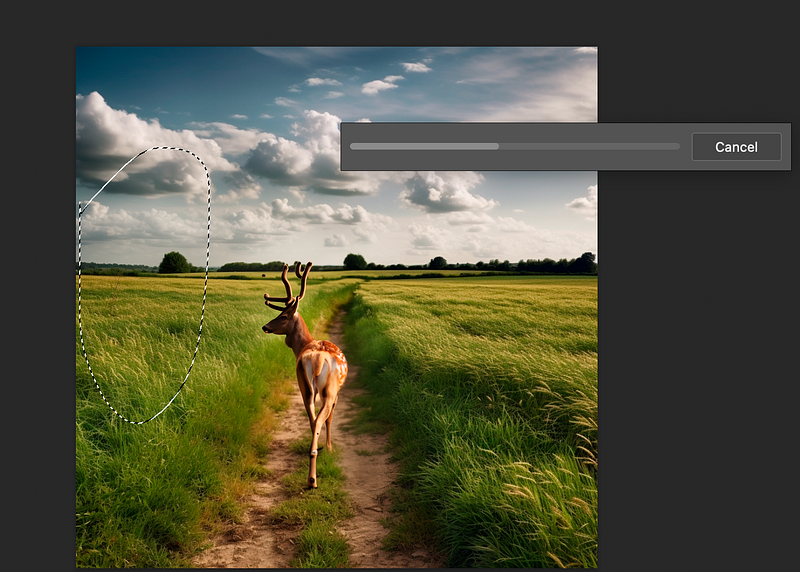
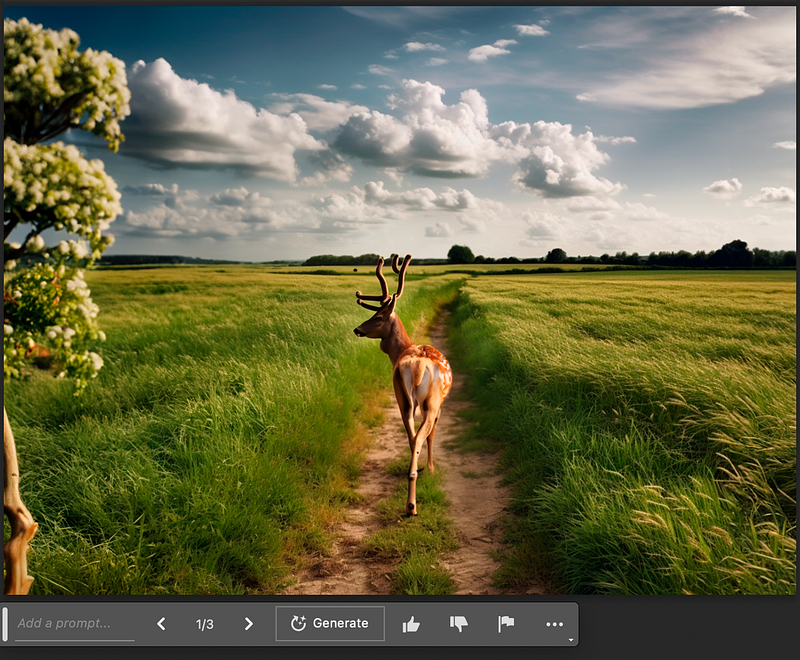
After openning Photoshop, you have to select the area you want to change ( like in the image below) and then choose “Generative fill”. Write down your prompt and click “Generate”.
I decided to generate a deer. I guess it would be perfect for this lawn and field. So, I enter the prompt and wait.
It takes only some seconds!
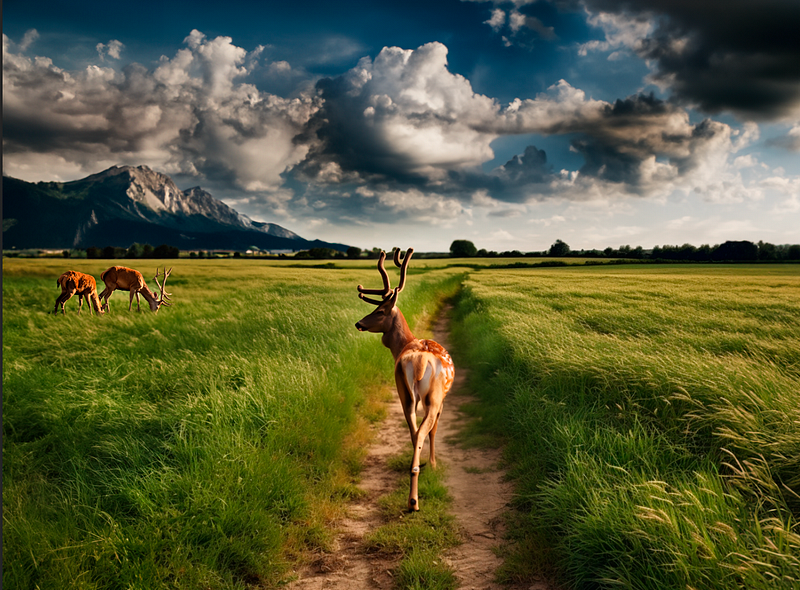
And here is my deer in the field. Just take a look at how good it combined with my previous picture of only the field. Looks pretty realistic to my eyes.
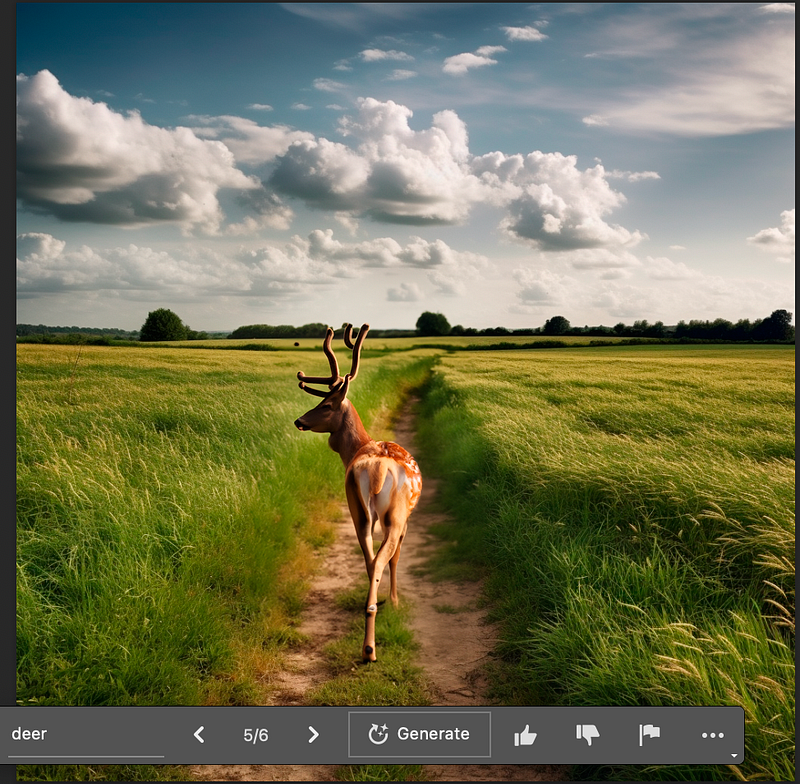
Perfect! I have the deer.
Now I wanna add something else. So, I choose again the area where I wanna add, say, a blooming tree and repeat the same steps as above.
Photoshop gives you three prompts to start with, but you can explore as many as you want. Pick the one that best suits your image.
It’s important to note that Photoshop may not always fully understand your prompts, unlike Midjourney, which excels at it effortlessly. Photoshop still has room to improve in that aspect.
Don’t be discouraged if it takes a few attempts before you nail the perfect prompt for your image. To give you an idea, I’ve included some failed tests below.
Prompt: Blooming tree
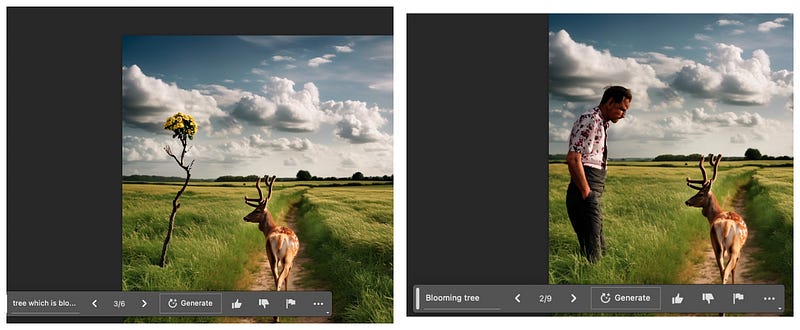
Yeah, I got this. But after some attempts, I finally got my blooming tree.
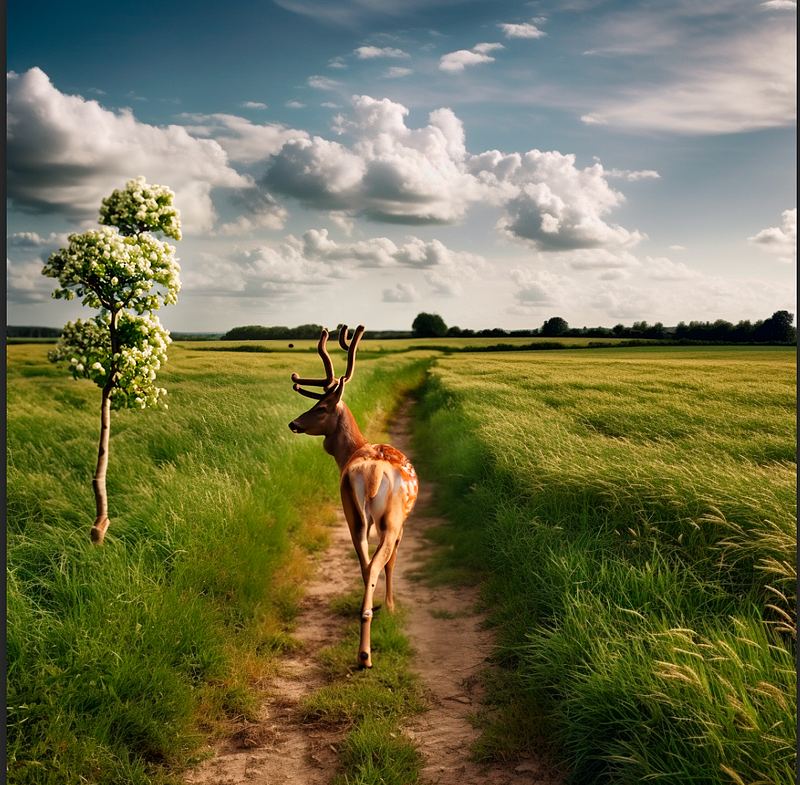
2. Zoom it out
Now I would like to make my image bigger, but not just stretch the image. This would degrade the image quality. But I want Photoshop to draw it.
So, I created borders for my image, selected the areas on the sides, and repeat the same steps as described above. Photoshop will most likely draw you what is already in the photo, for example, like in my case, the same flowers.
Note: Select the area on the sides and grab quite a bit of the area from your image
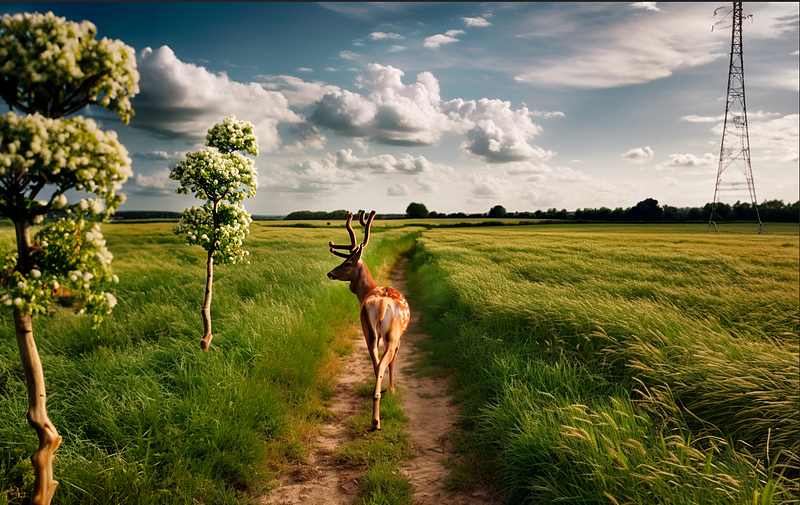
To my eyes, it became pretty realistic and nice.
3. Remove anything in seconds
In case I don't like something on my image I can easily delete it.
Let's say I don't like that first tree in the image. I choose the area around it and click “Generale” without any prompt.

It works better and faster than the Spot Healing Brush tool in Photoshop.
Then, I decided to play a little bit with Remove and Generate tools. After some time I got a really impressive picture. Check it out.
I must say, it’s truly impressive! No other AI tools were able to achieve the level of realism and attention to detail that Photoshop delivers. Even Leonardo AI, which has a similar feature, falls short in creating such lifelike shadows and intricate details. Photoshop is definitely leading the way in this regard.
4. Select anything and paste it on another image in a couple of clicks
In the past, doing this task in Photoshop required using the lasso tool or the selection tool. The first option took too much time, requiring careful tracing around the object, while the second didn’t always provide accurate selections of your object.
But now, with the new “Select subject” feature (you can also use “Remove background” for this), it’s as easy as using one of the iPhone features where you simply click on an object in the photo, and the tool automatically creates a precise circle around it, giving you the option to copy it. This streamlined process saves you time and effort. Let me show it to you using my picture as an example.
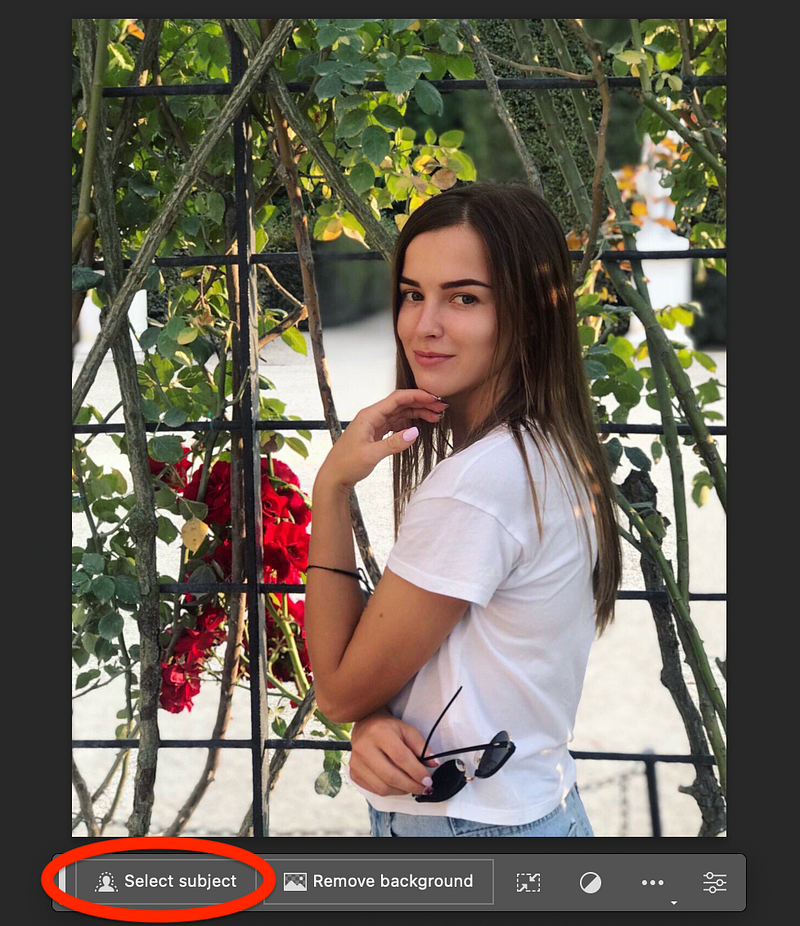
I simply clicked on the “Select subject” button, and my image is automatically selected. Then, without any effort, I moved it to a blank layer, ready to be pasted into a different background later. Quick and easy!
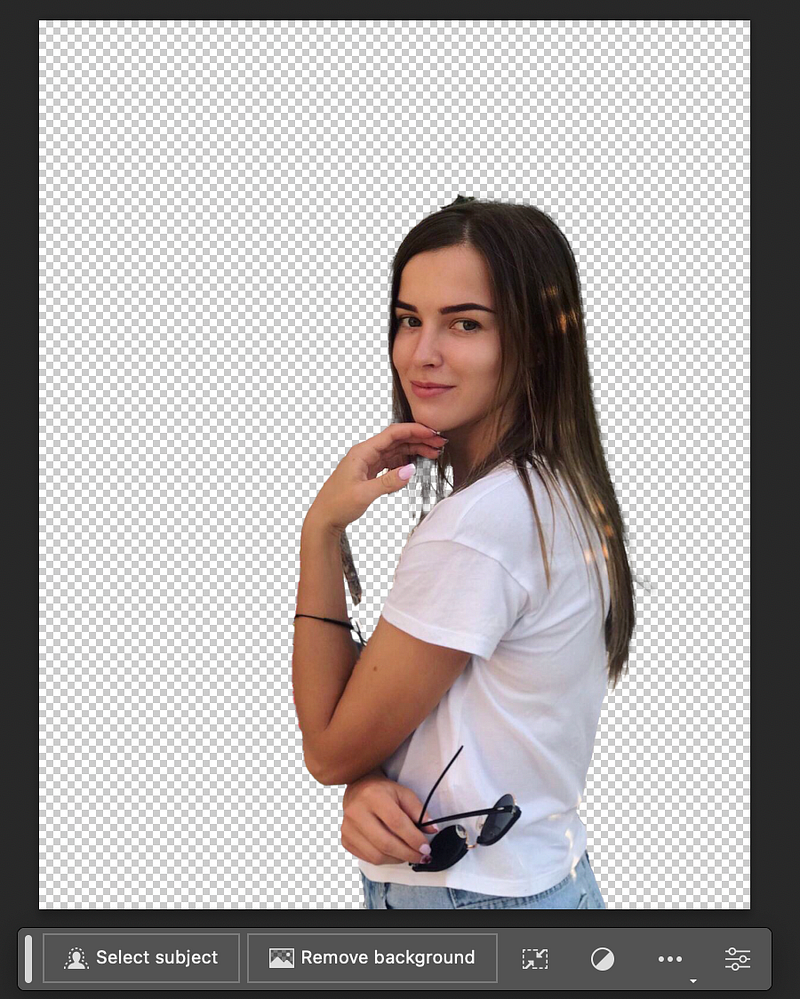
Of course, Photoshop may have grabbed a few objects that were not intended to be included, but overall, it did a pretty good job.
Now, I’ve prepared the background where I plan to paste this photo, following the steps outlined in the previous paragraphs. I created a new layer and placed various images and objects on it, using Photoshop’s generation tool.
Now, let’s see what the final result looks like!
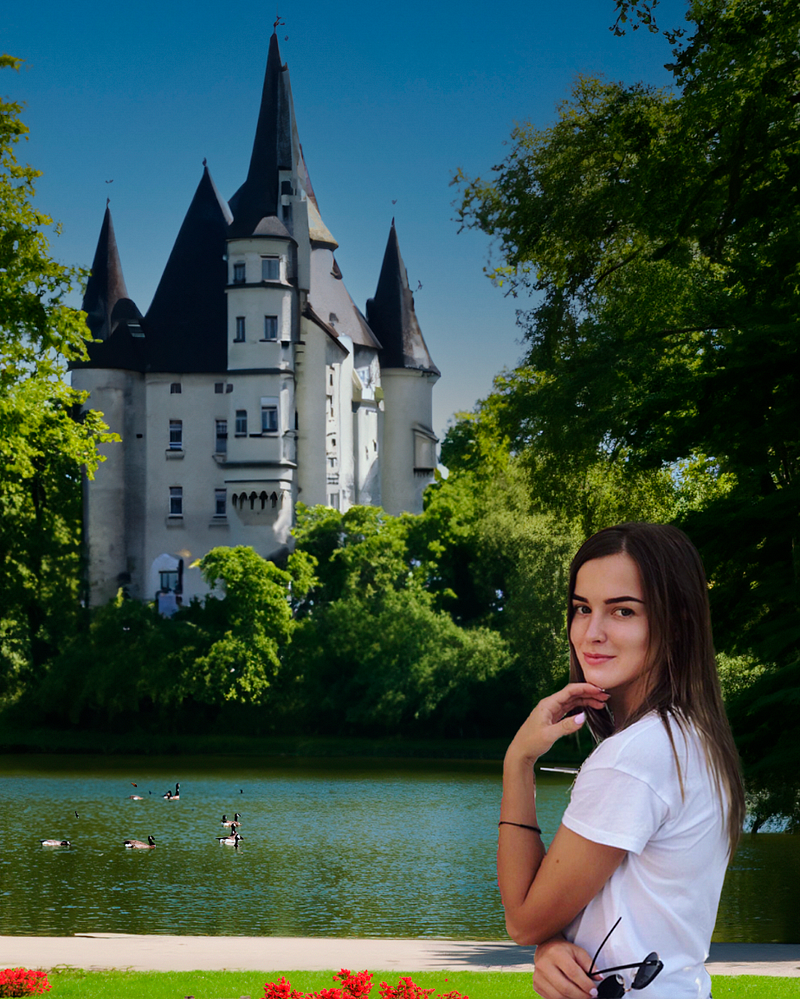
I have to say it is not too bad. Of course, with better Photoshop skills, I could have fine-tuned the lighting and “cleaned up” the photo even better. But taking into account I’m just an amateur, I’m quite pleased with how it turned out for my first attempt.
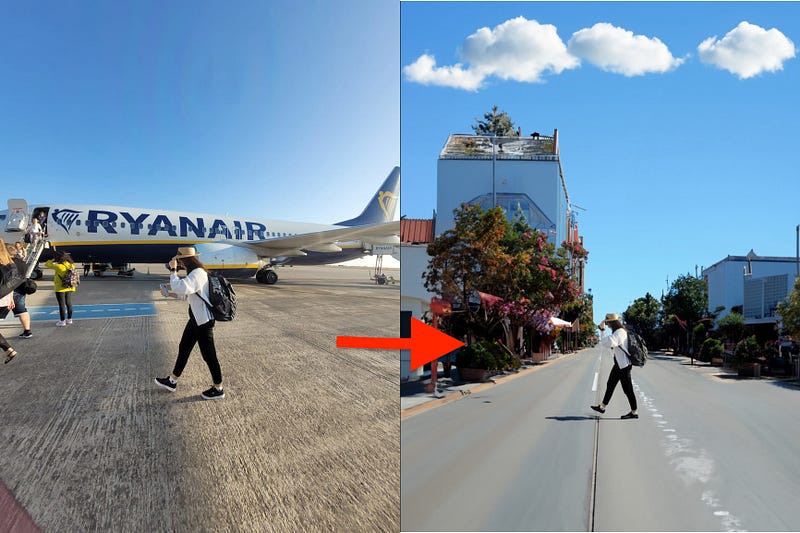
With this function, you can play around and get results super quickly. It used to take me at least an hour to achieve something similar, but now I did it in just 5 minutes. It’s amazing how fast and easy it is!
Bonus: Stable Diffusion
Stable Art is a useful plugin for Photoshop that works just like Midjourney. This plugin is capable of generating images based on text prompts or modifying existing images with text input. For example, changing clothes on models in the photo, changing the color of eyes, or adding anything to a picture.
With Stable Art, you can tap into your local Stable Diffusion setup within the software.
Note: This function is available in the official version of Photoshop, and not in the beta version.
The video above offers straightforward instructions on how to install this plugin. Additionally, on the tweet you’ll find links that provides access to download the necessary files. Just follow the instructions in the video, and you’ll be on your way to installing the plugin successfully.
Artificial Corner’s Free ChatGPT Cheat Sheet
We’re offering a free cheat sheet to our readers. Join our newsletter with 20K+ people and get our free ChatGPT cheat sheet.
Loved this story and want to support me as a writer? Consider signing up for Medium. If you sign up with my link, I earn a small commission at no cost to you! And you’ll get full access to all stories on Medium.