
5 Productivity Hacks Every Programmer Should Know
From multitasking tricks to shortcuts that will save you precious time, here you have my Top-5 functions and aliases for those “Bash-days”

Bash is a powerful command-line interface, but in my opinion, many times its syntax is way too cumbersome.
For the newcomers, it’s common to get stuck trying to remember what was the correct spelling of that “magical” but odd command to do a specific task.
Honestly, when I started using Bash, I had only two options: google for answers or open my “unix_recipes.txt” file. Simple as that.
With time, I learned how to define functions in the ~/.bashrc file, and started to migrate my old recipes to a more elaborated set of handy functions.
After a couple of years of programming shell scripts, my collection of functions grew substantially, and thus my productivity.
If you are a newcomer to Bash, or if you are that programmer who is continuously switching between different programming languages or tasks — you will love this post for those “Bash-days”.
In the following list, you will find my top-5 Bash functions oriented to enhance your productivity with the Linux or Sun OS terminal.
Have fun and save precious time with this “easy-to-remember” Swiss knife for Bash.
Instructions for Bash Newcomers
If you want to have right from the start of your console or terminal your own personalized environment, you need to include all the definitions of your parameters, functions, and aliases in the ~/.bashrc file.
If you want to use any of the functions defined in the next list, just copy and paste them in your
~/.bashrcfile.
And now, let’s go to my Top-5!

1. Clearly Differentiate Terminals with Different Workspaces
This is for those who need to work in concurrent parallel tasks using several terminals (xterm).
Unless you had a “multithreading” brain, most of us use to get lost or disorientated when switching frequently between terminals that we have dedicated to different tasks.
To help my brain focus at a glance and to be able to rapidly identify the task I was performing in the given terminal, I use a color code.
This is a visual trick that will help your brain in those hard multi-task days and consists of assigning a color to each task and using this color for the text of the terminal, just like in this example.
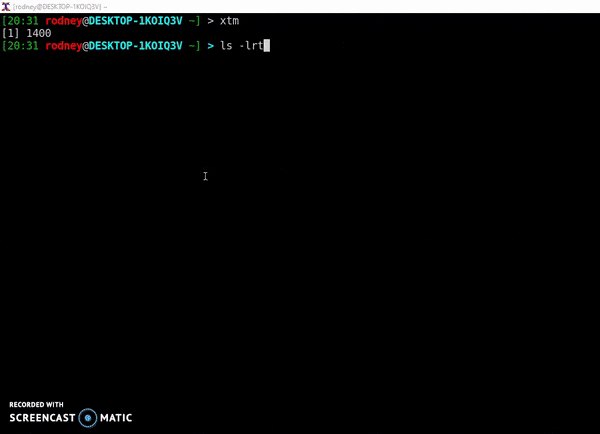
With these aliases, you just need to type xt, xtg, xty, xtc or xtm to open different color terminals.
# xterm XTermforeground → lightgray, XTermbackground -> black
 alias xt=”xterm -xrm \
 ‘XTerm*saveLines: 15000’ -xrm ‘XTerm*scrollBar: true’ -font ‘-misc-fixed-medium-r-normal — 15–140–75–75-c-90-iso8859–11’ \
 -xrm ‘XTerm*background: black’ -xrm ‘XTerm*foreground: lightgray’ \
 -xrm ‘XTterm*loginShell: true’ \
 -xrm ‘XTterm*geometry: 300x30’ \
 -xrm ‘XTterm*boldMode: false’ &”
# xterm XTermforeground → green, XTermbackground -> black
alias xtg=”xterm -xrm \
‘XTerm*saveLines: 15000’ -xrm ‘XTerm*scrollBar: true’ -font ‘-misc-fixed-medium-r-normal — 15–140–75–75-c-90-iso8859–11’ \
-xrm ‘XTerm*background: black’ -xrm ‘XTerm*foreground: green’ \
-xrm ‘XTterm*loginShell: true’ \
-xrm ‘XTterm*geometry: 300x30’ \
-xrm ‘XTterm*boldMode: false’ &”# xterm XTermforeground → cyan, XTermbackground -> black
alias xtc=”xterm -xrm \
‘XTerm*saveLines: 15000’ -xrm ‘XTerm*scrollBar: true’ -font ‘-misc-fixed-medium-r-normal — 15–140–75–75-c-90-iso8859–11’ \
-xrm ‘XTerm*background: black’ -xrm ‘XTerm*foreground: cyan’ \
-xrm ‘XTterm*loginShell: true’ \
-xrm ‘XTterm*geometry: 300x30’ \
-xrm ‘XTterm*boldMode: false’ &”# xterm XTermforeground → yellow, XTermbackground -> black
alias xty=”xterm -xrm \
‘XTerm*saveLines: 15000’ -xrm ‘XTerm*scrollBar: true’ -font ‘-misc-fixed-medium-r-normal — 15–140–75–75-c-90-iso8859–11’ \
-xrm ‘XTerm*background: black’ -xrm ‘XTerm*foreground: yellow’ \
-xrm ‘XTterm*loginShell: true’ \
-xrm ‘XTterm*geometry: 300x30’ \
-xrm ‘XTterm*boldMode: false’ &”# xterm XTermforeground → magenta, XTermbackground -> black
alias xtm=”xterm -xrm \
‘XTerm*saveLines: 15000’ -xrm ‘XTerm*scrollBar: true’ -font ‘-misc-fixed-medium-r-normal — 15–140–75–75-c-90-iso8859–11’ \
-xrm ‘XTerm*background: black’ -xrm ‘XTerm*foreground: magenta’ \
-xrm ‘XTterm*loginShell: true’ \
-xrm ‘XTterm*geometry: 300x30’ \
-xrm ‘XTterm*boldMode: false’ &”2. Find a String Pattern in a Set of Files
Bash is unbeatable when it comes to string searching. For this specific task, it might be easy to remember that you need to use some combination of find and gde>rep (or egrep) commands, but sometimes you forget how to arrange or spell the proper options.
Does this sound familiar to you? I got you covered.
The strf function will do the hard job for you when this dilemma pops up, you just need to type strf [string-to-find] [file-name-containing-this-string],and voilà, you will get all the matching coincidences recursively in all the directories down your current working directory.
 # Find a pattern in a set of files and highlight them:
 #+ (needs a recent version of egrep).
 function strf()
 {
 OPTIND=1
 local mycase=””
 local usage=”fstr: find string in files.
 Usage: fstr [-i] \”pattern\” [\”filename pattern\”] “
 while getopts :it opt
 do
 case “$opt” in
 i) mycase=”-i “ ;;
 *) echo “$usage”; return ;;
 esac
 done
 shift $(( $OPTIND — 1 ))
 if [ “$#” -lt 1 ]; then
 echo “$usage”
 return;
 fi
 find . -type f -name “${2:-*}” -print0 | \
 xargs -0 egrep — color=always -sn ${mycase} “$1” 2>&- | more
 }
As you can see in the next figure, the matching results are automatically highlighted with colors, indicating also the line number of each file found with a coincidence with the string you were looking for.
Useful, handy syntax, and easy to remember.
In case you want to look for a given pattern without caring for the exact upper or lower case coincidence, just use the -i option immediately after the strf function.
3. Kill Processes by Name with a Double-Check
Nothing compares in this word to the superpower feeling of killing an interactive running program that does not respond to the uncountable times that you have clicked the close button.
The kill -9 and pkill commands are always your allies.
The kill -9 command is your two-steps ally — it requires you to provide the PID of the processes that you want to end, so first, you have to type ps to identify the PID, and finally, you have to copy and paste them after the kill -9 command.
The pkill command is much handier, you just need to provide the name of the process you want to stop.
But, typing errors happen, and suddenly you realize that you have killed the wrong process by mistake…
To make the kill process typo-safe, I have created the killps function with the same functionality as pkillbut requiring first your confirmation. This function will look for coincidences and ask you if you really want to kill each of the matching processes.
 function ask() # See ‘killps’ for example of use.
 {
 echo -n “$@” ‘[y/n] ‘ ; read ans
 case “$ans” in y*|Y*) return 0 ;;
 *) return 1 ;;
 esac
 }

 function my_ps()
 {
 ps $@ -u $USER -o pid,%cpu,%mem,bsdtime,command ;
 }
function pp()
{
my_ps f | awk ‘!/awk/ && $0~var’ var=${1:-”.*”} ;
} function killps() # kill by process name
{
local pid pname sig=”-TERM” # default signal
if [ “$#” -lt 1 ] || [ “$#” -gt 2 ]; then
echo “Usage: killps [-SIGNAL] pattern”
return;
fi
if [ $# = 2 ]; then sig=$1 ; fi
for pid in $(my_ps| awk ‘!/awk/ && $0~pat { print $1 }’ pat=${!#} )
do
pname=$(my_ps | awk ‘$1~var { print $5 }’ var=$pid )
if ask “Kill process $pid <$pname> with signal $sig?”
then kill $sig $pid
fi
done
}For example, imagine that you want to kill all the nedit prompts that you have opened right now, to close all of them, you would just need to type the following command:
killps nedit4. One Command to Extract Them All
Have you ever wanted to have a universal command to extract every type of compressed file extension in Linux? I really do.
Just like Frodo’s ring, the extract function encapsulates all the different commands required to extract most of the compressed file extensions.
 function extract() # Handy Extract Program
 {
 if [ -f $1 ] ; then
 case $1 in
 *.tar.bz2) tar xvjf $1 ;;
 *.tar.gz) tar xvzf $1 ;;
 *.bz2) bunzip2 $1 ;;
 *.rar) unrar x $1 ;;
 *.gz) gunzip $1 ;;
 *.tar) tar xvf $1 ;;
 *.tbz2) tar xvjf $1 ;;
 *.tgz) tar xvzf $1 ;;
 *.zip) unzip $1 ;;
 *.Z) uncompress $1 ;;
 *.7z) 7z x $1 ;;
 *) echo “‘$1’ cannot be extracted via >extract<” ;;
 esac
 else
 echo “‘$1’ is not a valid file!”
 fi
 }
5. Aliases to Navigate Directories at Light Speed
How many times a day do you usually type any of the following commands?
 cd ..
 cd ../../
 cd ../../../
And so on …
I bet at least dozens of times, so save time, enhance your touch-typing, and your productivity with the following aliases.
 # Go one directory up
 alias ..=’cd ..’
 # Go two directories up
 alias …=’cd ../../’
 # Go three directories up
 alias ….=’cd ../../../’
 # Go three directories up
 alias 3.=’cd ../../../’
 # Go four directories up
 alias 4.=’cd ../../../../’
 # Go five directories up
 alias 5.=’cd ../../../../../’
 # Go to the previous directory
 alias bk=’cd -’
Now enjoy navigating through your directories faster than ever!
➡️ BONUS: More Productivity Hacks for Bash
If you are still curious about productivity hacks for Bash, you can go through the following links to discover more amazing functions and tips:


