Setup Windows 10 VM VirtualBox on macOS
It’s common that some applications were designed to run only on windows 10. For mac user, use windows 10 VM could be a properly solution.
This article shows 5main steps to make it work (Tested on macOS Big Sur v.11.5.1).
Step 1: Download and Installation
As i mentioned in another article “Setup Ubuntu VM VirtualBox on macOS and avoid 4 common errors”, we need to download and install virtualBox,
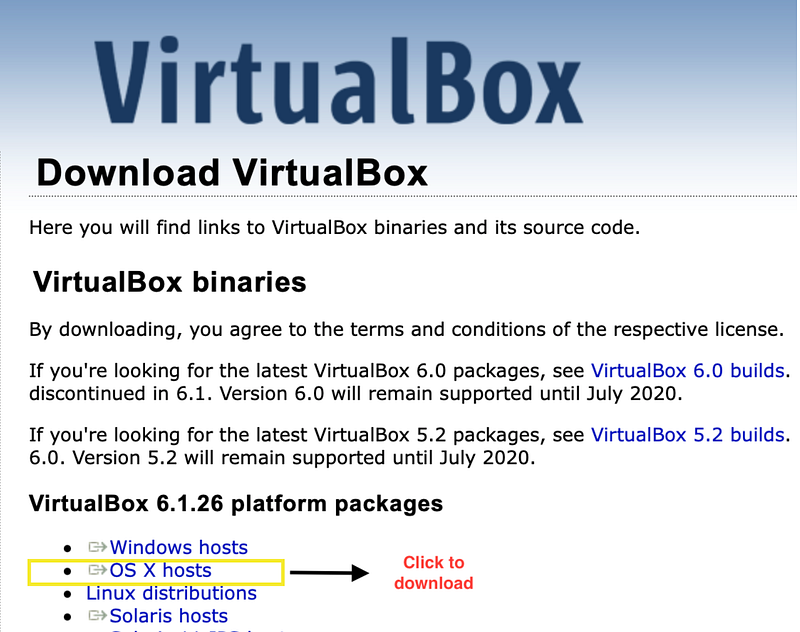
1.1 Download and install VirtualBox for macOS
1.2 Download Windows 10 iso file 64Bit
On the download page, choose Edition “Windows 10” and product language you wanna have, after confirm you will get the iso file downloaded.
Step 2: Start the Vitual box and resolve security issue.
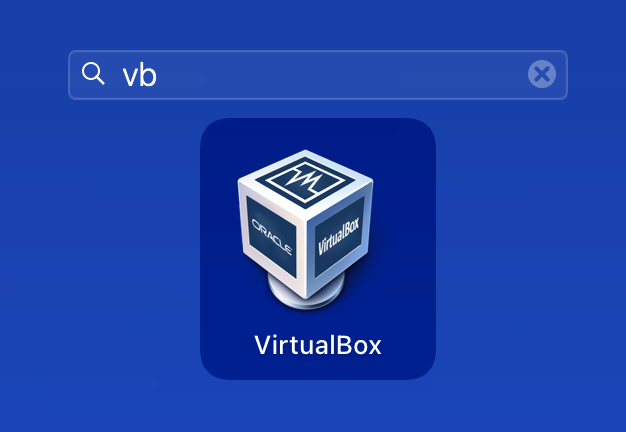
2.1 After you installed the VirtualBox, click on VirtualBox to start it.
2.2 Go to Mac Icon ->System Preference… ->Security & Privacy -> General. Click on the lock icon on the bottom left to unlock it.
2.3 Allow VirtualBox App on macOS Choose “App Store and identified developers” in section “Allow apps downloaded from:” (If this information is not shown, maybe you macOS already allowed it, you can just skip this step)
Click on “Allow” left to text “System software from developer ‘Oracle America. Inc.’ was blocked from loading”. (If this information is not shown, it might mean that the virtualBox is already allowed on your macOS. It could also be shown, when you click on “start” to start the Windows 10 VirtualBox by the first time.)
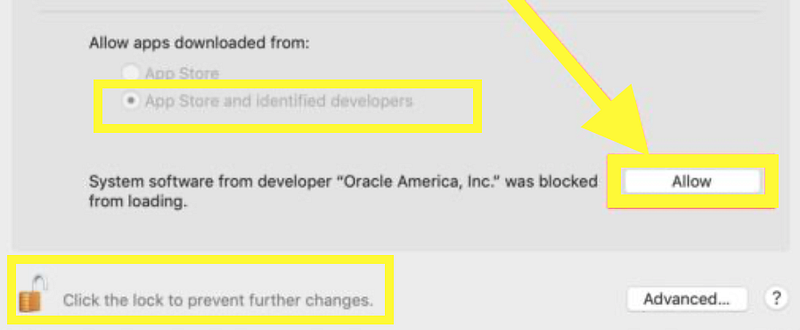
Allow Oracle Software on Mac
2.4 check status of System Integrity Protection from terminal, it should be enabled.
$csrutil statusIf the it is disabled, we can easily enable it by run the command in recovery mode. ( CMD + R during reboot to enter Recovery Mode, enable it and then restart again.)
$csrutil enableStep 3: Create an empty windows 10 VM VirtualBox and configure it
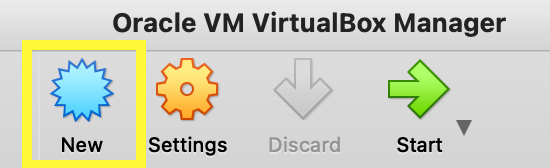
3.1 Click on “New” Button On this step, the ISO file of Windows 10 will not yet be used. We just start the virtualBox and click on “New” to create a empty windows 10 VM Box.
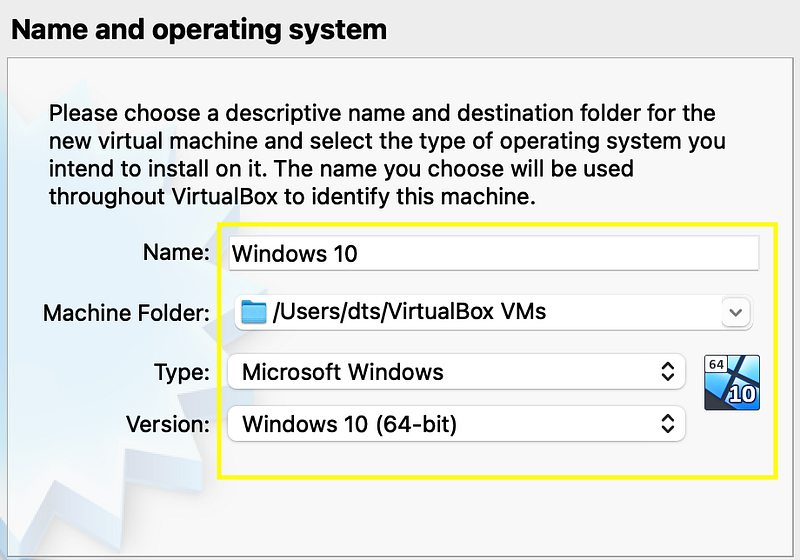
3.2 Choose OS On the Popup Window, give a name of the VM Box with prefix “windows 10”, the type and version of VirtualBox will be automatically adjusted to windows 10.
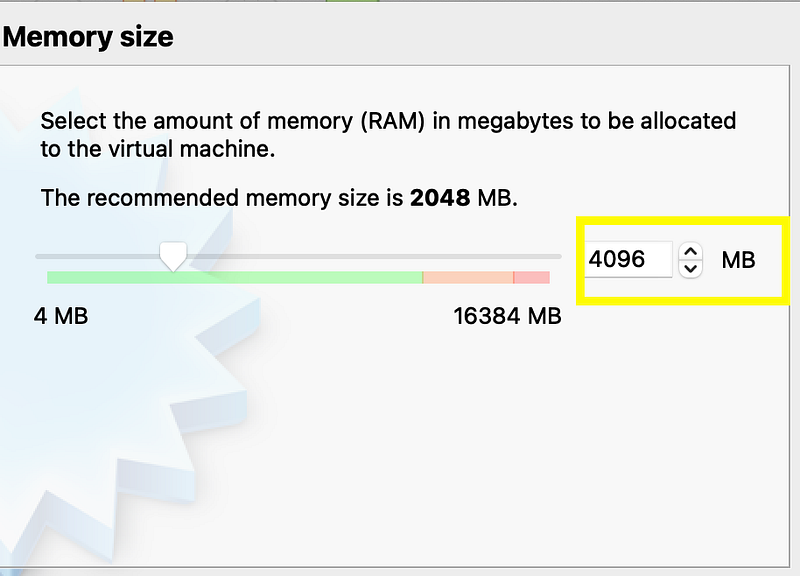
Click on “Continue”, on the next panel you can adjust the memory size to 4096MB.
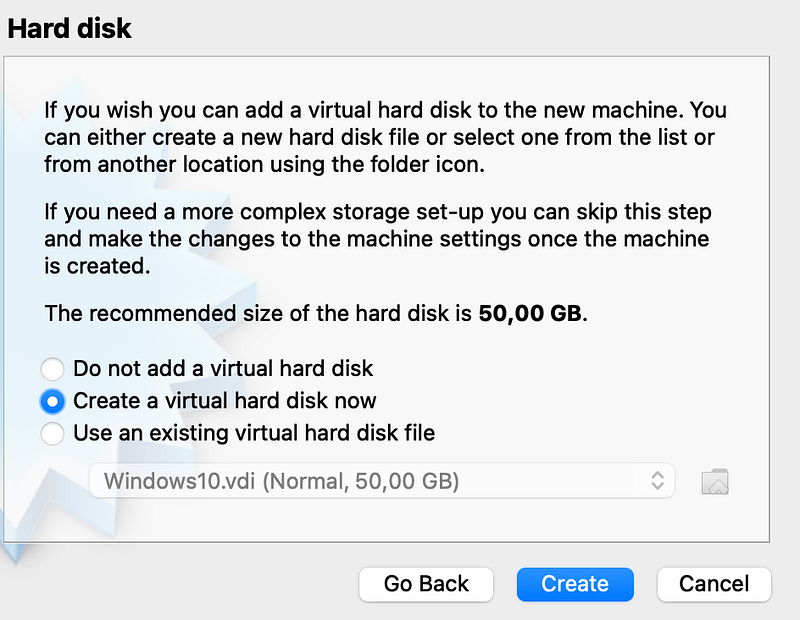
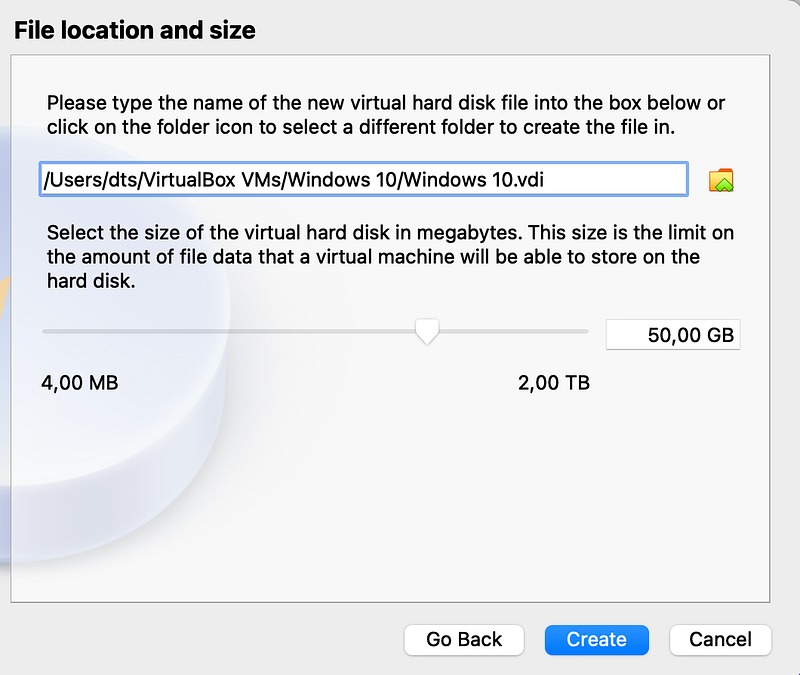
On the next Panel, use default option and create the virtual hard disk, on the next panel, select VDI (VirtualBox Disk Image) as default, then choose “Dynamically allocated”, then click on create.
Step4: Check the boot order. Locate the iso file and vdi file of Windows 10.
4.1 check boot order in system
Choose the windows 10 virtualBox and click on “settings” from menu. Then click on “System” and make sure that the “Optical” is checked for boot order. Make sure that “optical” is under “Hard Disk”.

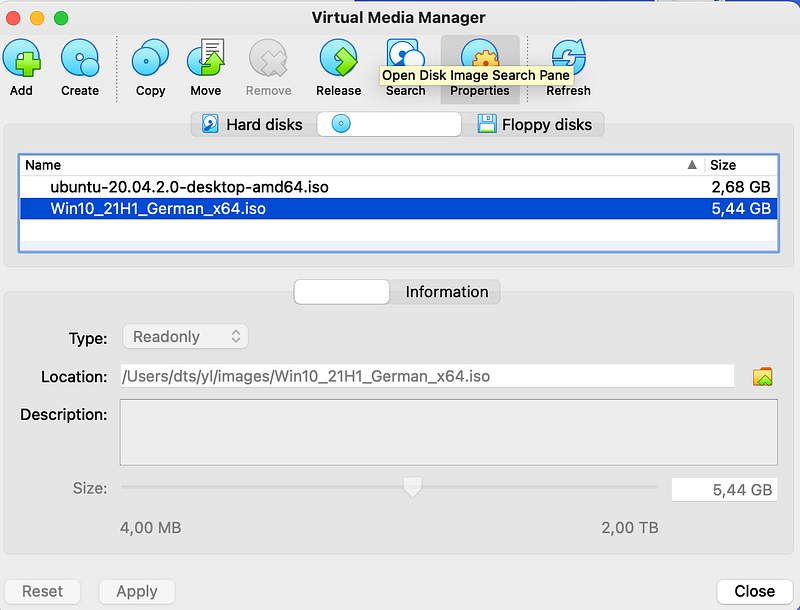
4.2 Link iso file and vdi file of Windows 10.
Click on main menu “File”-> Virtual Media Manager, then choose the tab ”properties”. This tab panel has three sub tabs: hard disks, optical disks and floppy disks.
Make sure the the hard disks tab has the vdi file located, this vdi file has been created by virtualBox on step 3.2. Also make sure the the optical disks tab has the iso file located. It was download on step 1.2. If the vdi or iso file is not yet found, you can simply add them on the folder icon right to “Location” input field.

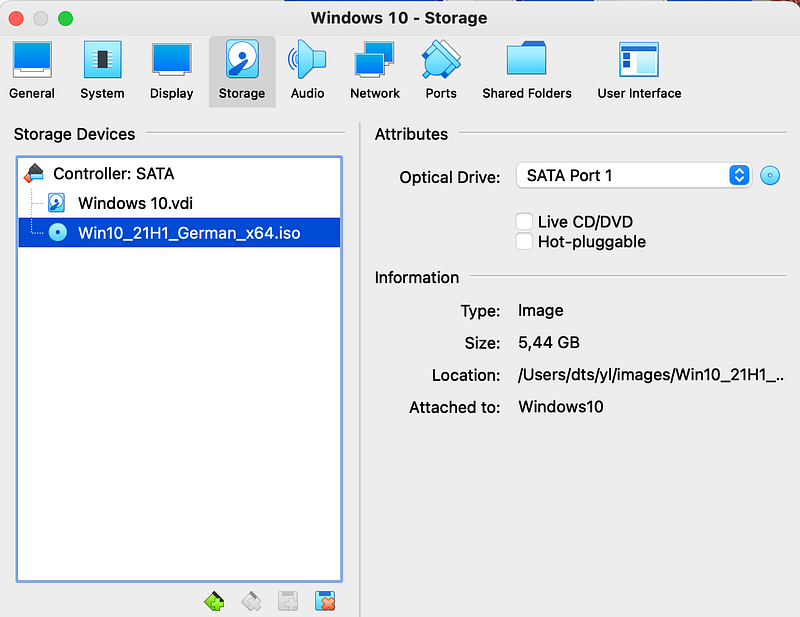
4.3 Add iso and vdi to storage configuration
Go back to the main panel of virtualBox and click on “settings” -> “storage” , then delete all controller from the left panel “Storage Devices”, the panel should be empty now.
Now we need to add two controllers.
Firstly, please add an AHCI (SATA) controller, then right click on it and choose “Hard Disk”, then attach your vdi file and iso file.
Step 5: Start VM
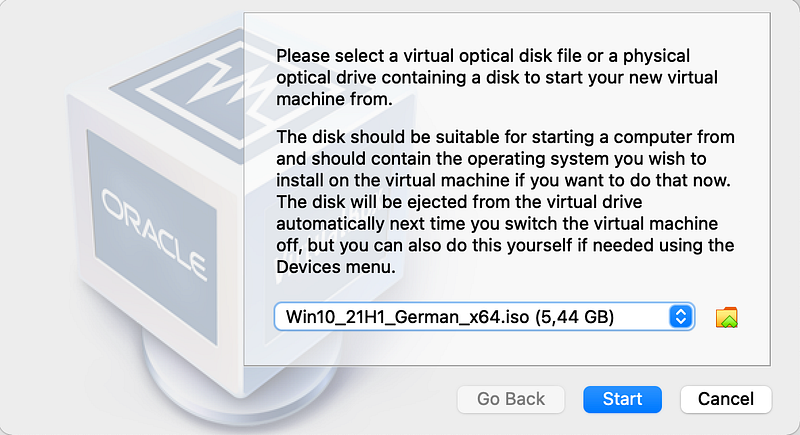
5.1 Choose your Windows 10 VirtualBox and click on “Start” from menu.

5.2 The virtual optical disk file for windows 10 which we defined in step 4 will be shown, just click on Start button.
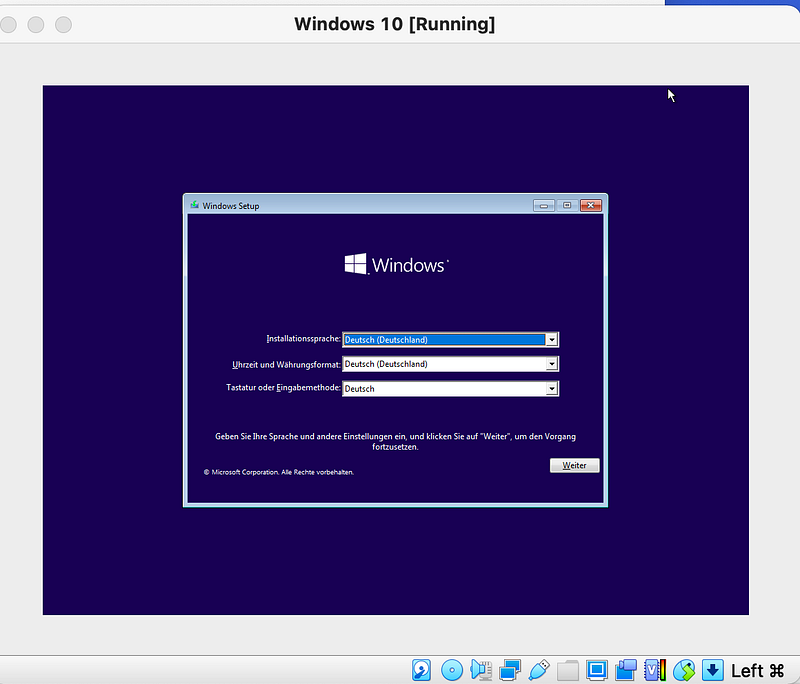
5.3 Setup Windows 10.
Now a windows install wizard will be shown, after you finish of setup of it, windows VM is ready on macOS and enjoy it.