
5 Advanced Strength Exercises for Runners Who Want To Go the Distance
A kinesiologist’s recipe for complete injury prevention
Squats and lunges are great; don’t get me wrong. It’s virtually inevitable that they’ll make you stronger and improve form in one way or another. There is something to be said, however, about progressing your strength training in the same way that you’d gradually increase the intensity or volume of your runs. Whether you find yourself plateauing with performance or continuously getting injured, pushing the envelope with resistance training will be in your best interest.
While there are hundreds of exercises out there to choose from, I want to narrow in on five that are ultra-specific to the stressors of running. As a kinesiologist and trainer, I find too often that runners fail to consider the principle of specificity when designing workouts. Sure, there may be an argument that bicep curls or bench presses would help to some degree, but the majority of your efforts should be spent focusing on areas that cause runners the most issues. I’m talking about the feet, calves, knees, and hips. More specifically, we should zero in on single-leg movements that follow a similar recruitment pattern to the gait.
The program below will take you less than 10 minutes to complete and can be done with virtually no equipment. For the best results, try this at least 2–3 times per week. As a bonus, slot this workout in before your run to maximize your warm-up and keep you safe out there. Here’s to taking that next step in your running journey!
Fine-Tuning How You Move as a Runner
As we dive into the exercises below, please remember that new movements always come with potential risks. If you’re brand new to resistance training and/or you have chronic conditions or injuries that may complicate things, please talk with a trusted health provider before moving forward.
If you are cleared to get started, ensure you never push through pain with these. While it should feel challenging, do your best to stay under a 3/10 pain scale at all times. If you require modifications, just reach out and I’ll be happy to help!
Before we get into things, I want to encourage those who struggle with motivation around strength training. Being more of an endurance-based athlete myself, I found it intimidating and overwhelming to transition over to the resistance training space for years. It wasn’t until I realized just how interconnected the two were that I finally bought into the benefits.
For one, this is a routine that you can do in the comfort of your own home. It will only add 10-minutes to your routine so it’s not the end of the world. Secondly, while it may feel like a chore, resistance training is a vessel to make running feel easier. Beyond injury prevention, doing movements like the ones below will improve your running economy, lowering exertion and fuel requirements as you push the pace.
All this to say, do your strength exercises! You’ll be a better runner for it.
1) Bulgarian Split Squat
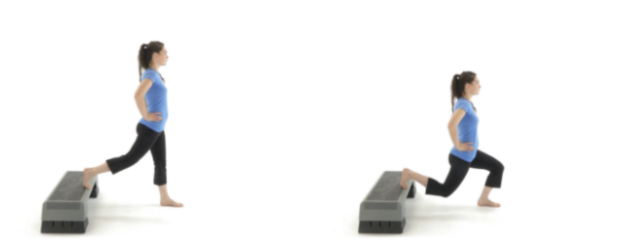
Application: 2 x 10–15 reps/side
Cues: Step back until your back toes are resting comfortably on the step or stair. Next, lower down while keeping the majority of your weight on the front (planted leg). Ensure your feet are far enough apart that you can fully lunge while keeping the front knees tracking over the toes. If your hip flexors are feeling too stretched, step in slightly. If there was only one lower-body strength exercise you could choose, I’d strongly recommend this one based on its unique balance, stability, and strength requirements. Any time we can utilize a single-leg with resistance training is a big win.
If you’re looking to increase the intensity, consider adding height to the step, moving to a bench, increasing reps, and/or adding dumbbells. To regress, lower the step or move close to a wall so your hand can rest against it for balance. This exercise will light up your quad muscles like nothing else!
2) Single-Leg Deadlifts

Application: 2 x 10–15 rep/side
Cues: Before you begin, tighten your core and picture stacking the ribs over your pelvis. Next, plant one foot and hinge the hips until your back leg extends back behind you. All the while, keep the back + neck neutral and core engaged. Once you’ve reached the lowest point that you can control, extend the hips and fire up your glutes to return to the starting position. If you’re using weight, ensure it stays close to your legs throughout to protect the back.
You may notice that the athlete passes the weight into the second hand, but this is only a progression. If you’re just starting, please just keep the weight in the opposite hand to the planted leg to focus on the hinge.
3) Single-Leg Bent-Knee Calf Raise
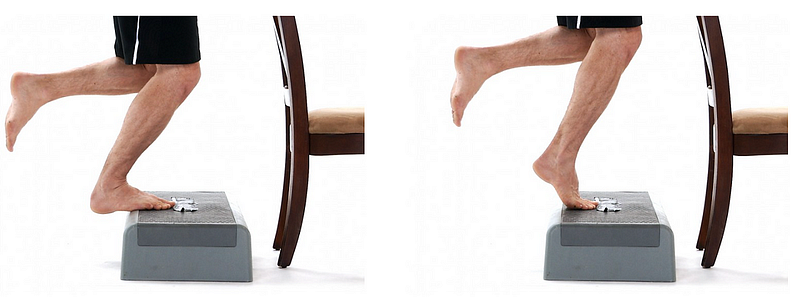
Application: 2 x 12–15 reps per side
Cues: Stand on a platform with a chair or balance support in front of you. Start with a slight bend in your knees. Next, lift one foot off and elevate the other as you assume a single-leg calf raise stance. Hold at the top of your pain-free range of motion for 2–3 seconds and then SLOWLY lower back down before switching sides. If this is too hard, place more weight onto your balance support or begin with doing both legs at once.
4) Side Plank with Leg Raise
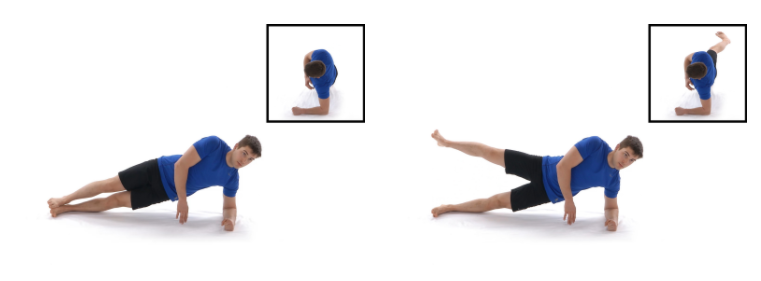
Application: 2 x 10–15 reps or 30–45s/side
Cues: This exercise is certainly more challenging, so please feel free to start on your knees if you need to. Drop yourself onto your elbow with the only other point of contact being your foot. Ensure the core is engaged and the glutes are squeezed together.
Once you’re locked in, slowly raise the top leg 1–2 feet toward the ceiling. Keep your top leg internally rotated so the heel stays in line with the toes — this will help engage your glutes while avoiding quadriceps takeover. Once you complete the recommended reps or start to lose form due to fatigue, rest for a brief period and switch sides.
5) Copenhagen Plank

Application: 2 x 15–30s hold/side
Cues: Place yourself in a plank position perpendicular to the bench. Next, place the inside of your top leg on the bench and use the internal aspect of your bottom leg to support it. As you hold, think about applying as much load throughout the top leg as you can to work the adductor muscles. Additionally, keep the core and hips engaged so that they stay in an isometric position with the rest of the body. Fight the drooping hip with your life! After 15–30 seconds, or whatever you can handle to start, slowly drop back down to the floor and rest for about 30 seconds in preparation for your next hold.
Want more exercises like this? Check out my full library of rehab guides and movement routines below. There’s something for everyone! ⤵️
In Closing,
If you want to take your running to the next level, look no further than this 10-minute strength routine. From improved injury prevention to enhanced running economy, your maximum potential lies in your willingness to train on and off the roads. While it is a commitment, your hard work with strength training will pay off in ways you can’t even imagine. Here’s to being the best runner you can be!
You got this.
— DavidLiiraKin