
3 Steps to Add a Nice and Interactive Table to Your Blog Post
I used it and I am impressed by how much it is easy and nice.

You have some data to show in a nice way, and you have decided that using a table is the best way to do that. You have looked for the “Insert Table” button inside the editor of Medium. Unfortunately, you have not found anything (If this happened to you, it happened to me too :) ).
We need a solution for this matter, and after searching and several trials and errors, I have found a very nice way to do that. Simply, you can create a table using a 3d-party tool (datawrapper in this case) and then embed it in your story.
Let us talk practically now. In order to insert a table in your story, you have to follow these simple 3 steps.
- Sign up in Datawrapper
- Create the Table
- Embed the Table
Let's move on and see how to do that in a real example.
1. Sign up in Datawrapper
This step is very straightforward. Just go to datawrapper and sign up for an account using your email.
2. Create a Table
Let us assume that I want to create a table for the following data:

Once you have an account, log in and go to your dashboard. In the upper left corner, click on “Create new …” and select “Table”.
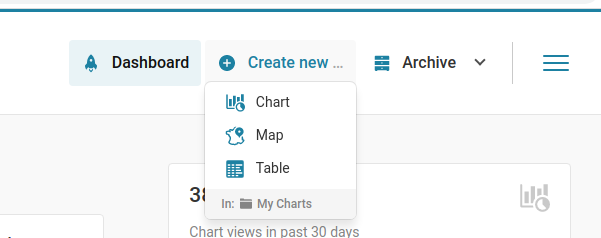
You will see a window like the following image.
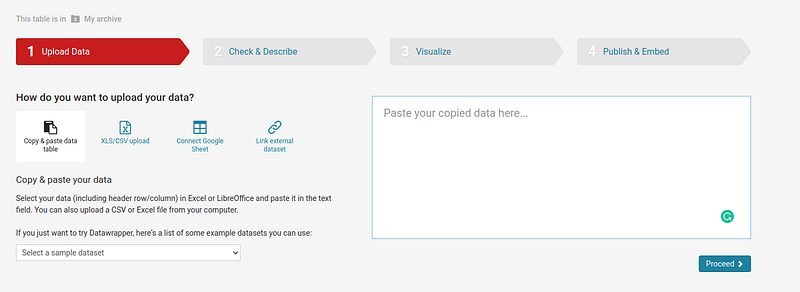
Now, copy and paste your data into the white box and click on “Proceed”.
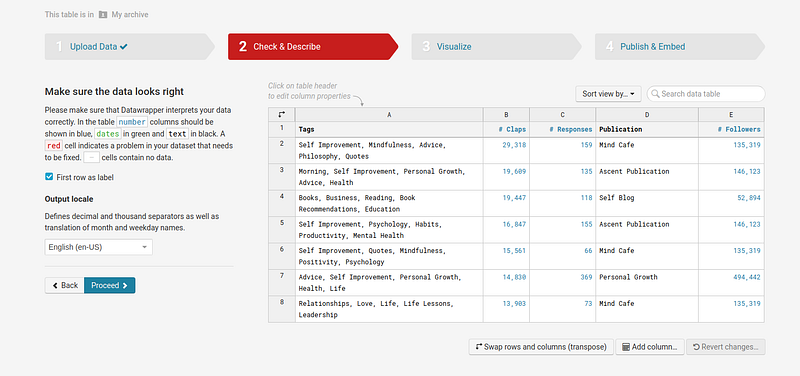
Check that your data has been inserted properly and then click on “Proceed”.
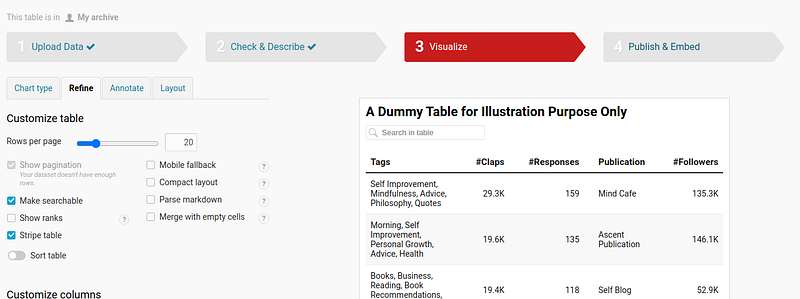
Now you can customize your table and there are tons of options for that like adding a title, making it searchable, changing the format of the number, adding social tags for easy sharing…etc
Once you are happy with your table, click on “Proceed”.
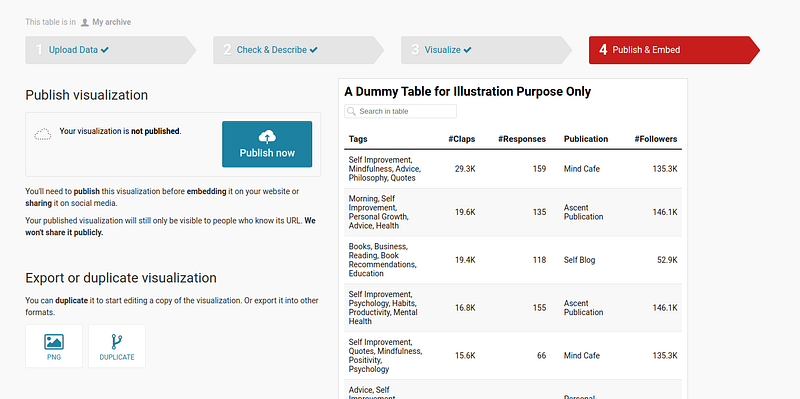
Finally, click on “Publish now”, copy the provided link, and move to the next step.
3. Embed the Table
Now you have a link for your table. All you have to do is paste this link into the story editor and hit the “Enter” button on your keyboard.
Horray, your table is ready.
Note: you can make any text clickable in the table by wrapping this text with the HTML Text tag. Your raw data should look like this.

In this simple example, all of the values of the title column are clickable. You can try that in the next table.
That’s it !!
Conclusion
In this article, you have learned how to add a nice and interactive table to your story. Simply we can do that by creating the table using a 3rd-party tool like datawrapper and then embedding the table in your story.
P.S.: A million thanks for your time reading my story. Before you leave let me mention quickly two points:
- First, to get my posts in your inbox directly, would you please subscribe here, and you can follow me here.
- Second, writers made thousands of $$ on Medium. To get unlimited access to Medium stories and start earning, sign up now for Medium membership which only costs $5 per month. By signing up with this link, you can directly support me at no extra cost to you.


