
Web Development Tips
3 More Extremely Useful React Tricks To Speed Up Development Process
Here are my 3+ years of experience with React

In today’s standards, React or a React-based framework is a go-to tool for most developers from beginners to all the way seniors. This is because of the community behind it that constantly works and produces new features to enhance React experience. There are a variety of libraries that you can choose to reshape React to fulfill your needs.
This is a sequel to another story named 3 Extremely Useful React Tips To Speed Up The Development Process. Make sure you checked it out.
For 3+ years, I’ve got my hands dirty with React and React-based frameworks. In this journey, I encountered many problems that I have to solve. So, here are 3 of my tricks to certain problems.
1. What If You Have To Add Two Refs?
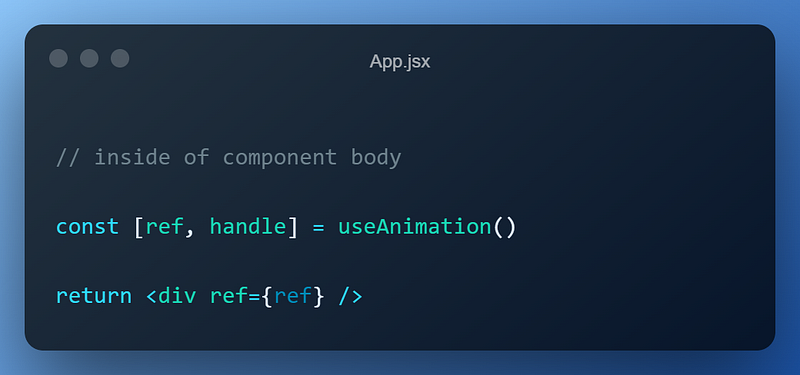
In React, to access the underlying DOM element of components, you have to give refs to them. Since, under the hood, React uses virtual DOM, you cannot use conventional document methods. That’s why many external libraries return a ref from hooks to access and manipulate the element.
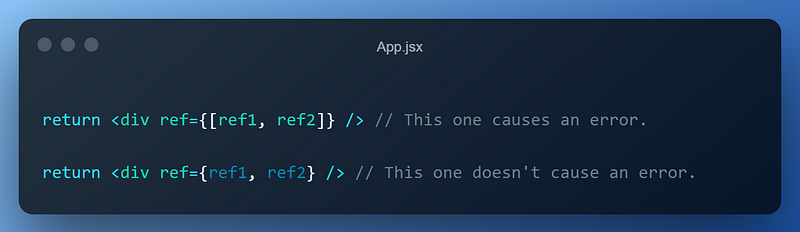
However, things get annoying when you try to add one more ref to the same element. If you try to pass an array of refs such as [ref1, ref2], React will shout you not to. You can try to pass refs without brackets and React won’t shout you anymore. However, by doing so, only the last ref passed will be assigned to the element — ref1 will be undefined.
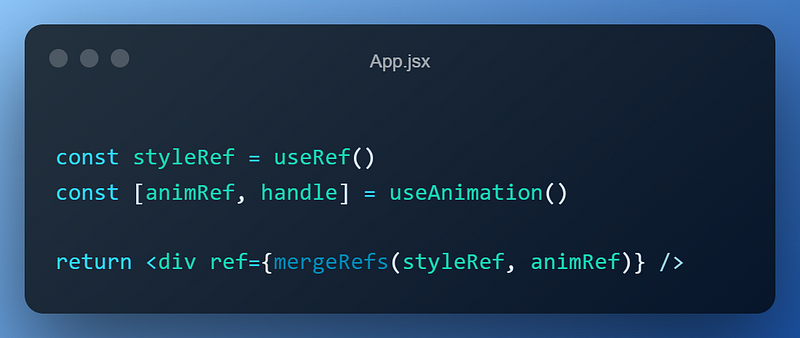
So, here’s my mergeRefs function to merge these two refs, as if they’re one, and make them both functional. It copies the functional ref’s content to the undefined one so that both refs can be used for different purposes.
Once you have this function, you can assign as many refs as you want to a single component, without any flaw.
2. Private Routes To Handle Authentication Elegantly
Authentication is an integral part of a functional app or website. However, it, generally for beginners, looks scary and confusing. Especially when user roles come into play. Handling it correctly prevents many problems and complexity, later on.
In this trick, I’ll show my private route component. It creates a route that is only accessible by authenticated users that has appropriate roles. If the user doesn't suffice these conditions, it’ll be redirected to authentication or home page based on the authentication state.
It receives the component of the route, roles that’ll have access to the route, and the other props passed. Then it returns a route that renders the private route conditionally.
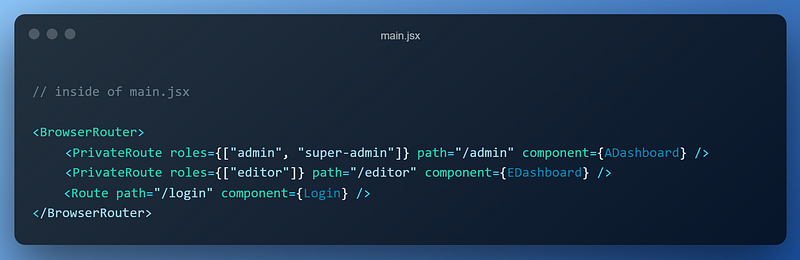
Now that you have this private route component, you can use it just as a normal route in the router.
The use case of this component is not limited to authentication purposes. You can use it basically anywhere that includes conditional logic. To see this component in action, check this repository out.
3. 15 Context Providers At The Same Time (!)
React contexts are useful. They help us pass data to child components without dealing with props from one component to another. Thanks to them, the data needed is available across the whole app. However, because of the comfort they provide, it is convenient to see this kind of things in the source code:
However, this is certainly not React style. They all have the same purpose, which is providing data but they’re written over and over. Just think of the unbearable headache of your developer friend, trying to figure out what this provider stack does.
So, let’s rewrite it in React style and make the code way more readable. To achieve this, we have to create a component named Provider that will encapsulate all context providers and act as one centralized provider.
Then, we can simplify the root file by using the Provider component.
Conclusion
Congratulations! Now you know 3 more React tricks to ease and power up your development process. These were my observations and experiences. But I’m sure you have your own tricks, as well. Make sure you share it with me and others in the response section.

If you liked this article, make sure you clapped and if you have anything to say, leave a response. See you in the next story.


